Grand Willys Project
-
robtus

- Senior Member
- Posts: 1108
- Joined: Wed Apr 27, 2011 9:54 pm
- Location: Moffat Beach SUNNY QLD
- Contact:
Re: Grand Willys Project
I am trying to picture what you storage room looks like, everything all lined up, labelled and bagged with the correct bolts.. Right ?? Photo please just to annoy the rest of us !!! 
I never make the same mistake twice, I do it 5 or 6 times just to be sure !!!
Making progress, https://www.muston.com/public_html/34%2 ... _Limo.html
Making progress, https://www.muston.com/public_html/34%2 ... _Limo.html
-
Gojeep
- Old Hand
- Posts: 7219
- Joined: Mon Jan 07, 2008 1:24 pm
- Location: Eastern Suburbs of Melbourne
- Contact:
Re: Grand Willys Project
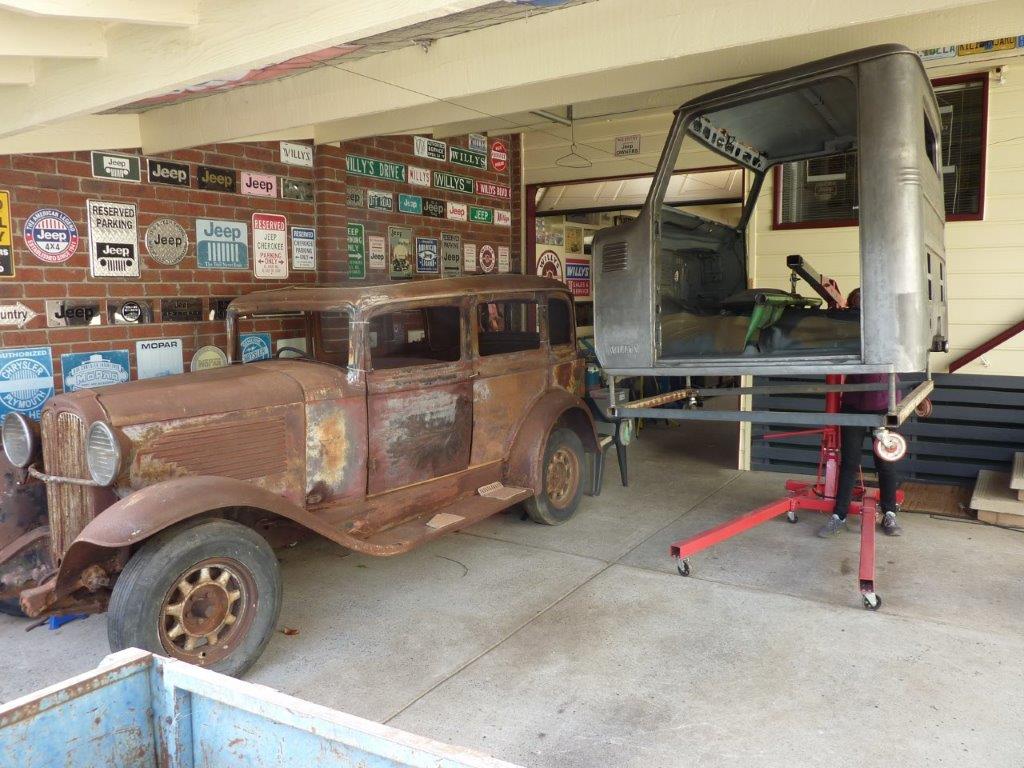
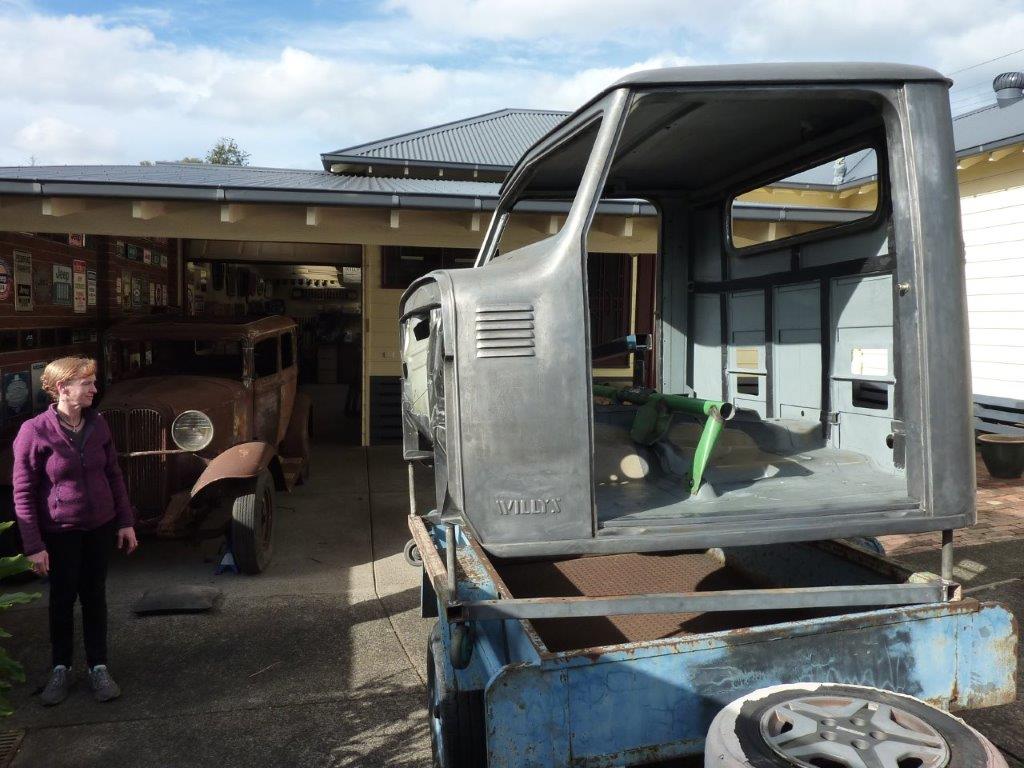
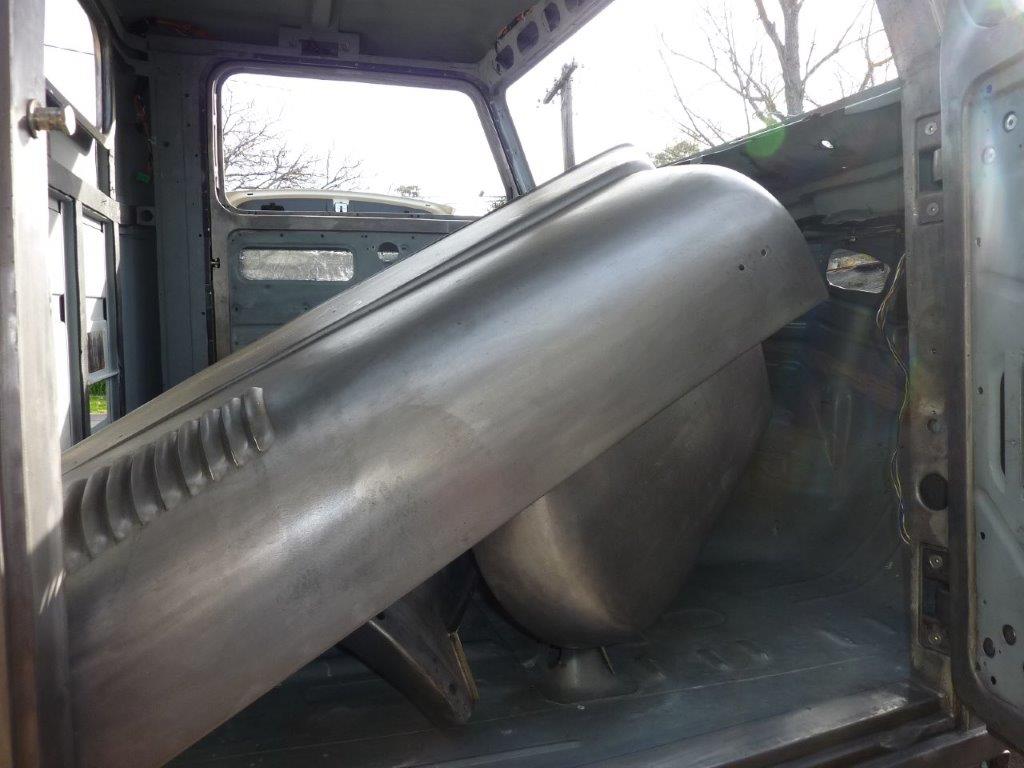
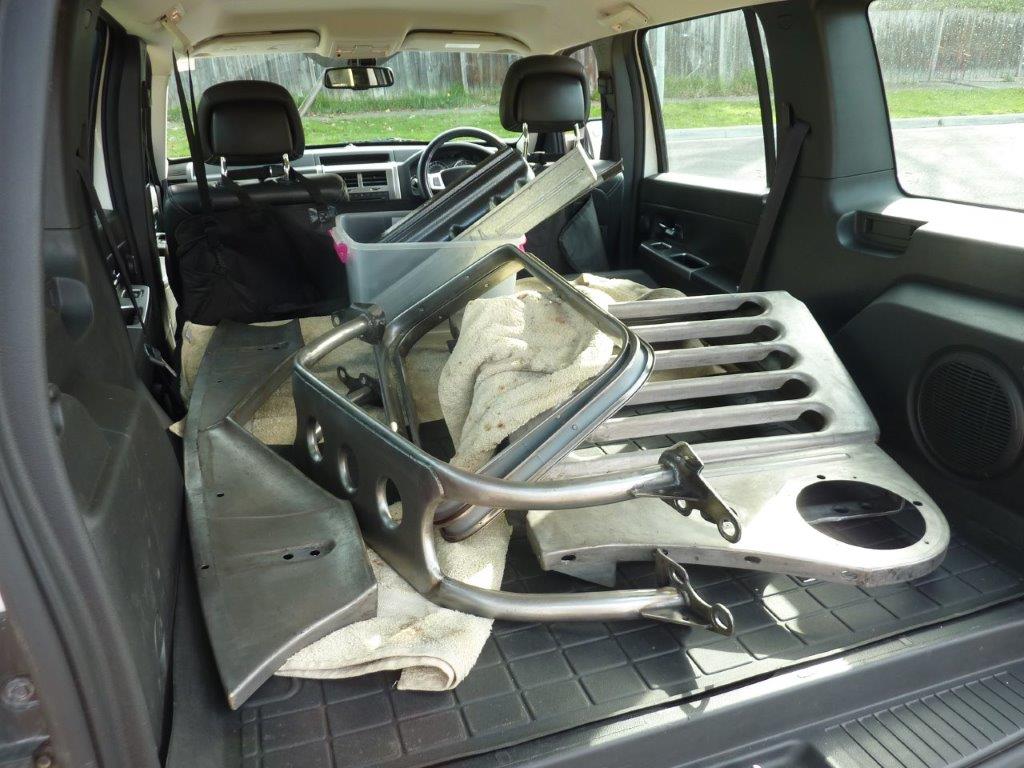
Cab is now completely gutted and ready to come off.
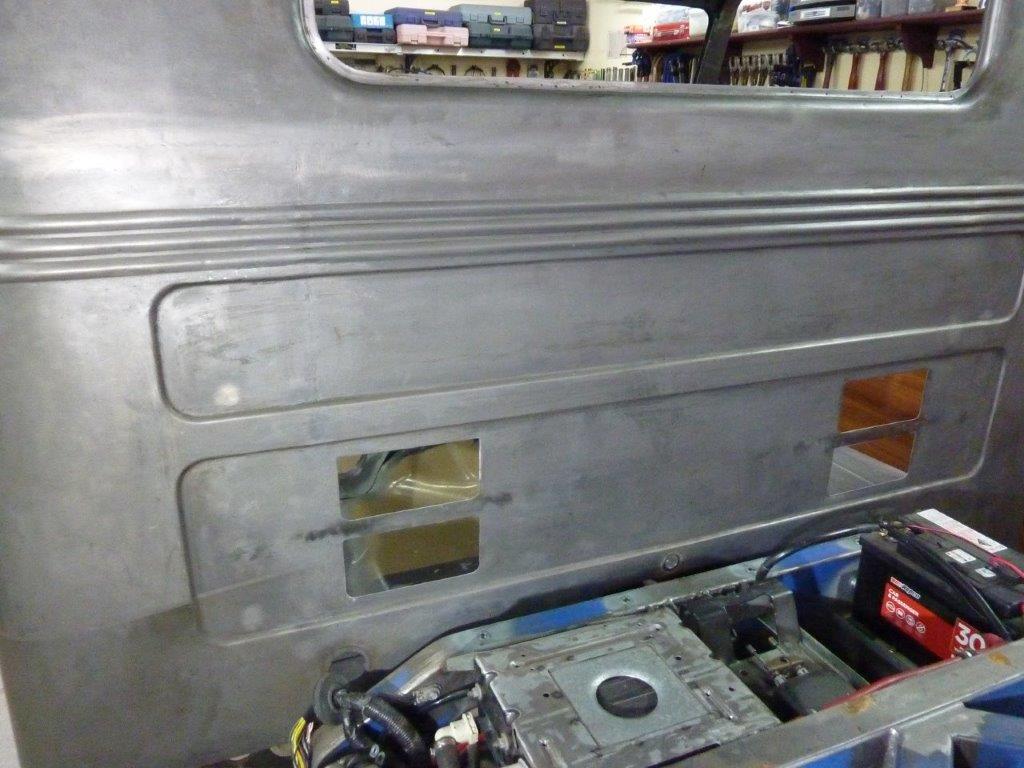
The biggest thing I couldn't do anything about while assembled, was how hard it was to close the last door if the windows were completely up. There was just too much cabin pressure and you could see the panels swell for a second when closing the last door. I really didn't expect my door seals etc to seal that well for it to be a problem!
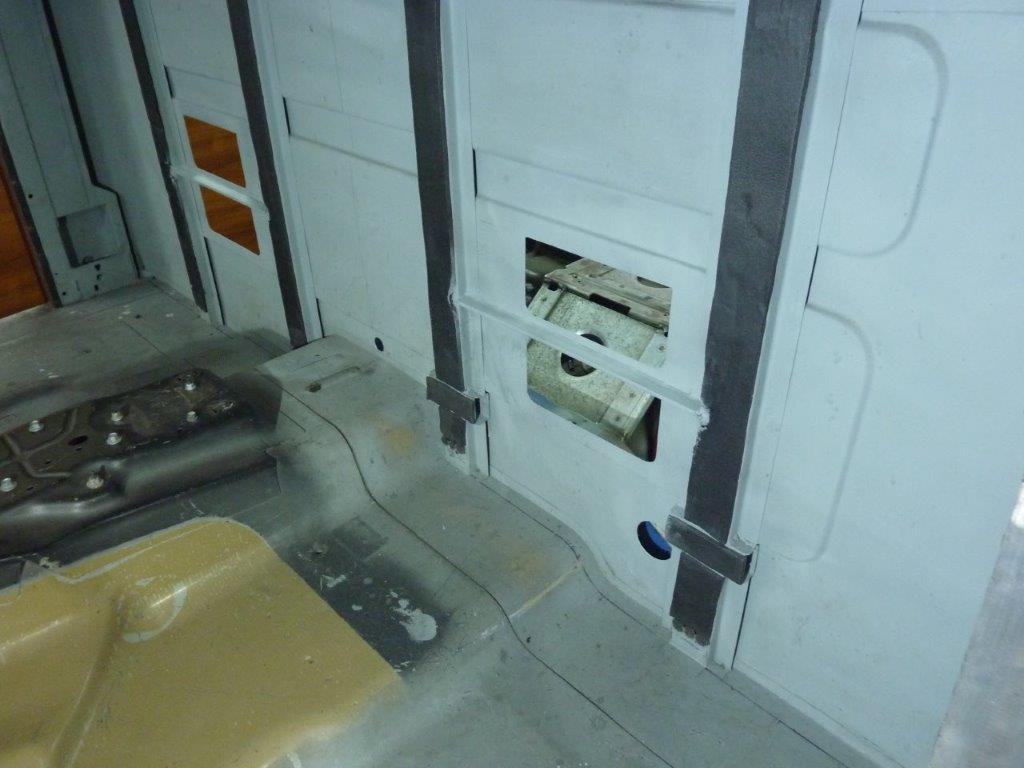
The solution was simply what all modern vehicles have and that is pressure relief vents. I spent some time looking around the wrecking yard to find something that wasn't a weird shape or too deep. I doubled up on the amount of vents I my thinking is that a smaller cab builds more pressure than a sedan or station wagon that has a larger volume. You can see I added a brace between the vent holes to keep the panel taught.
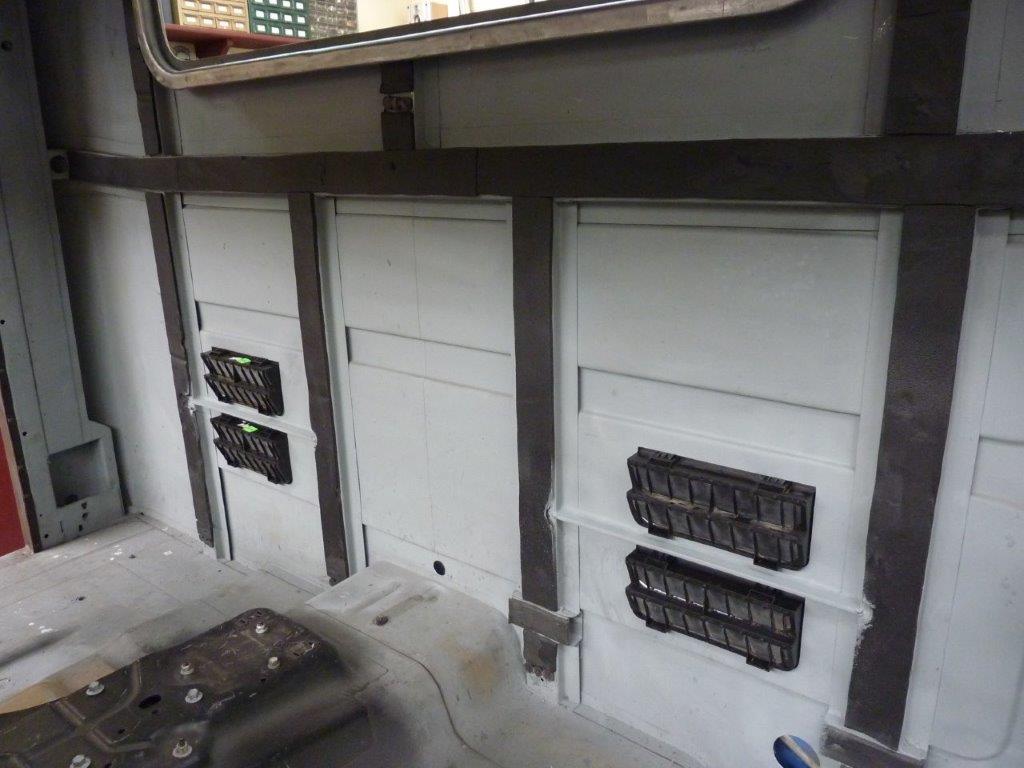
These vents came out of a VW sedan and hatch of 2000 vintage and were in the boot venting to behind the bumper. The rubber flap hinges outwards briefly when the pressure is higher inside the cabin.
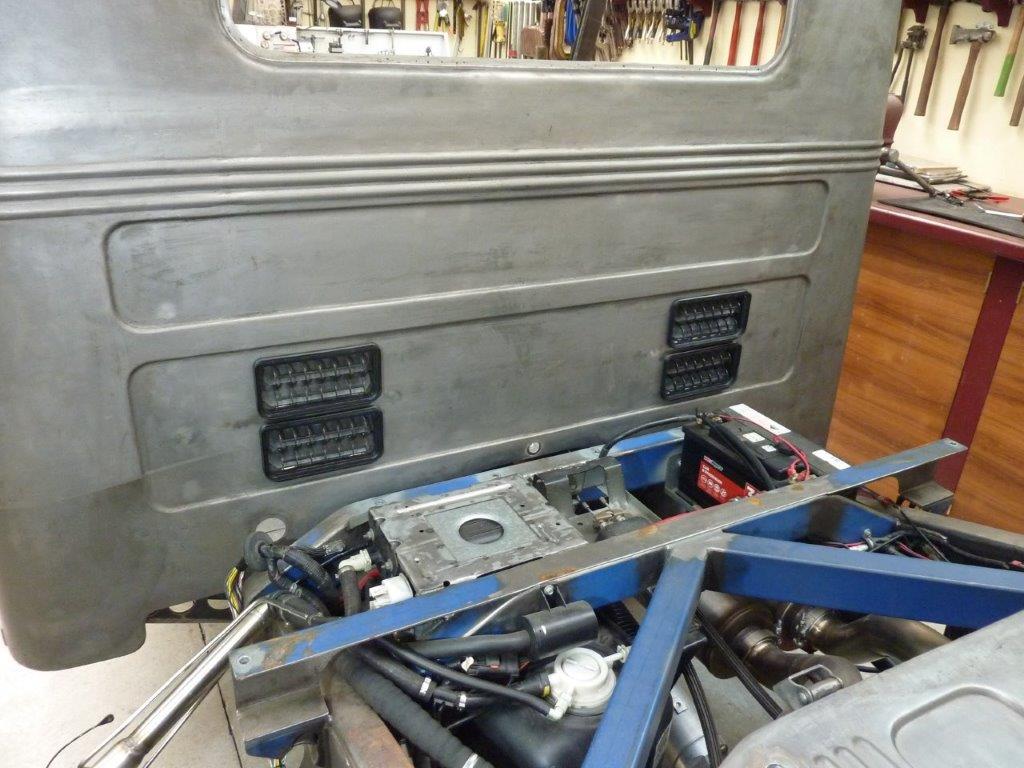
They have a cage over them to stop them going too high. It will vent to the space between the back of the cab and the front of the bed. Will not be able to be seen once the bed is back on.
The biggest thing I couldn't do anything about while assembled, was how hard it was to close the last door if the windows were completely up. There was just too much cabin pressure and you could see the panels swell for a second when closing the last door. I really didn't expect my door seals etc to seal that well for it to be a problem!
The solution was simply what all modern vehicles have and that is pressure relief vents. I spent some time looking around the wrecking yard to find something that wasn't a weird shape or too deep. I doubled up on the amount of vents I my thinking is that a smaller cab builds more pressure than a sedan or station wagon that has a larger volume. You can see I added a brace between the vent holes to keep the panel taught.
These vents came out of a VW sedan and hatch of 2000 vintage and were in the boot venting to behind the bumper. The rubber flap hinges outwards briefly when the pressure is higher inside the cabin.
They have a cage over them to stop them going too high. It will vent to the space between the back of the cab and the front of the bed. Will not be able to be seen once the bed is back on.
Marcus
To try where there is little hope, is to risk failure.
Not to try at all, is to guarantee it!
____| \______\
|/¯\ |¯ |----O||||O
()_)-o-)¯¯()_)-o-)_)
To try where there is little hope, is to risk failure.
Not to try at all, is to guarantee it!
____| \______\
|/¯\ |¯ |----O||||O
()_)-o-)¯¯()_)-o-)_)
-
zuffen
- Senior Member
- Posts: 1926
- Joined: Fri Jan 28, 2011 7:45 pm
- Location: Sydney
Re: Grand Willys Project
How do you think they will go with keeping dirt out when you're 4x4ing?
Never argue with an idiot, they will drag you down to their level and beat you with experience.
-
robtus
- Senior Member
- Posts: 1108
- Joined: Wed Apr 27, 2011 9:54 pm
- Location: Moffat Beach SUNNY QLD
- Contact:
Re: Grand Willys Project
Good idea and well out of the way there. Also helps with flow-thru for your air-cond system. Do you have a fresh air intake for that ? I think mine will not need it as I am just using the old windlace seals, and I am sure the fabric sunroof will leak plenty of air.
I never make the same mistake twice, I do it 5 or 6 times just to be sure !!!
Making progress, https://www.muston.com/public_html/34%2 ... _Limo.html
Making progress, https://www.muston.com/public_html/34%2 ... _Limo.html
-
Gojeep
- Old Hand
- Posts: 7219
- Joined: Mon Jan 07, 2008 1:24 pm
- Location: Eastern Suburbs of Melbourne
- Contact:
Re: Grand Willys Project
They are normally closed and all 4x4's have them as well without problem, so can't see why it wont work here.
Marcus
To try where there is little hope, is to risk failure.
Not to try at all, is to guarantee it!
____| \______\
|/¯\ |¯ |----O||||O
()_)-o-)¯¯()_)-o-)_)
To try where there is little hope, is to risk failure.
Not to try at all, is to guarantee it!
____| \______\
|/¯\ |¯ |----O||||O
()_)-o-)¯¯()_)-o-)_)
-
Gojeep
- Old Hand
- Posts: 7219
- Joined: Mon Jan 07, 2008 1:24 pm
- Location: Eastern Suburbs of Melbourne
- Contact:
Re: Grand Willys Project
Yes, will help aircon when in fresh air mode. The louvers I punched by hand on the side of the cowling are the fresh air intakes. The plenum goes from one side to the other and I calculated out the area of the open slots to equal that of the stock intake of the Grand Cherokee. It uses its plenum as well as part of the donor firewall.robtus wrote: ↑Sun Jul 02, 2023 2:45 pm Good idea and well out of the way there. Also helps with flow-thru for your air-cond system. Do you have a fresh air intake for that ? I think mine will not need it as I am just using the old windlace seals, and I am sure the fabric sunroof will leak plenty of air.
Marcus
To try where there is little hope, is to risk failure.
Not to try at all, is to guarantee it!
____| \______\
|/¯\ |¯ |----O||||O
()_)-o-)¯¯()_)-o-)_)
To try where there is little hope, is to risk failure.
Not to try at all, is to guarantee it!
____| \______\
|/¯\ |¯ |----O||||O
()_)-o-)¯¯()_)-o-)_)
-
Gojeep
- Old Hand
- Posts: 7219
- Joined: Mon Jan 07, 2008 1:24 pm
- Location: Eastern Suburbs of Melbourne
- Contact:
Re: Grand Willys Project

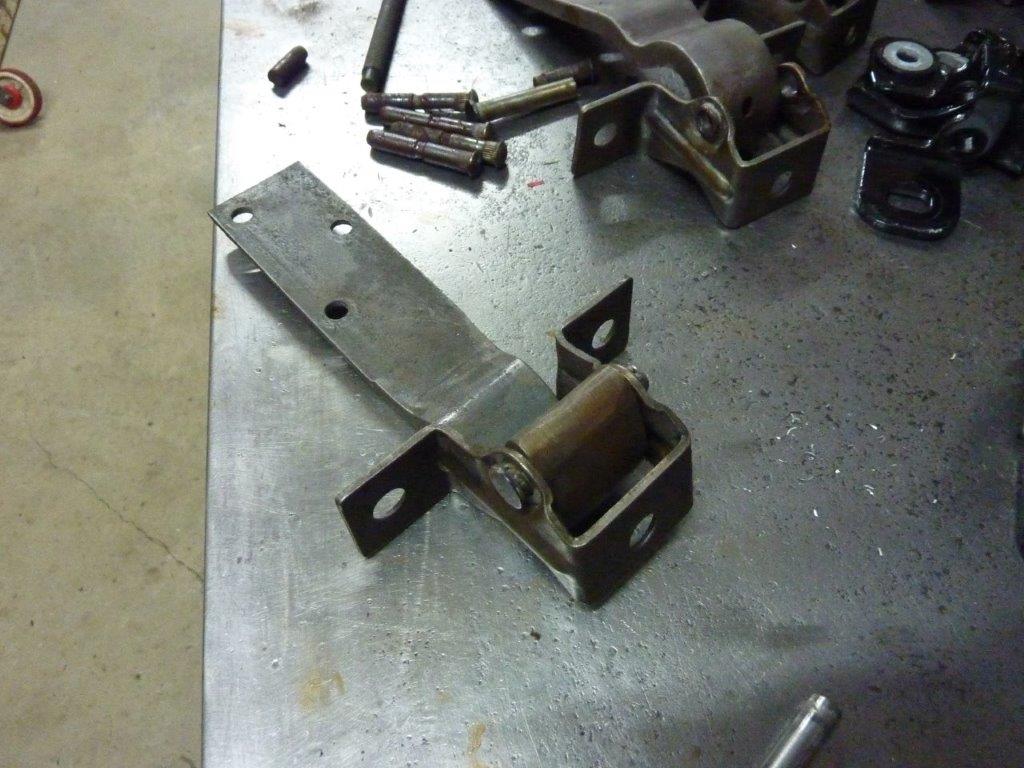
Tending to anything that should be done before painting. I have always wanted to rebuild the hinges, as after 75 years of service, there is play in them. I temporarily got them to work better by swapping the hinges top to bottom.
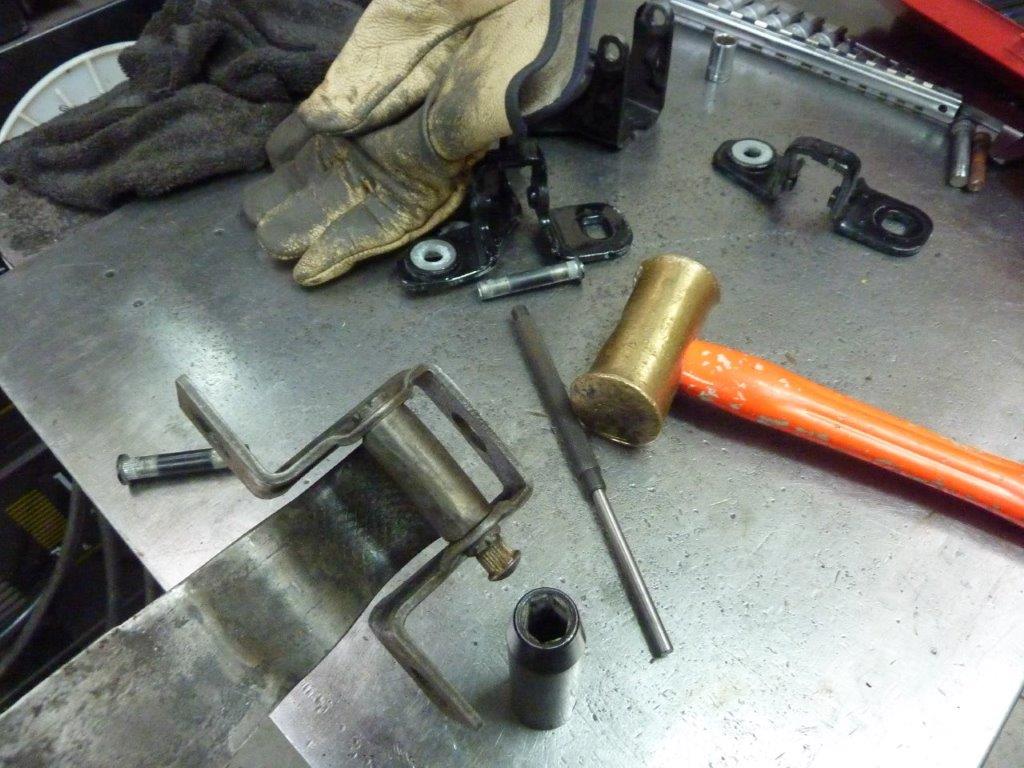
First thing to do is remove the old pins. The trick is to place the pin head inside a close fitting impact socket, 12mm, so the hitting force is concentrated around where the the head sits in the bracket. One sharp wrap very a heavy brass mallet on the bottom of the pin got it moving, and then drove the pin out completely using a punch.
I measured the old pins, 11/32", and they were not worn at all! So fitting replacement pins will not do anything to help. Putting a 11/32" drill bit inside the hinge arm though had it rattling around. So that is where the wear is, as most likely just mild steel and not high tensile like the pins. So bigger pins is what is needed and found just what I needed in the 2008 donor Grand Cherokee hinges.
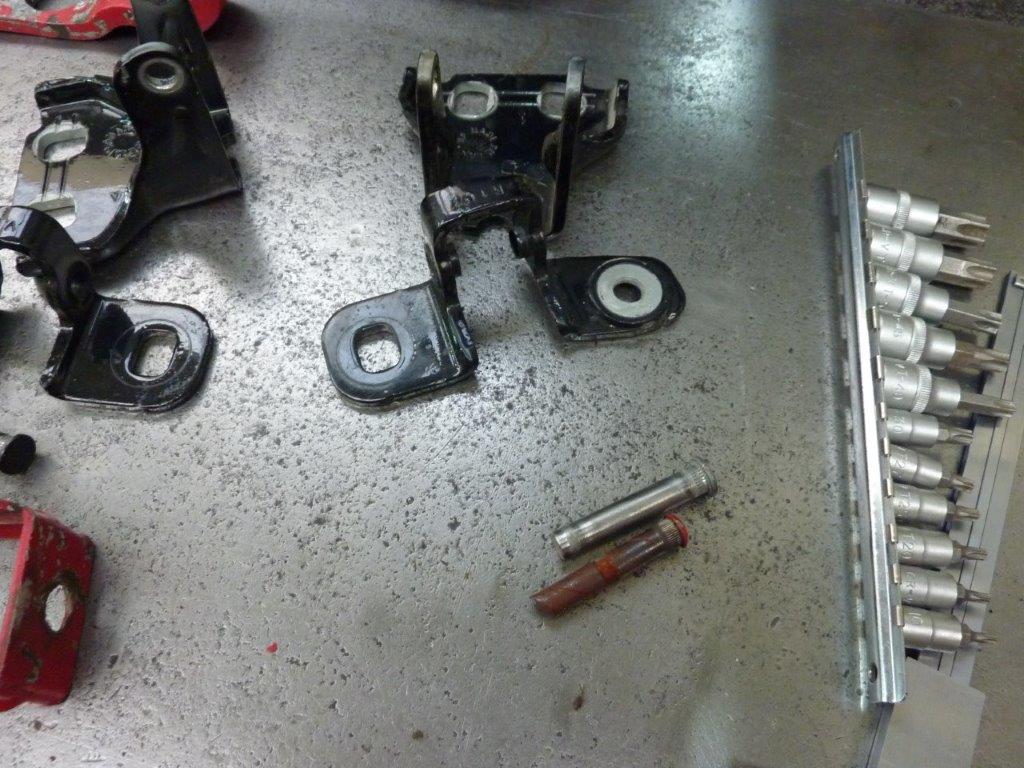
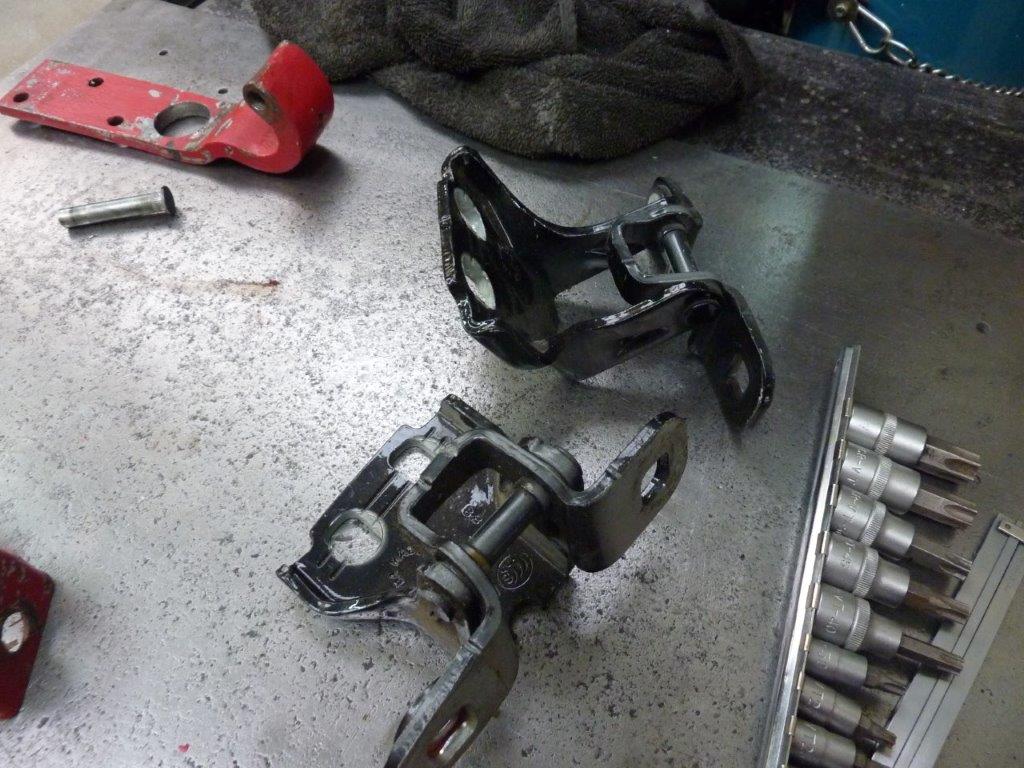
I ground the flattened ends on the bottom of the Grands pins off and punched them out. These are 3/8" so only 1/32" bigger. Only the hinge without the coil spring is long enough though at 2". Strangely the 2007 model Grand has smaller pins, the same size as the Willys, so cannot be used.
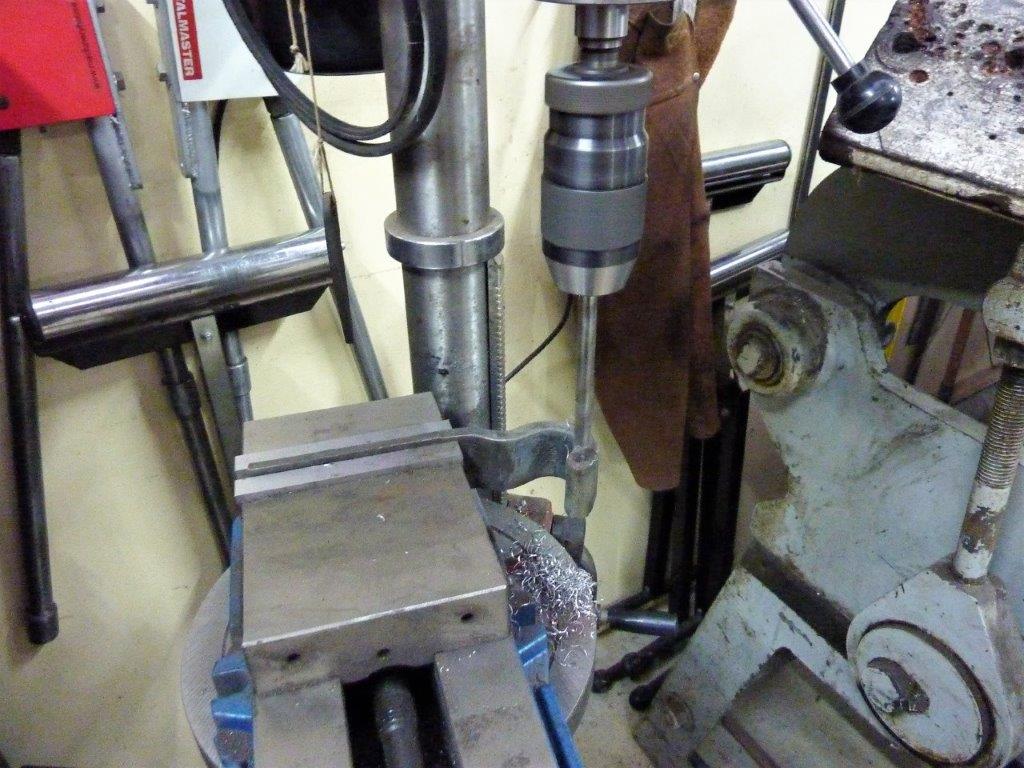
I setup the hinge arm perfectly level to the drill press and drilled it out to 3/8".
Knocked the Grand Cherokee pin in over the impact socket and zero play in the hinges now. I placed a couple of tacks on the bottom of the pin to make sure the pin does not rotate in the bracket rather than in the arm. Instead of using the Grand Cherokee pins, using grade 8 bolts or grade 9 cap screws would also work. Start with at least 3.5"-4" long ones to make sure you have no threaded section of the shaft inside the hinge and cut off the remainder.
Marcus
To try where there is little hope, is to risk failure.
Not to try at all, is to guarantee it!
____| \______\
|/¯\ |¯ |----O||||O
()_)-o-)¯¯()_)-o-)_)
To try where there is little hope, is to risk failure.
Not to try at all, is to guarantee it!
____| \______\
|/¯\ |¯ |----O||||O
()_)-o-)¯¯()_)-o-)_)
-
Sly Fox
- Senior Member
- Posts: 1923
- Joined: Sat Apr 24, 2010 7:10 pm
- Location: Castle Hill, NSW
Re: Grand Willys Project
Ready for another 75 years' service, nice job to have sorted before paint.
51 Dodge Custom & 63 EH Ute - Dare to be different
-
Gojeep
- Old Hand
- Posts: 7219
- Joined: Mon Jan 07, 2008 1:24 pm
- Location: Eastern Suburbs of Melbourne
- Contact:
Re: Grand Willys Project
Think they will out live me that is for sure!
I noticed the 48 set had oiling holes drilled but the 58 ones didn't. Probably another cost saving measure after Kaiser took over.
I changed to the 48 set for the re-pinning.
Marcus
To try where there is little hope, is to risk failure.
Not to try at all, is to guarantee it!
____| \______\
|/¯\ |¯ |----O||||O
()_)-o-)¯¯()_)-o-)_)
To try where there is little hope, is to risk failure.
Not to try at all, is to guarantee it!
____| \______\
|/¯\ |¯ |----O||||O
()_)-o-)¯¯()_)-o-)_)
-
Pato
- Posts: 103
- Joined: Thu Sep 23, 2010 2:12 am
- Location: Warrnambool
Re: Grand Willys Project
Hi Marcus, with the drilling of the hinges to 3/8 just a trick I learnt whist doing my apprenticeship as a toolmaker. If you radius the drill on the edge of the cutting face and the outside of the flutes it will drill to a reamed size. You need to drill 1/64 under the finished size and then use high speed and oil to finish off to 3/8. I was taught this by some German tradesman in 1968 and have used it all the time since. Hope this is understandable Cheers Pat
-
Gojeep
- Old Hand
- Posts: 7219
- Joined: Mon Jan 07, 2008 1:24 pm
- Location: Eastern Suburbs of Melbourne
- Contact:
Re: Grand Willys Project
Good to know Pat.Pato wrote: ↑Sat Jul 15, 2023 8:37 am Hi Marcus, with the drilling of the hinges to 3/8 just a trick I learnt whist doing my apprenticeship as a toolmaker. If you radius the drill on the edge of the cutting face and the outside of the flutes it will drill to a reamed size. You need to drill 1/64 under the finished size and then use high speed and oil to finish off to 3/8. I was taught this by some German tradesman in 1968 and have used it all the time since. Hope this is understandable Cheers Pat
Marcus
To try where there is little hope, is to risk failure.
Not to try at all, is to guarantee it!
____| \______\
|/¯\ |¯ |----O||||O
()_)-o-)¯¯()_)-o-)_)
To try where there is little hope, is to risk failure.
Not to try at all, is to guarantee it!
____| \______\
|/¯\ |¯ |----O||||O
()_)-o-)¯¯()_)-o-)_)
-
Gojeep
- Old Hand
- Posts: 7219
- Joined: Mon Jan 07, 2008 1:24 pm
- Location: Eastern Suburbs of Melbourne
- Contact:
Re: Grand Willys Project
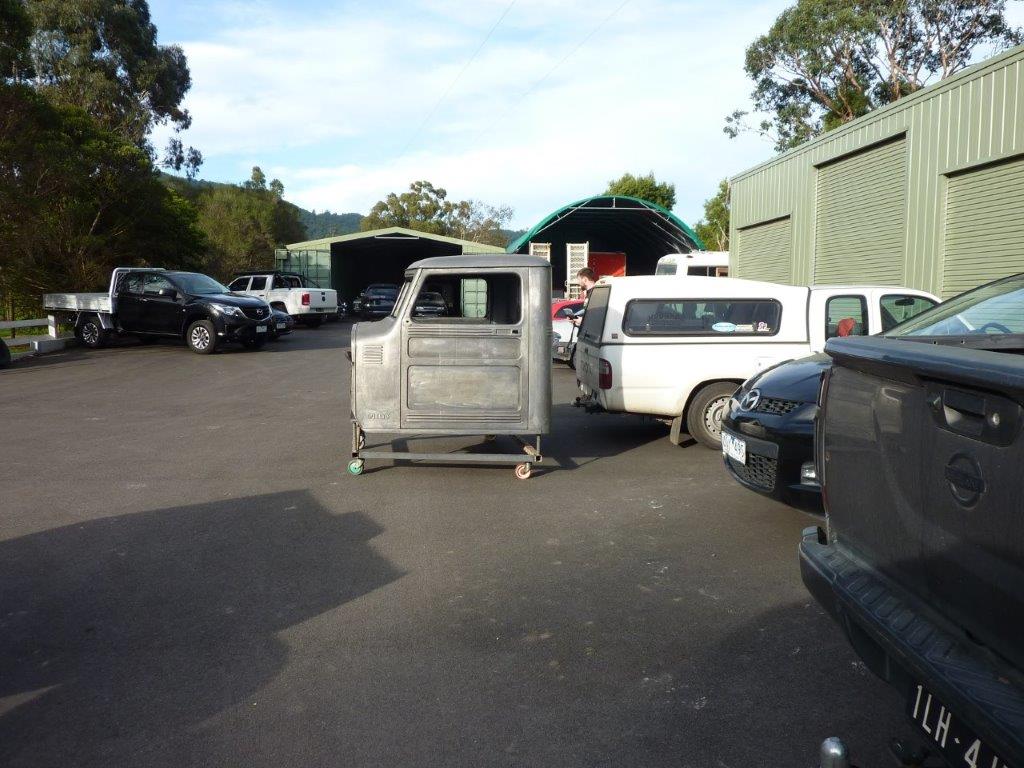
Getting ready to put the cab on the trailer, or so we thought.
Soon discovered that fitting the cab onto the trailer under the carport meant we didn't have enough clearance to drive back out
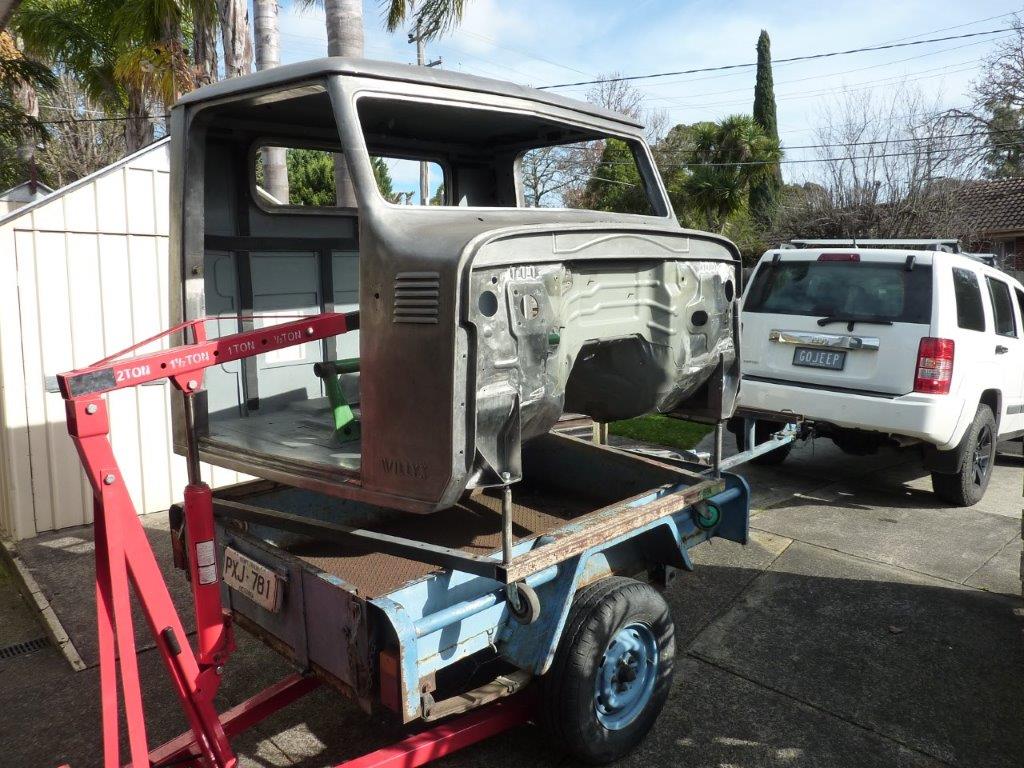
Wish it fitted better onto the trailer, but too late now.
I bolted the doors back onto the cab and have the two guards and bonnet inside as well.
Every panel from the bed forward is going to the painters first, including window trims and the suspension tower brace.

Unstrapped and ready to be taken off the trailer at the painters. Fortunately only a 10 minute drive from our house.
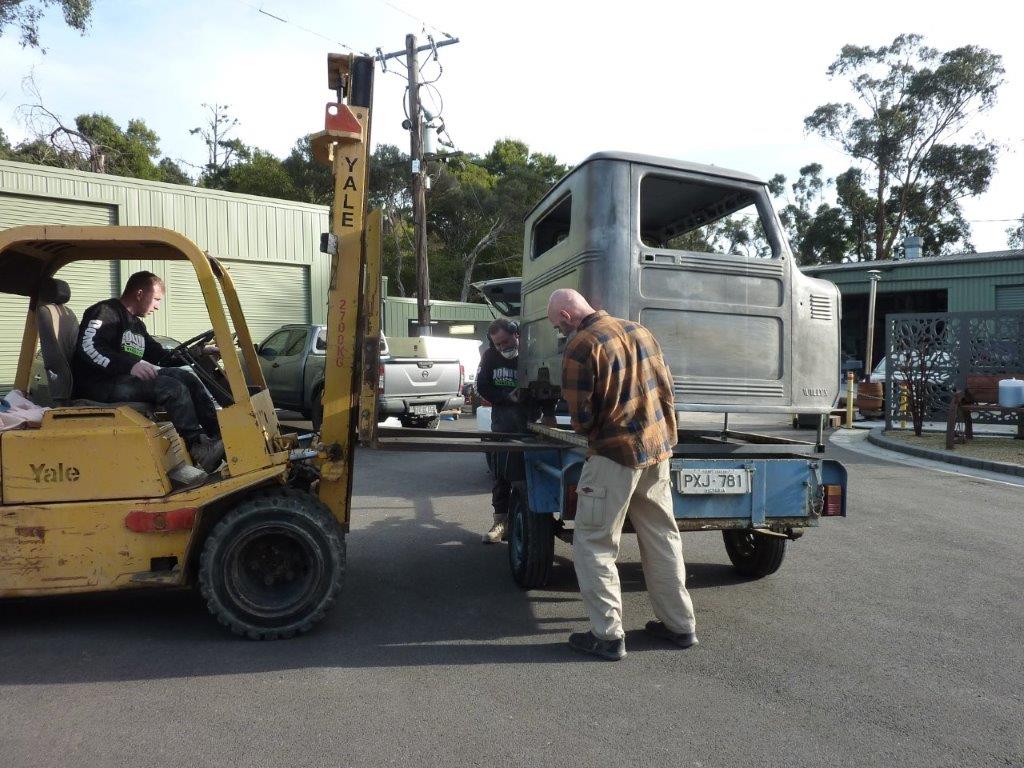
Getting the forklift tynes under the cab dolly. Unfortunately they were not long enough to go under the other part of it so two of us had to hold that up while Lisa drove the trailer away.
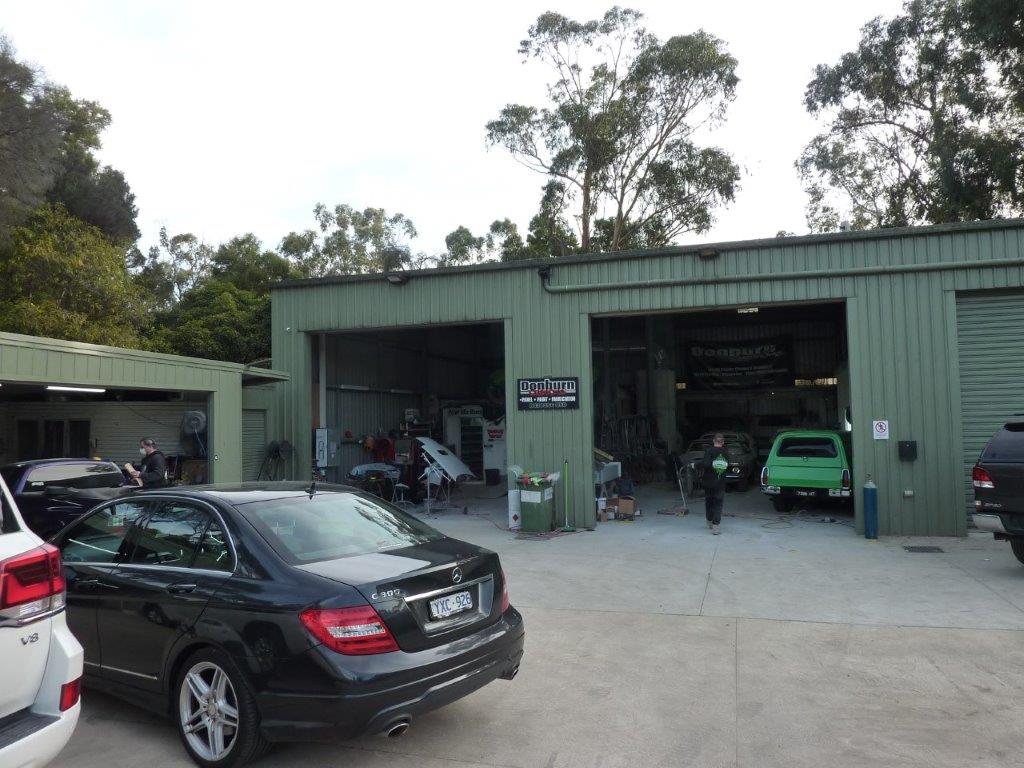
Set on a country property, the panels are being painted by Donburn customs. https://www.facebook.com/donburncustoms
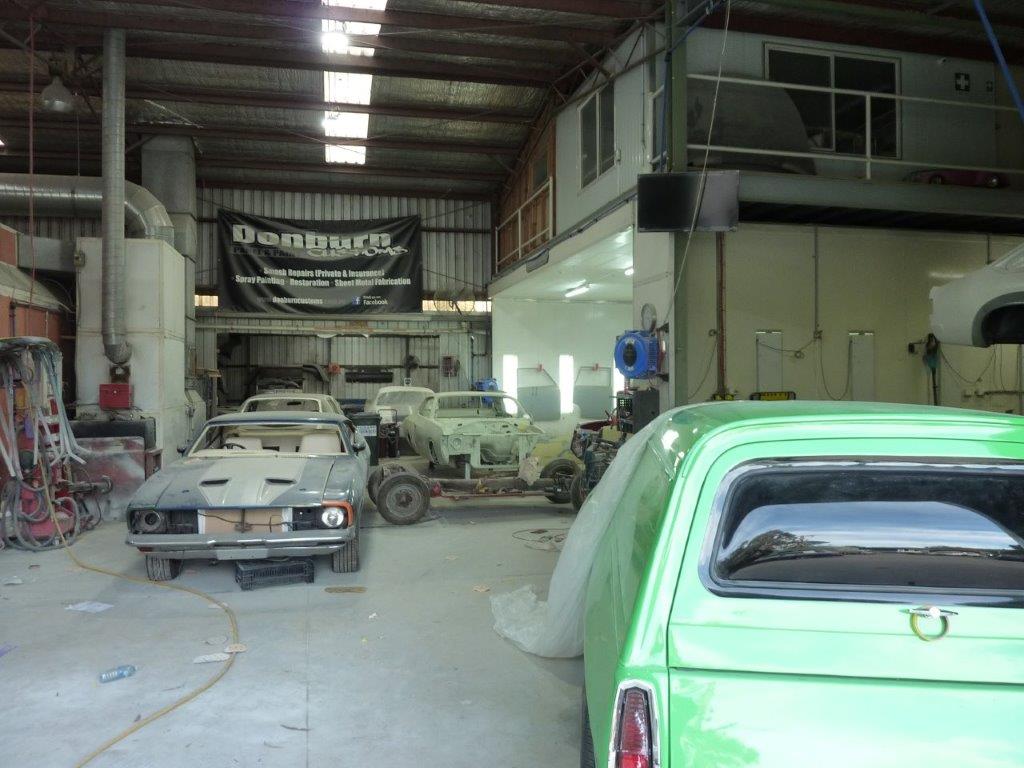
We have seen cars and pickups that they has done while taking the Truck to shows, also aired a TV on 7mate show called Workshop Wars Downunder, still showing at 3pm on Saturdays here.
For the first time it is no longer in my hands! Plan is to strip all the running gear etc off the chassis and Lisa painting all that while the cab etc is being painted.
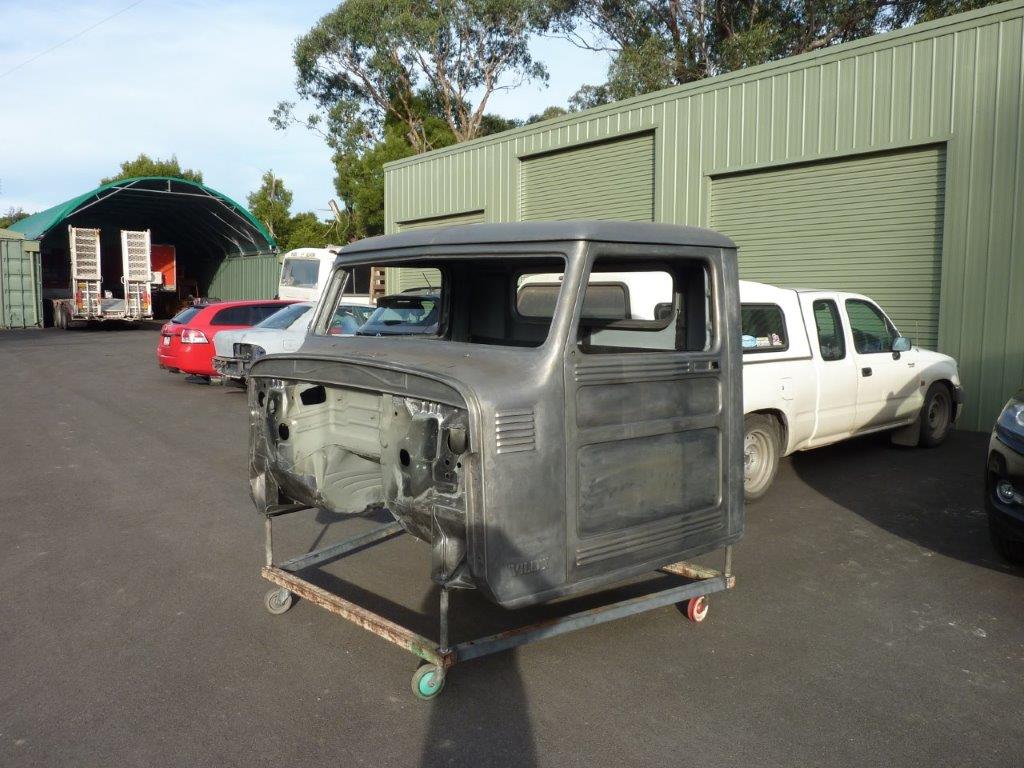
Looking to have all these panels painted by October when I will drop off the bed panels. While they are being painted I'll begin assembly of the everything that goes inside the cab.
Marcus
To try where there is little hope, is to risk failure.
Not to try at all, is to guarantee it!
____| \______\
|/¯\ |¯ |----O||||O
()_)-o-)¯¯()_)-o-)_)
To try where there is little hope, is to risk failure.
Not to try at all, is to guarantee it!
____| \______\
|/¯\ |¯ |----O||||O
()_)-o-)¯¯()_)-o-)_)
-
turns

- Old Hand
- Posts: 2922
- Joined: Mon Dec 17, 2007 8:23 pm
- Location: Sydney NSW
Re: Grand Willys Project
Exciting times 
"Normal is an illusion. What is normal for the spider is chaos for the fly"...............Morticia Addams
-
zuffen
- Senior Member
- Posts: 1926
- Joined: Fri Jan 28, 2011 7:45 pm
- Location: Sydney
Re: Grand Willys Project
I'm glad I'm not the only one who has trouble getting engine cranes to move.
Getting close now.
Are you sure the cab didn't go into paint jail?
Every time I'm told 2 months it takes six. I hope you do better.
Getting close now.
Are you sure the cab didn't go into paint jail?
Every time I'm told 2 months it takes six. I hope you do better.
Never argue with an idiot, they will drag you down to their level and beat you with experience.
-
46 deluxe
- Old Hand
- Posts: 3641
- Joined: Sun Aug 17, 2003 12:50 am
- Location: geelong vic
Re: Grand Willys Project
That's something i'd be worried about also .
The time frame of 2-3 months is already too long in my books for a body that's almost ready to prime and shoot .
scott