Model A Tourer Build
-
rattyrod
- Member
- Posts: 666
- Joined: Thu Mar 12, 2009 3:21 pm
- Location: Bayswater Victoria
Re: Model A Tourer Build
Great job so far , looks super cool already
when are you going to finish it?
-
Angry
- Member
- Posts: 571
- Joined: Wed Nov 27, 2013 10:55 pm
- Location: Wagga Wagga Riverina NSW
Re: Model A Tourer Build
Bloody awsome work there mate,....love the column rebuild n the Con Rod drop.....
Im loving the "Crusty on the outside " look,..........
I get a few jaws drop when some look at Effy with the crusty Patina on the outside,...n then they see the new inside n start looking closer ,...n I love popping the bonnet n seeing thier eyes pop when they see the Injected Windsor hiding under there..... Love the Sleeper ...LOL
Al.
64 Ford F100 SWB Patina Pickup
69 Camaro Z28 Clone....
64 Ford F100 SWB Patina Pickup
69 Camaro Z28 Clone....
-
toprodz

- Old Hand
- Posts: 2604
- Joined: Sun Mar 23, 2003 10:44 am
- Location: Wallan Victoria 0412 81 1932
Re: Model A Tourer Build
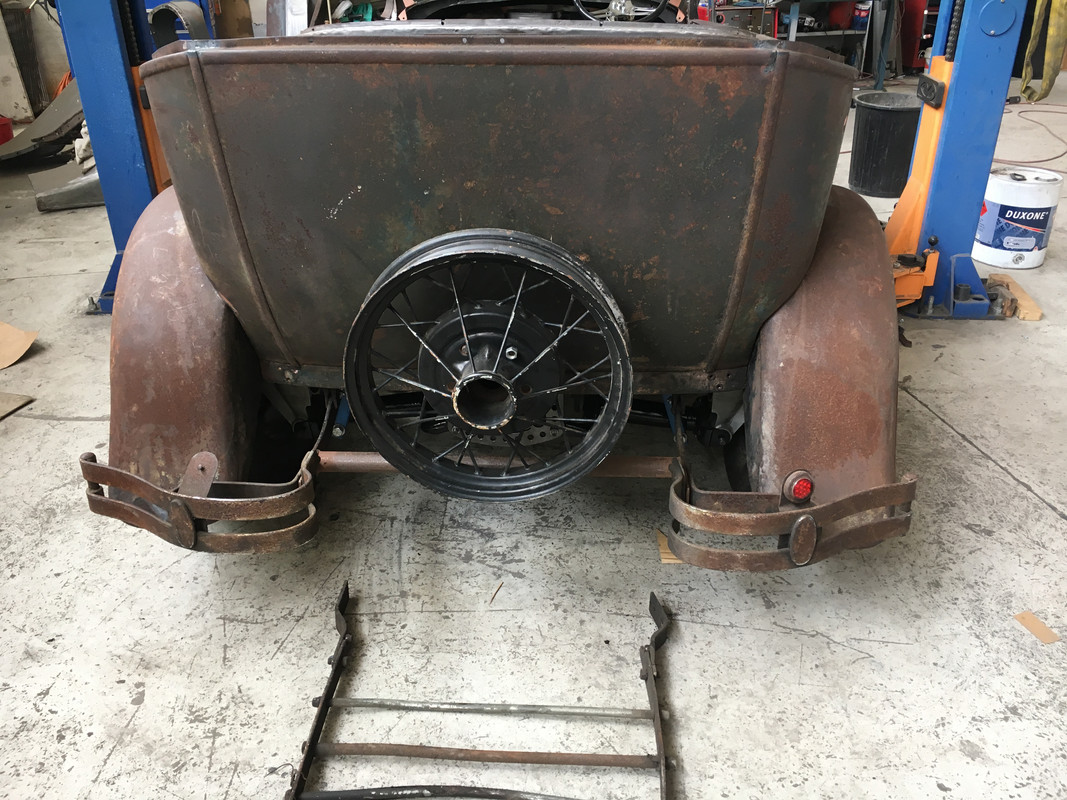
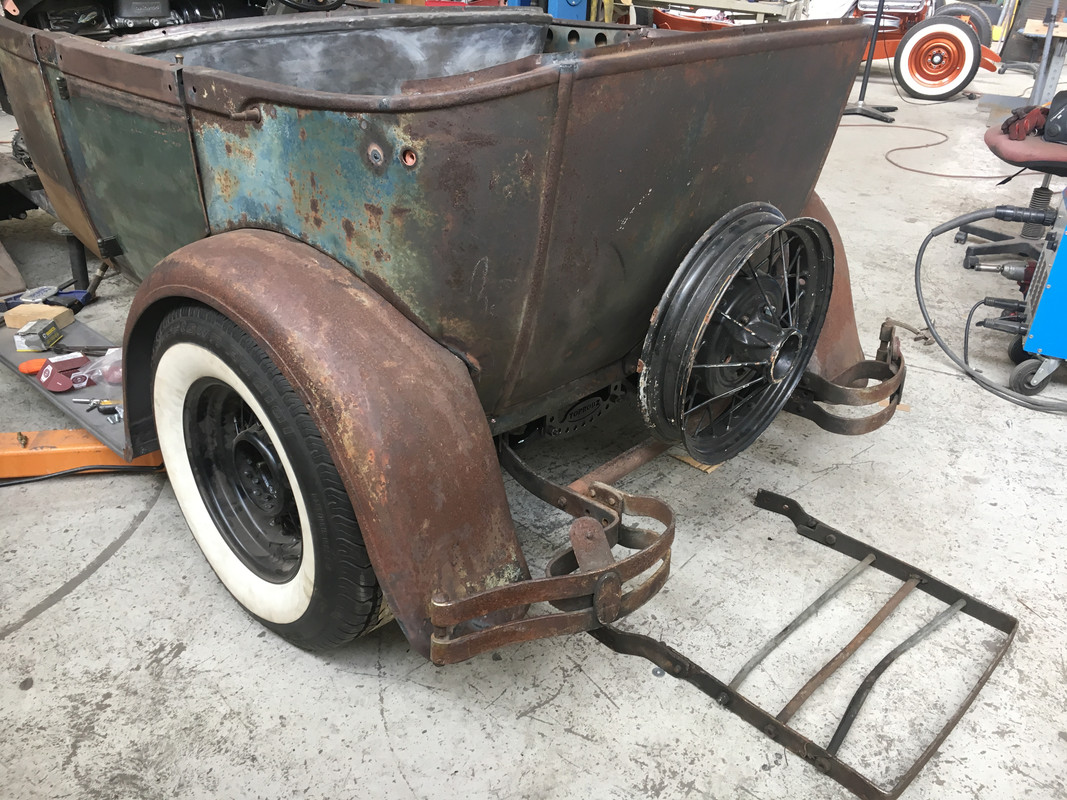
Well time for another update, I started modifying the rear bumper irons so the will fit the modified rear section of the chassis, It took a bit of heating and bending to make them fit, I will add some pictures of the mounts later as I forgot to take some, 


I still have to straighten the luggage rack and will fit it at a later date
I have been working on getting the rear of the body steeled out, first I welded the rear floor into place, it has an access hole in the middle so I can get to the diff mounting bolts, without having to remove the body to get the diff out of the chassis, then I made the rear seat riser, to support the base of the seat, it was all done in 1.6mm, I also made and welded the captive nuts in place for the guards to bolt to, the rear angled section of the floor has the seat belt mounts welded to the bottom, I have to sand all the plug welds to tidy up the whole thing

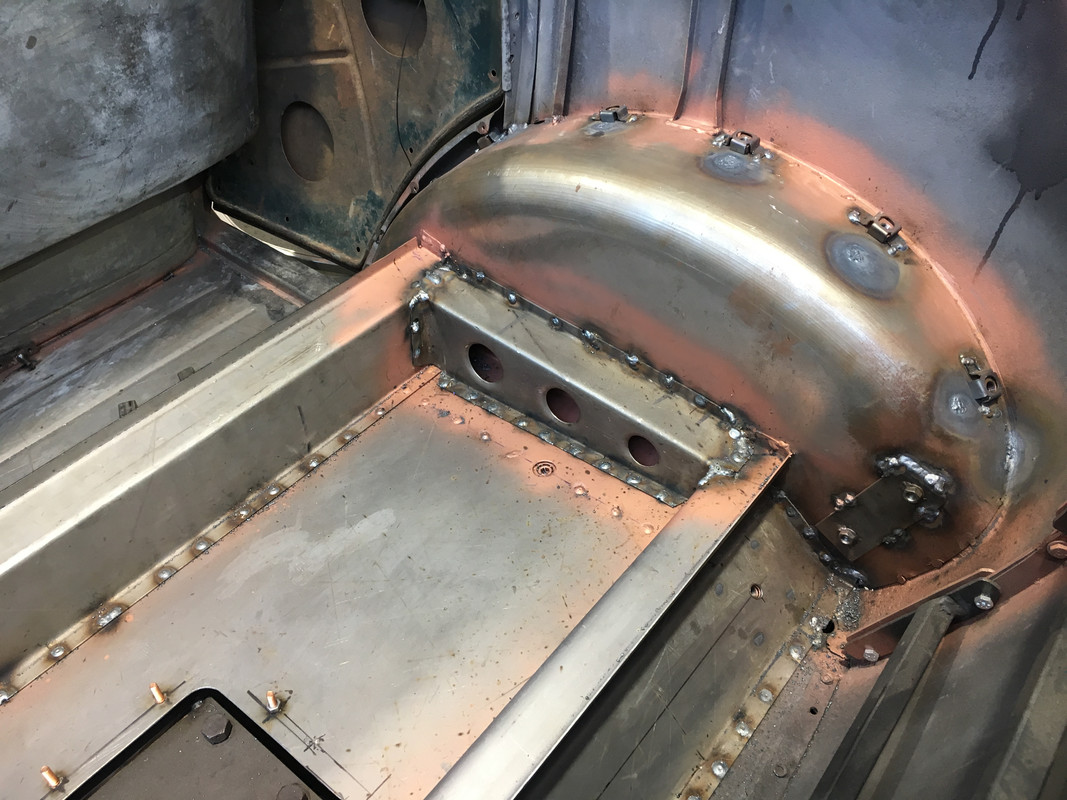
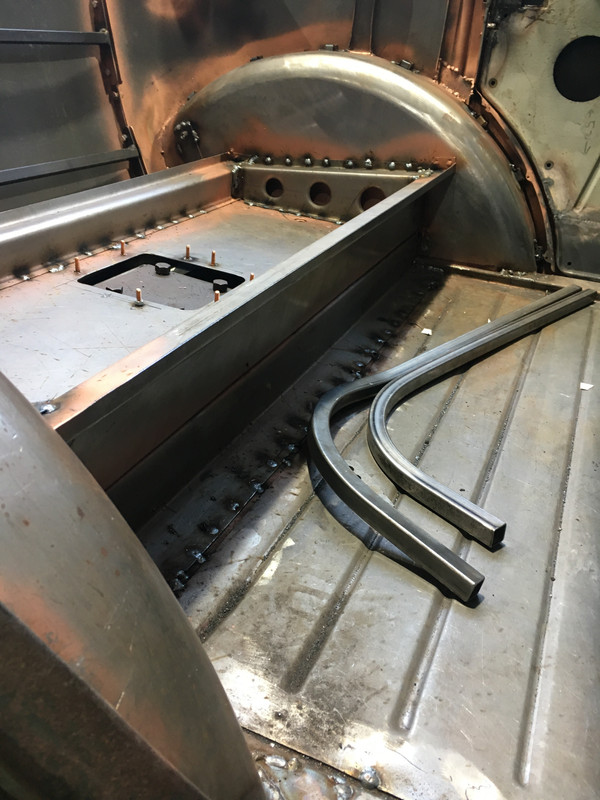
I bent some square tub and weld it in place to increase the strength of the body, then I made a rear sheet metal panel from 1.2mm sheet with belled holes and swages that will be plug welded to the rear steel frame to add to the structure and also help protect the fuel tank from any possible rear impact, It will be welded in place once all the other matching panels are made to suit.
I have also started on the parcel shelf which will also mount the rear seat belt retractors, I will be back on it tomorrow

I managed to get another hood rest pin as I only had one and a set of clamps by asking on a Facebook site from Outback on here, they fit the look of the car,
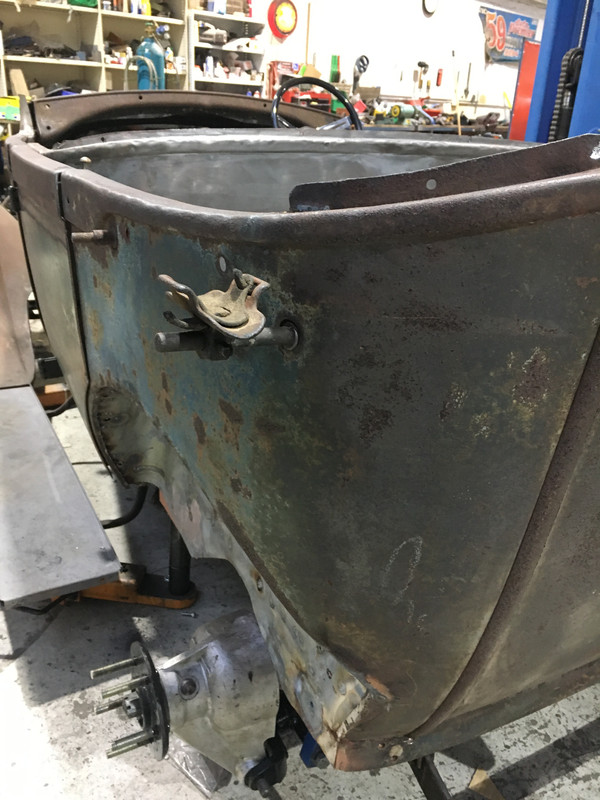
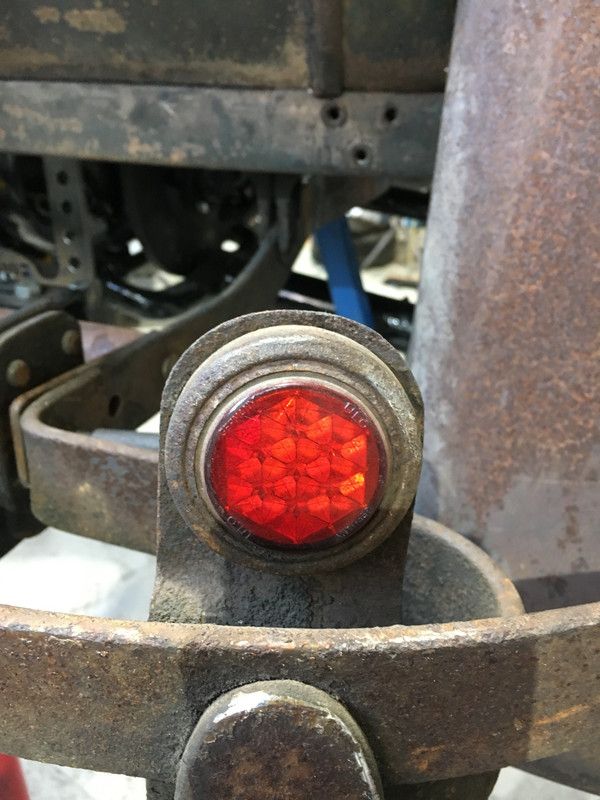
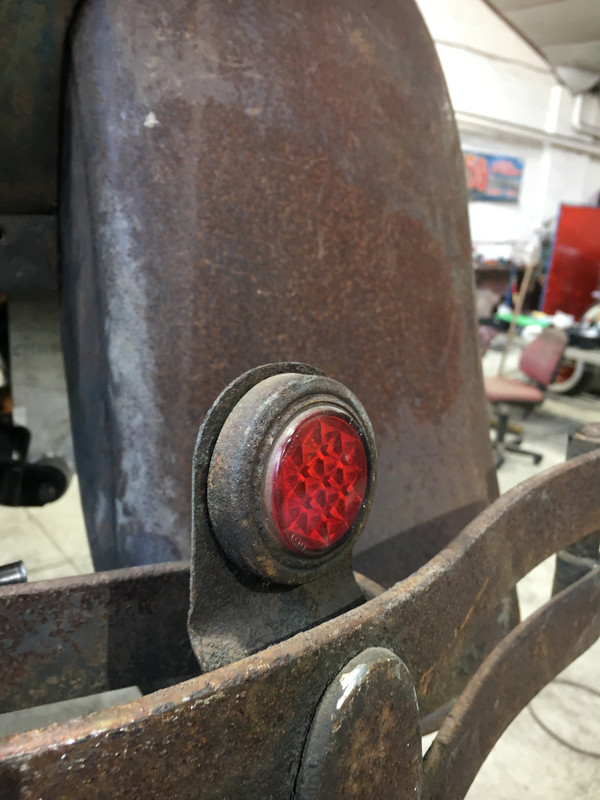
I am still chasing a windscreen mount RHD rear view mirror if anyone has one stashed away that they don’t need, also chasing a matching reflector to the one I have on the rear bumper,
That’s all for now thanks for looking in
I still have to straighten the luggage rack and will fit it at a later date
I have been working on getting the rear of the body steeled out, first I welded the rear floor into place, it has an access hole in the middle so I can get to the diff mounting bolts, without having to remove the body to get the diff out of the chassis, then I made the rear seat riser, to support the base of the seat, it was all done in 1.6mm, I also made and welded the captive nuts in place for the guards to bolt to, the rear angled section of the floor has the seat belt mounts welded to the bottom, I have to sand all the plug welds to tidy up the whole thing
I bent some square tub and weld it in place to increase the strength of the body, then I made a rear sheet metal panel from 1.2mm sheet with belled holes and swages that will be plug welded to the rear steel frame to add to the structure and also help protect the fuel tank from any possible rear impact, It will be welded in place once all the other matching panels are made to suit.
I have also started on the parcel shelf which will also mount the rear seat belt retractors, I will be back on it tomorrow
I managed to get another hood rest pin as I only had one and a set of clamps by asking on a Facebook site from Outback on here, they fit the look of the car,
I am still chasing a windscreen mount RHD rear view mirror if anyone has one stashed away that they don’t need, also chasing a matching reflector to the one I have on the rear bumper,
That’s all for now thanks for looking in
Regards
Peter Gough
FOUNDING MEMBER #24 OZ-E-RODDERS ROD & KUSTOM CLUB
Peter Gough
FOUNDING MEMBER #24 OZ-E-RODDERS ROD & KUSTOM CLUB
-
Mopar Mick

- Old Hand
- Posts: 7364
- Joined: Tue Jun 10, 2003 7:13 pm
- Location: Beyond the Black Stump.
Re: Model A Tourer Build
Looking real good Pete. 
I look forward to the day when you take me for a cruise.
Keep up the good work.
Mick.
I look forward to the day when you take me for a cruise.
Keep up the good work.
Mick.
Old age and treachery will always overcome youth and skill.
-
Chrisso
- Old Hand
- Posts: 4178
- Joined: Thu Apr 12, 2012 10:44 am
- Location: Albury NSW
Re: Model A Tourer Build
Great progress Pete it is going to be one nice Model A when you are finished with it. Thanks for posting.
-
Gojeep
- Old Hand
- Posts: 7219
- Joined: Mon Jan 07, 2008 1:24 pm
- Location: Eastern Suburbs of Melbourne
- Contact:
Re: Model A Tourer Build
Coming along great there Peter.
Marcus
To try where there is little hope, is to risk failure.
Not to try at all, is to guarantee it!
____| \______\
|/¯\ |¯ |----O||||O
()_)-o-)¯¯()_)-o-)_)
To try where there is little hope, is to risk failure.
Not to try at all, is to guarantee it!
____| \______\
|/¯\ |¯ |----O||||O
()_)-o-)¯¯()_)-o-)_)
-
Mudgy
- Old Hand
- Posts: 3249
- Joined: Sun Dec 12, 2010 8:36 am
- Location: Gosford, NSW
Re: Model A Tourer Build
Happy Birthday Pete. That's some serious planning and top work as usual mate.
Cheers, Mudgy
Cheers, Mudgy
Good Judgement comes from experience....experience comes from bad judgement.
-
Chrisso
- Old Hand
- Posts: 4178
- Joined: Thu Apr 12, 2012 10:44 am
- Location: Albury NSW
Re: Model A Tourer Build
Happy Birthday Peter.
-
jailbar joe
- Old Hand
- Posts: 3440
- Joined: Sat Oct 24, 2009 8:33 pm
- Location: york west aus
Re: Model A Tourer Build
the A is looking great peter and happy birthday
like all your stuff....always a lot of clever stuff
like all your stuff....always a lot of clever stuff
cheers joe
if you do nothing then nothing happens
if you do nothing then nothing happens
-
toprodz
- Old Hand
- Posts: 2604
- Joined: Sun Mar 23, 2003 10:44 am
- Location: Wallan Victoria 0412 81 1932
Re: Model A Tourer Build
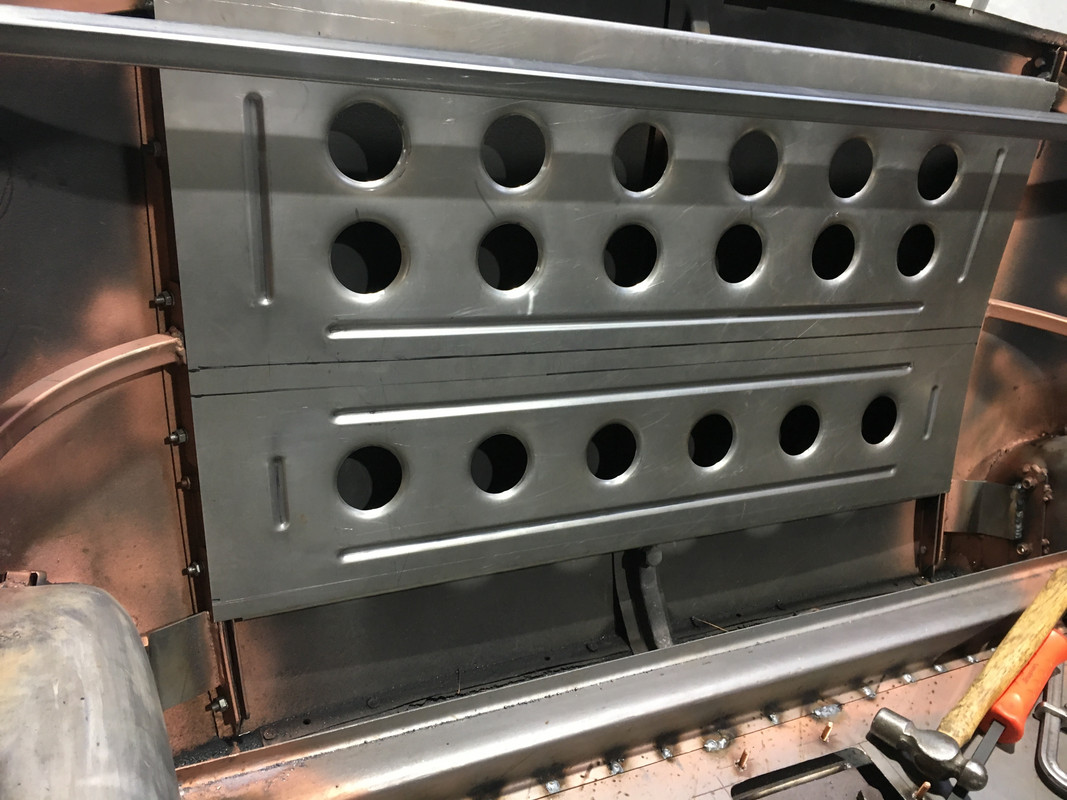
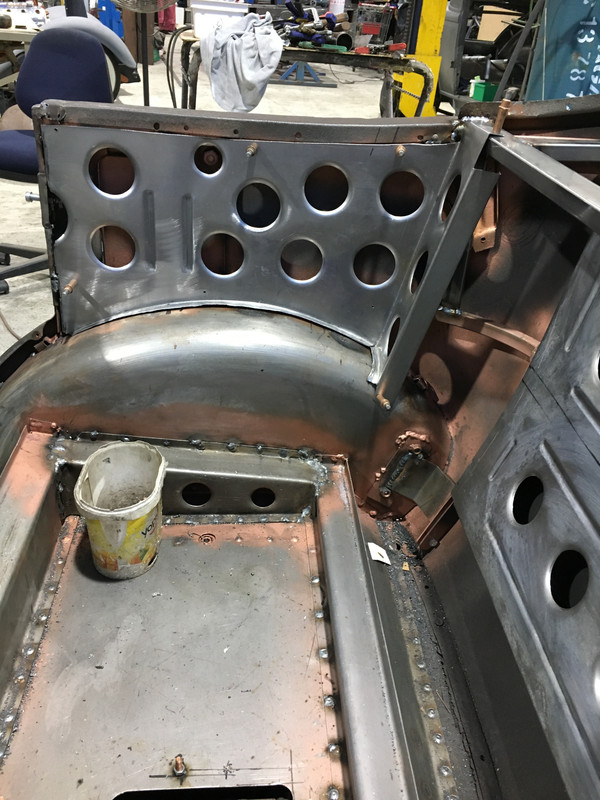
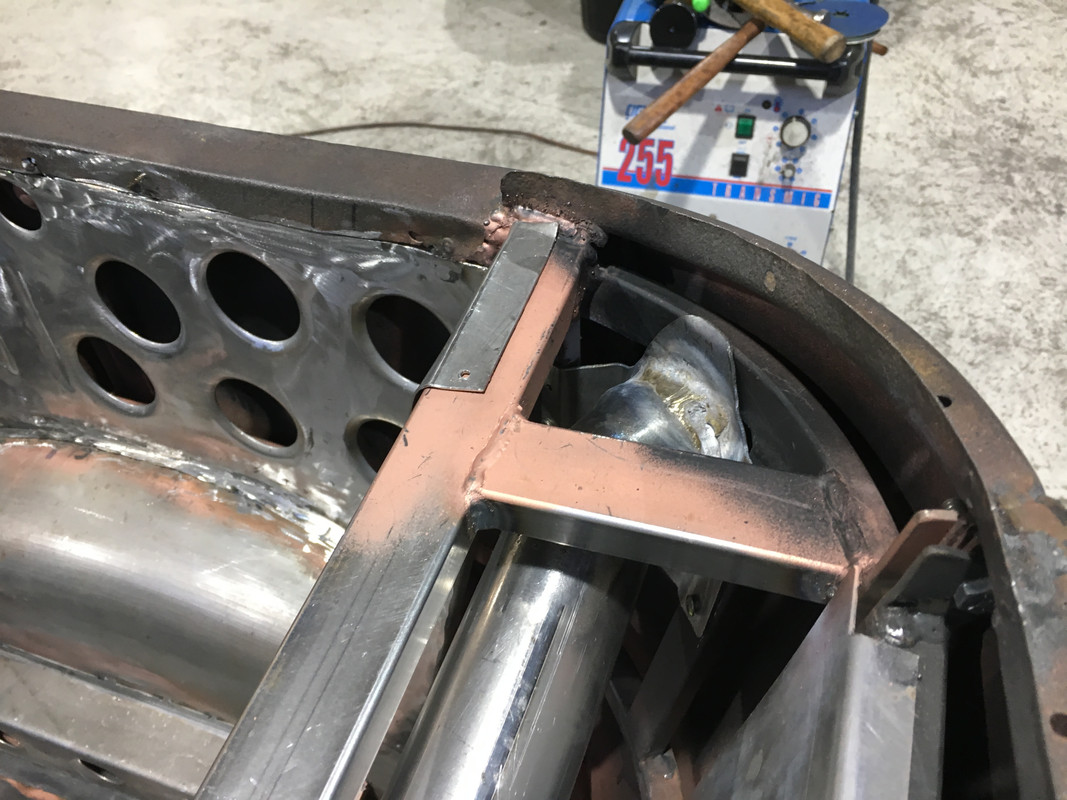
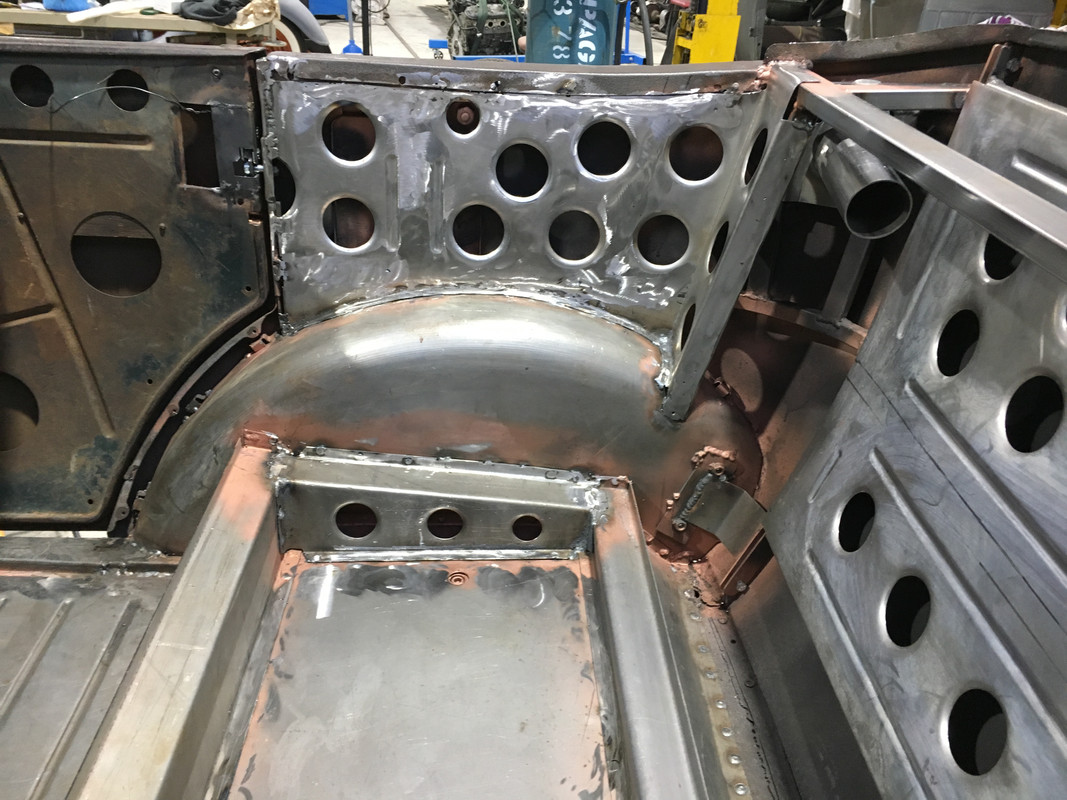
I have been trying to keep things moving forward on the tourer build, so it was time to carry on with the rear steel out, first was to add the frame for the rear parcel shelf that will sit above the fuel tank and give the rear seat upright to sit against
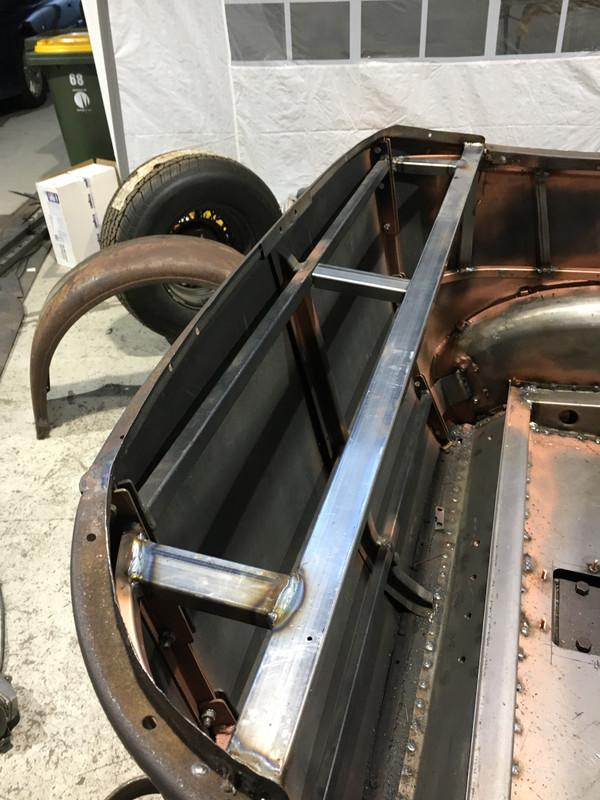
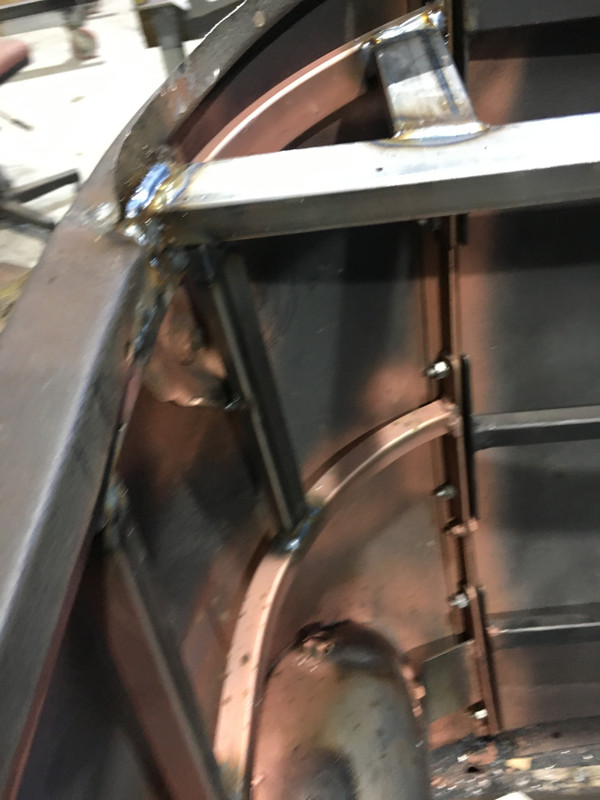
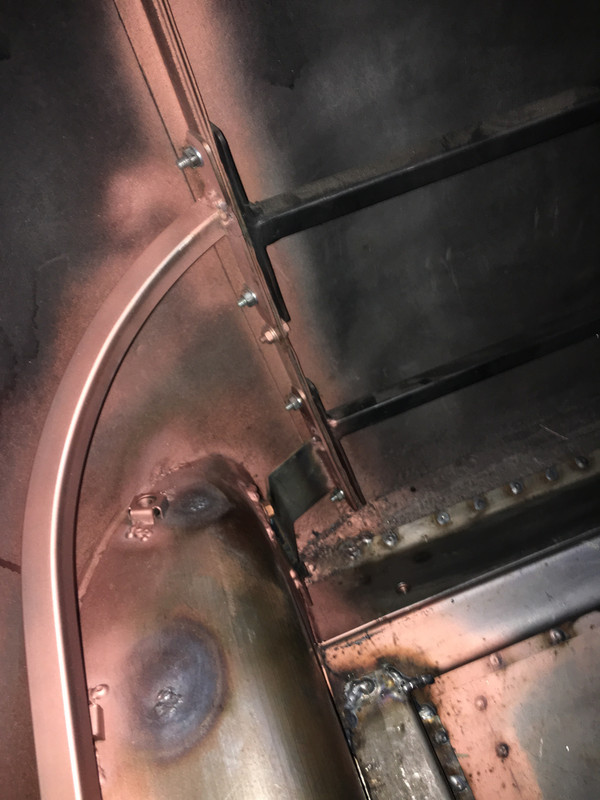
Then I made some side panels to help strengthen the C pillar areas
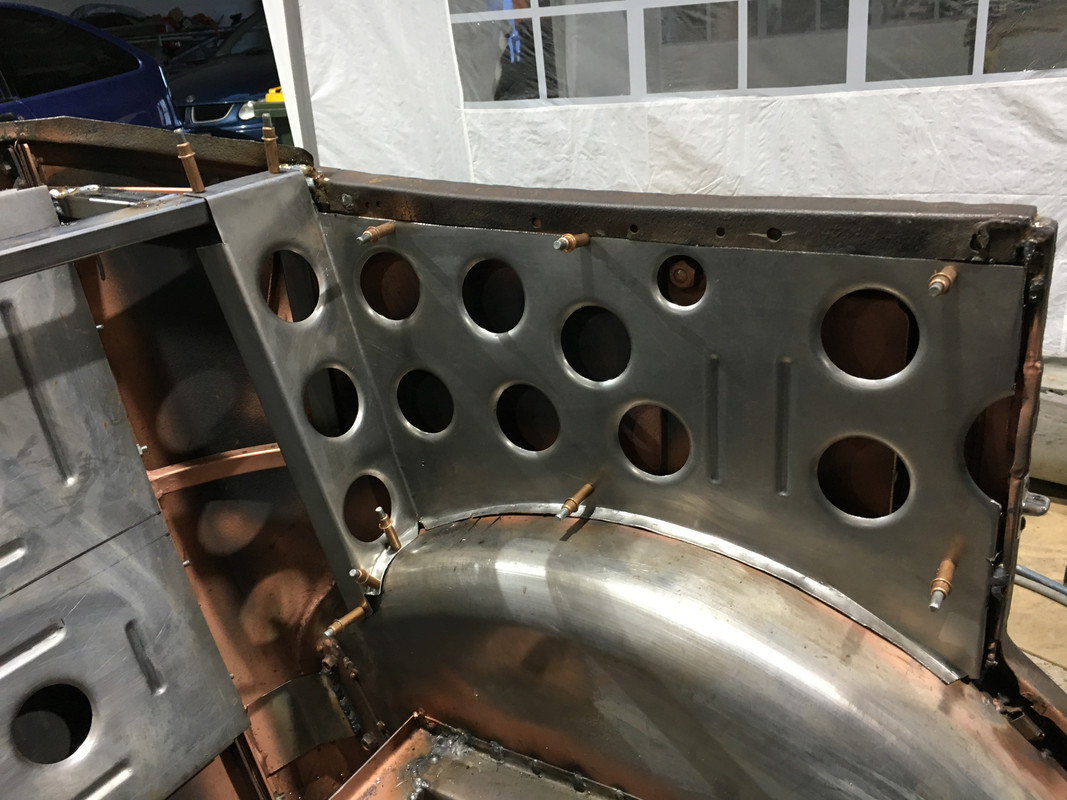
I also had to add a fuel filler neck to the right rear quarter panel, So I used an A Model fake radiator neck form norm at Aussie Desert coolers, I got an exhaust bend swaged up a little on one end to go over the brass section and brazed the 2 pieces together, it can be removed easily from inside the car, I will get it zinc plated at a later date to prevent any rust on the steel sections
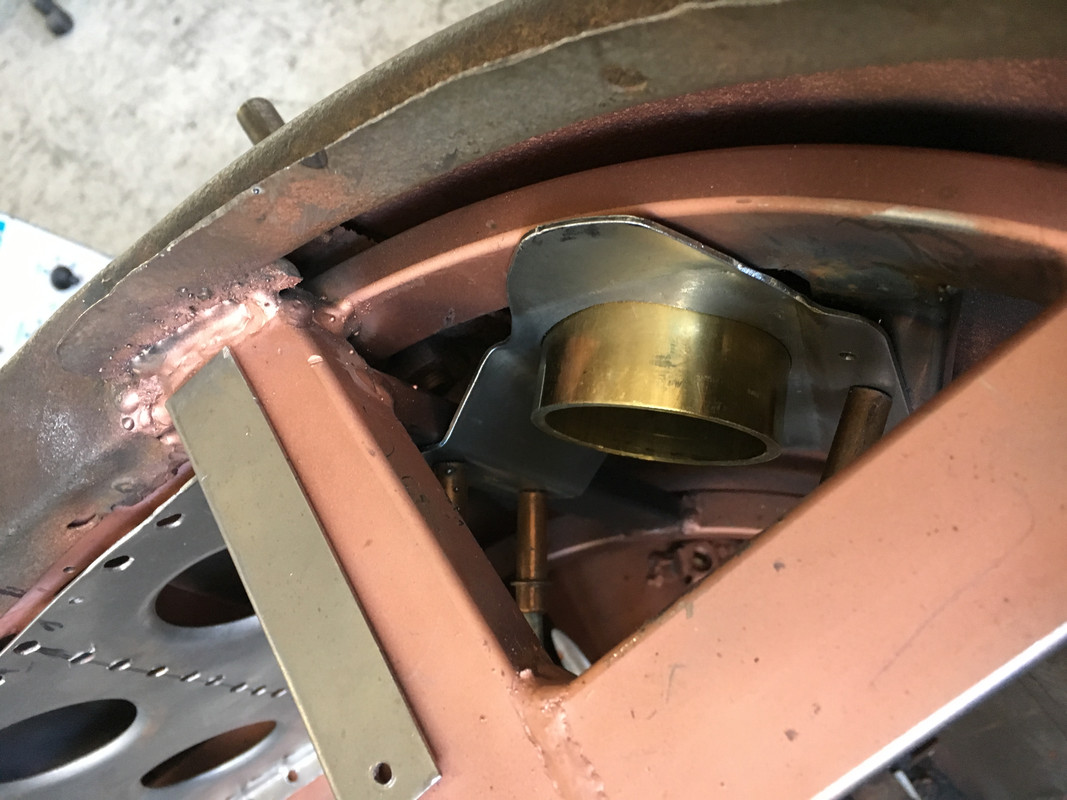
You can see the inlet in the top right of the body which will connect to the tank with a rubber hose
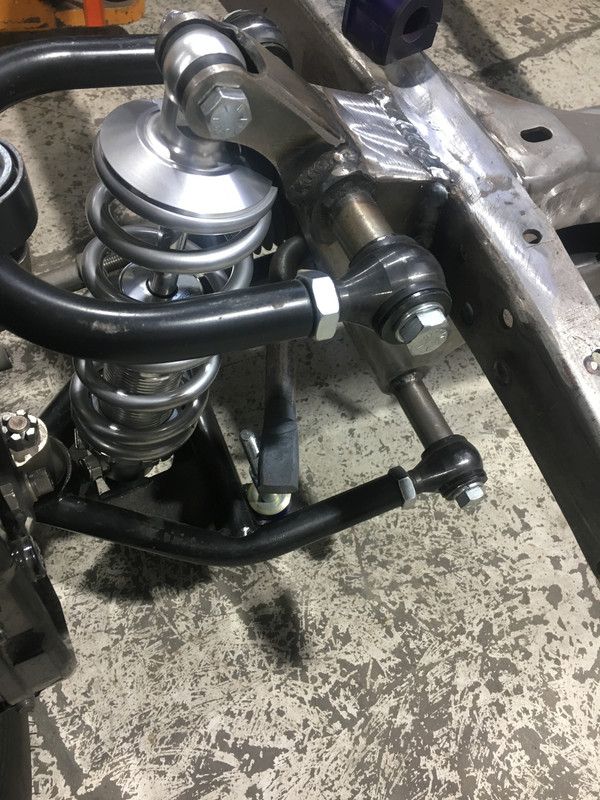
I also welded some plates between the original style front crossmember and the suspension crossmember to fill in the gap and reassembled the front end with the coilovers
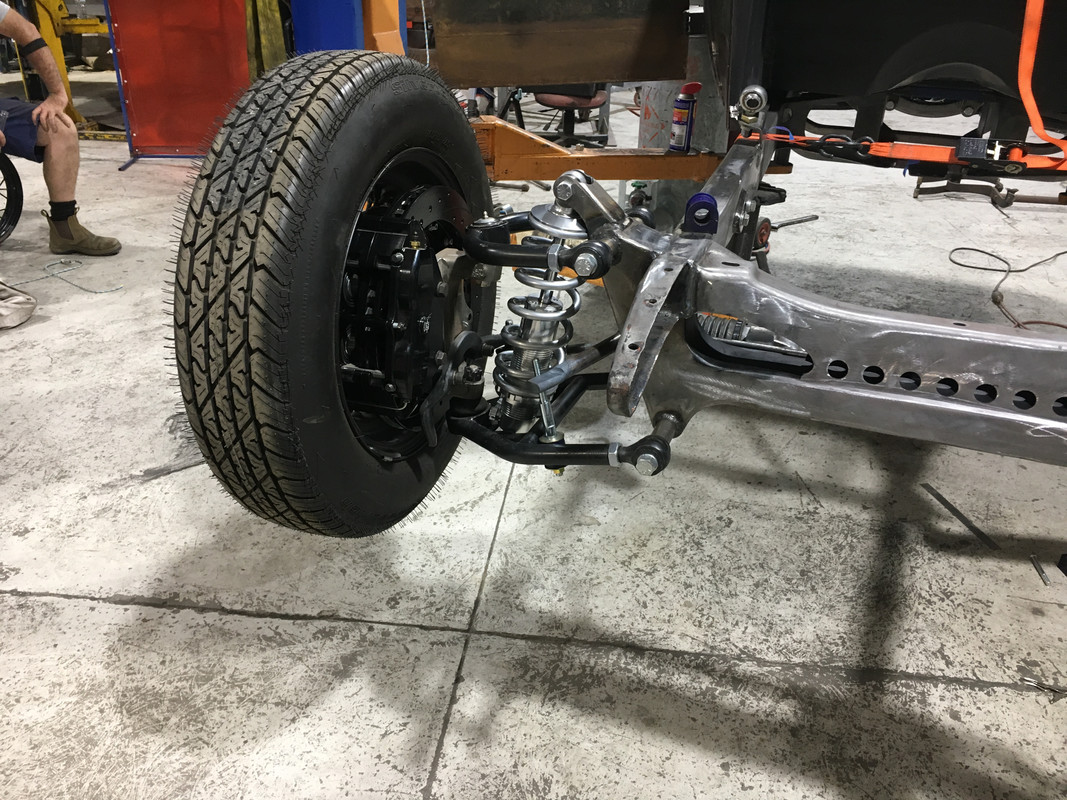
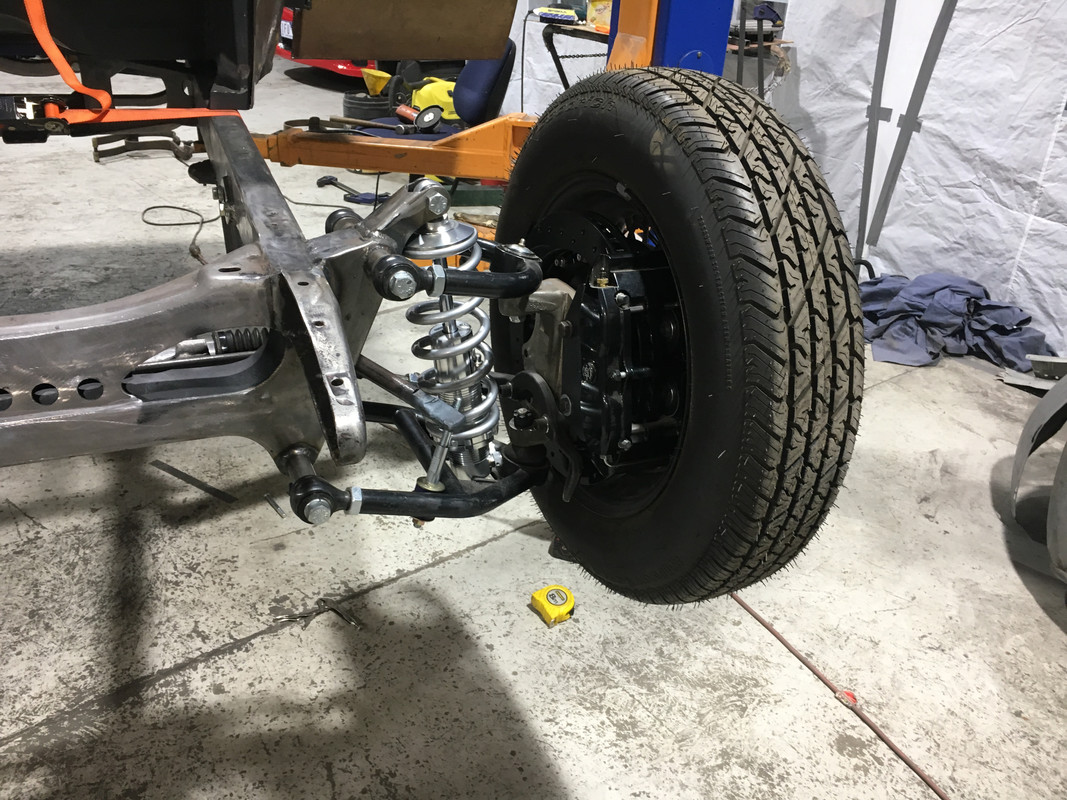
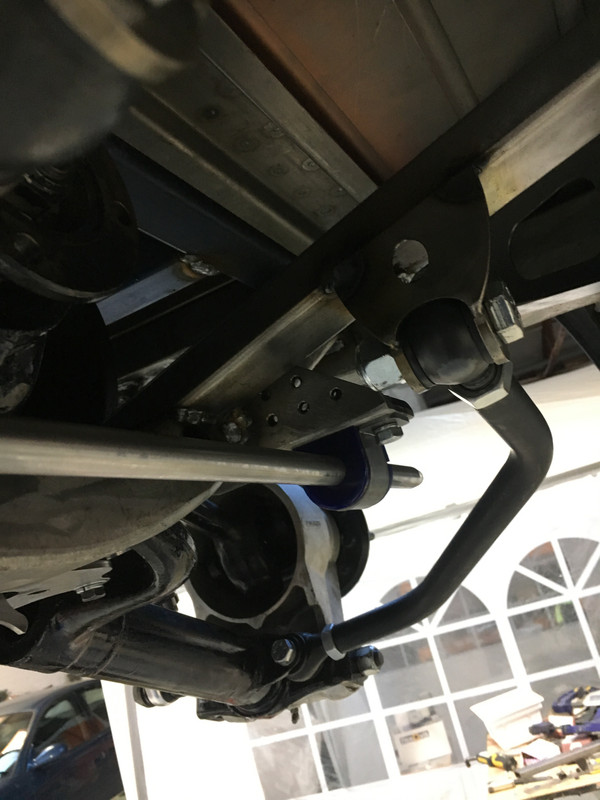
The rear end required some control arms, so these were made like a front suspension arms and pivot on the same plane as the lower jag arms

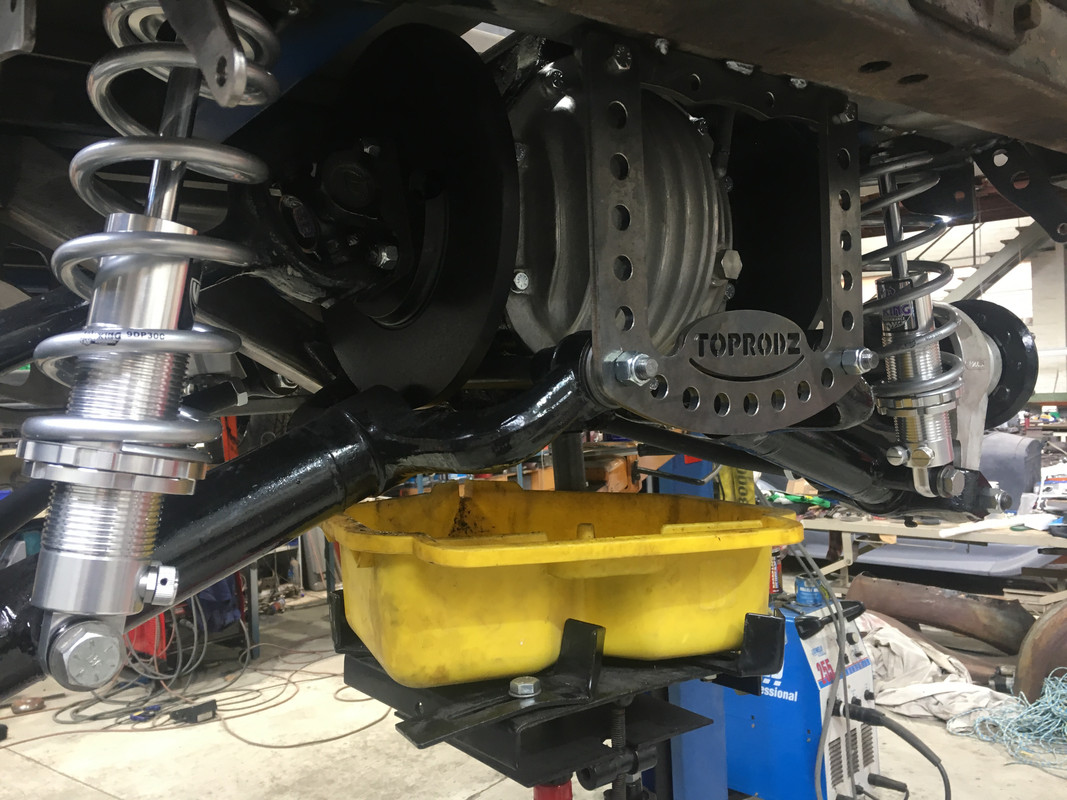
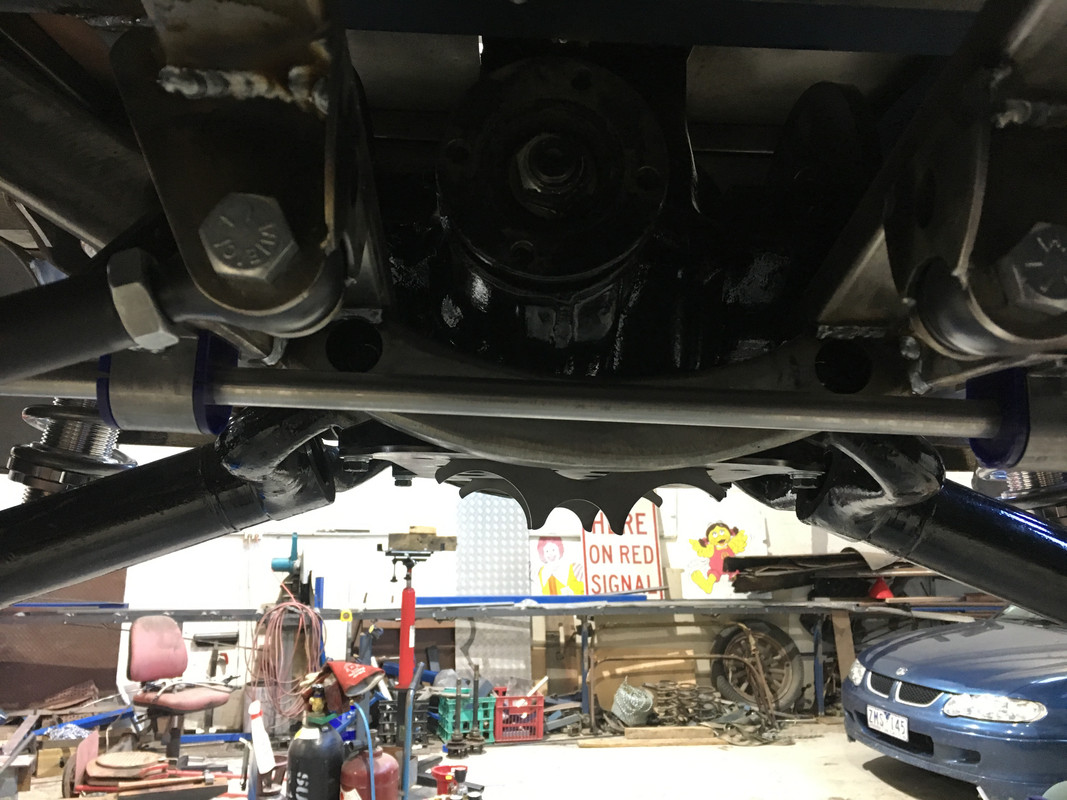
Then the rear shock mounts were welded into place, the coilovers were then bolted in, also put the aluminium diff cover on, you can see the bumper mounts hanging down near the coilover in the first photo


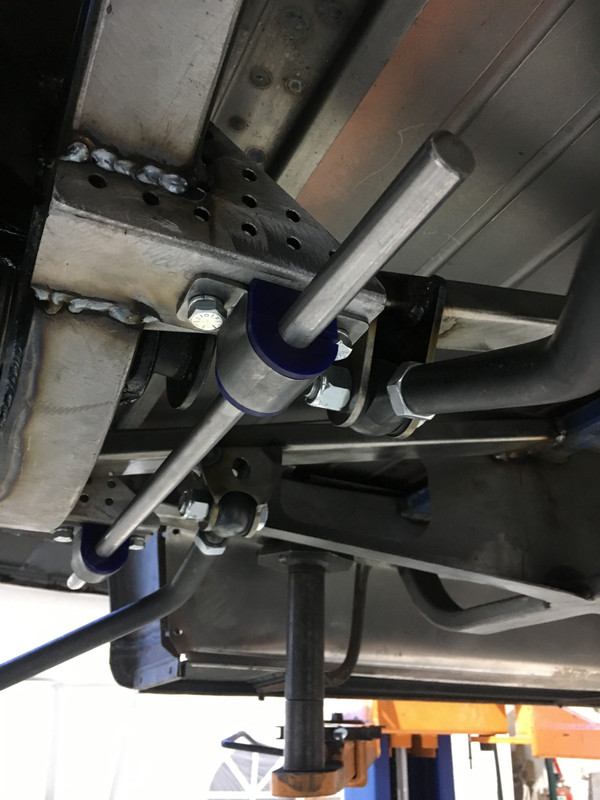
A bit of heat and a drop hammer was used to form the ends of the front sway bar as you can see, I will add a little more detail about that soon.
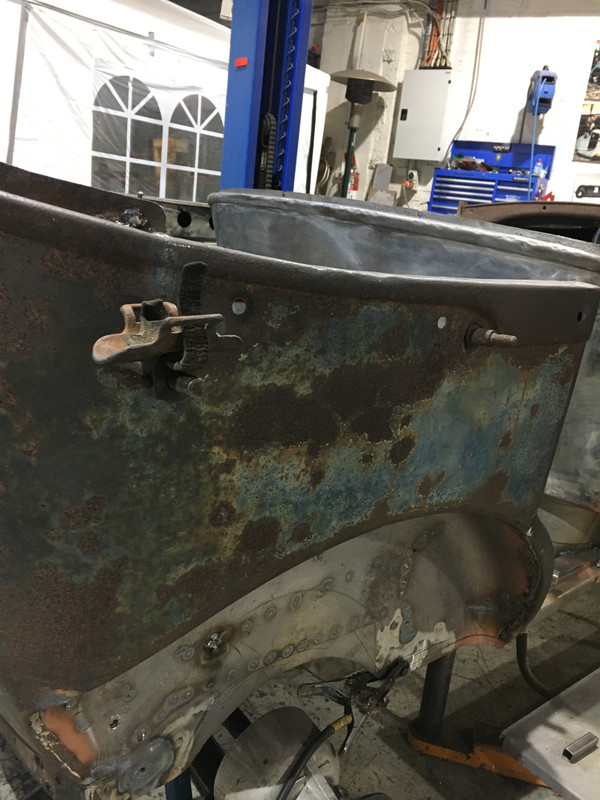
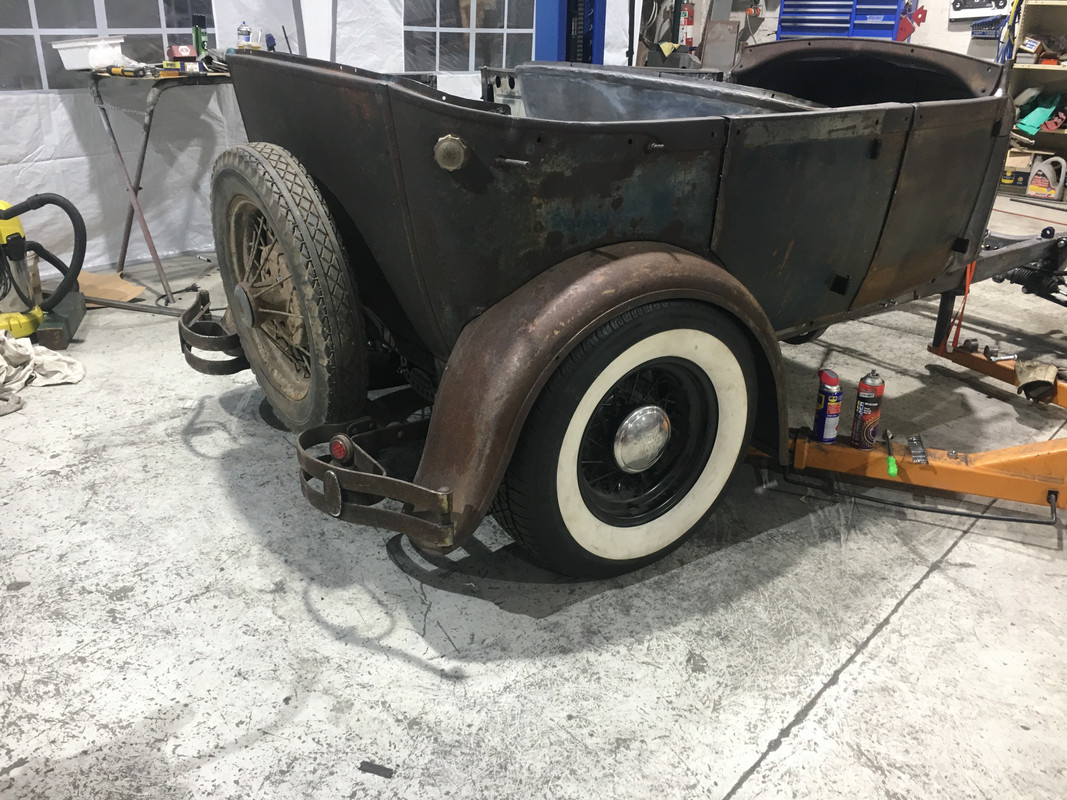
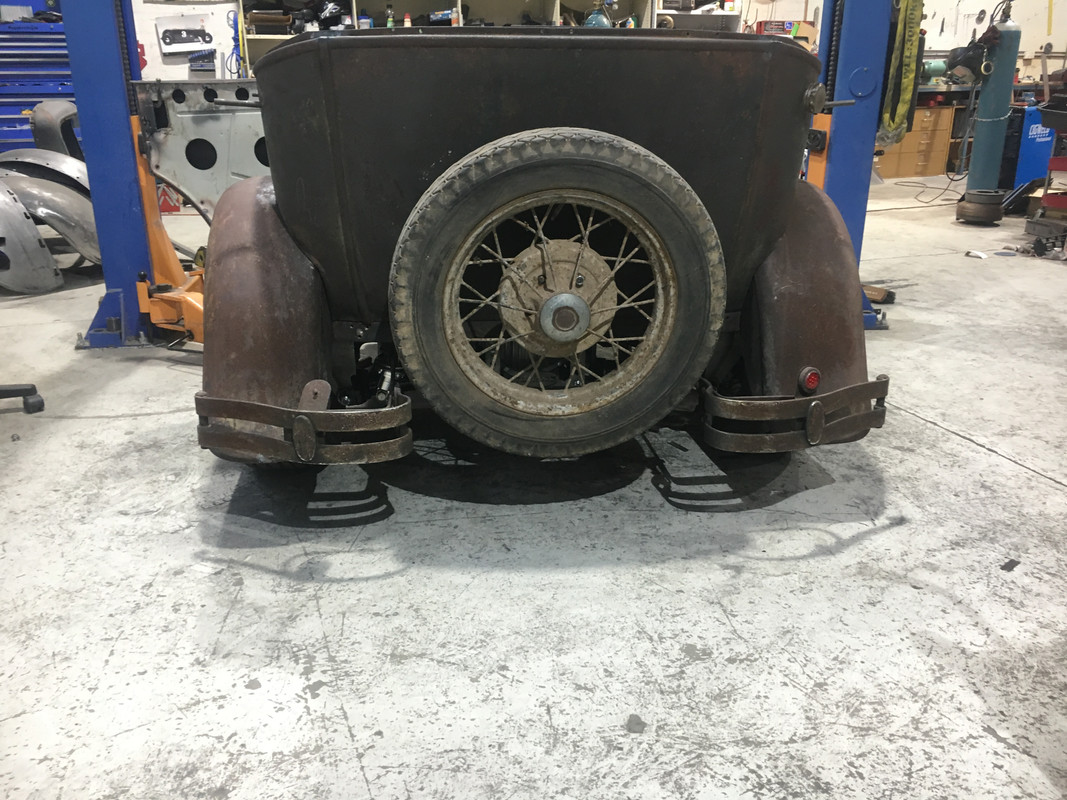
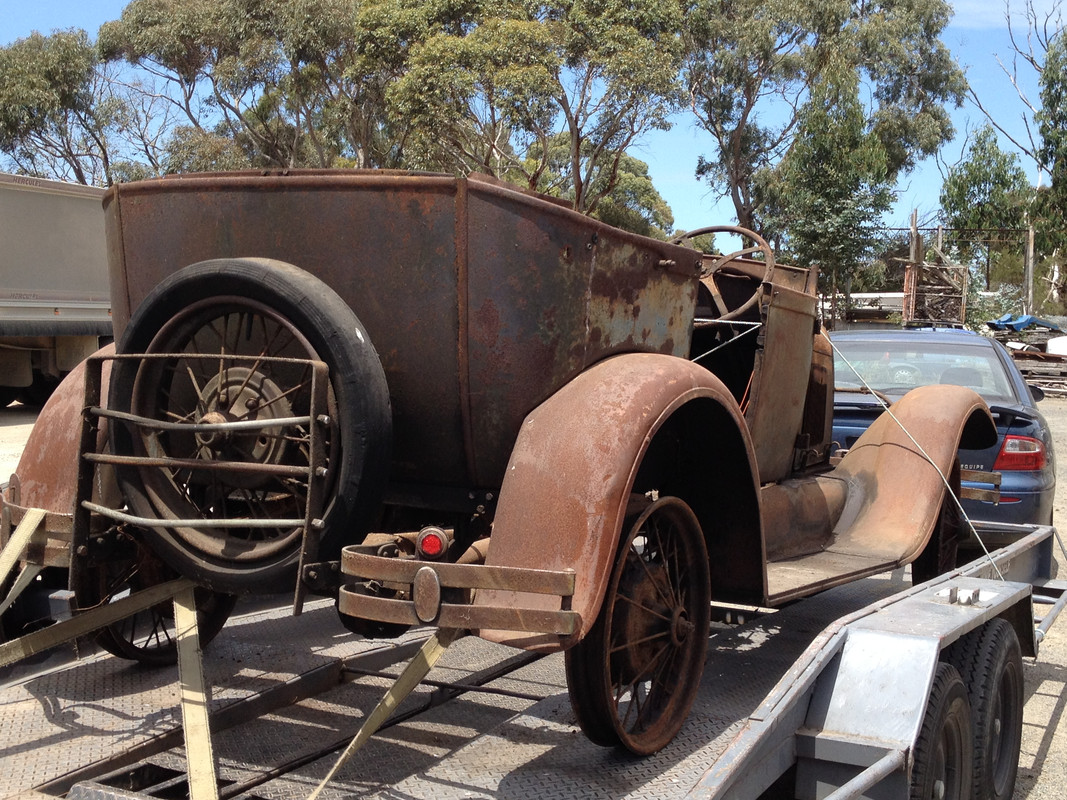
I have refitted the rear bumper and rear guards then put a spare wheel on the back, it is starting to look like it did when I got it
Well that’s about all for now, thanks for looking in
Then I made some side panels to help strengthen the C pillar areas
I also had to add a fuel filler neck to the right rear quarter panel, So I used an A Model fake radiator neck form norm at Aussie Desert coolers, I got an exhaust bend swaged up a little on one end to go over the brass section and brazed the 2 pieces together, it can be removed easily from inside the car, I will get it zinc plated at a later date to prevent any rust on the steel sections
You can see the inlet in the top right of the body which will connect to the tank with a rubber hose
I also welded some plates between the original style front crossmember and the suspension crossmember to fill in the gap and reassembled the front end with the coilovers
The rear end required some control arms, so these were made like a front suspension arms and pivot on the same plane as the lower jag arms
Then the rear shock mounts were welded into place, the coilovers were then bolted in, also put the aluminium diff cover on, you can see the bumper mounts hanging down near the coilover in the first photo
A bit of heat and a drop hammer was used to form the ends of the front sway bar as you can see, I will add a little more detail about that soon.
I have refitted the rear bumper and rear guards then put a spare wheel on the back, it is starting to look like it did when I got it
Well that’s about all for now, thanks for looking in
Regards
Peter Gough
FOUNDING MEMBER #24 OZ-E-RODDERS ROD & KUSTOM CLUB
Peter Gough
FOUNDING MEMBER #24 OZ-E-RODDERS ROD & KUSTOM CLUB
-
Chrisso
- Old Hand
- Posts: 4178
- Joined: Thu Apr 12, 2012 10:44 am
- Location: Albury NSW
Re: Model A Tourer Build
Sweet Peter looks like a real head turner and it will go like a scolded cat as well .
-
Mopar Mick
- Old Hand
- Posts: 7364
- Joined: Tue Jun 10, 2003 7:13 pm
- Location: Beyond the Black Stump.
Re: Model A Tourer Build
Wow, a lot of amazing work going on there Pete.
Looking very nice.
Many thanks for the updates.
Mick.
Looking very nice.
Many thanks for the updates.
Mick.
Old age and treachery will always overcome youth and skill.
-
hammered30
- Posts: 487
- Joined: Thu Jan 01, 2009 5:36 pm
- Location: in the shed
Re: Model A Tourer Build
Alot of work going on .looking really good thanks for the updates
Cheers Paul
Cheers Paul
63 galaxie 260 boss
-
SimonG
- Posts: 499
- Joined: Wed Jan 20, 2016 3:56 pm
- Location: Cairns, Nth Queensland
Re: Model A Tourer Build
it is always great to see how a professional does things and I appreciate you sharing your knowledge with those of us who have less experience
-
toprodz
- Old Hand
- Posts: 2604
- Joined: Sun Mar 23, 2003 10:44 am
- Location: Wallan Victoria 0412 81 1932
Re: Model A Tourer Build
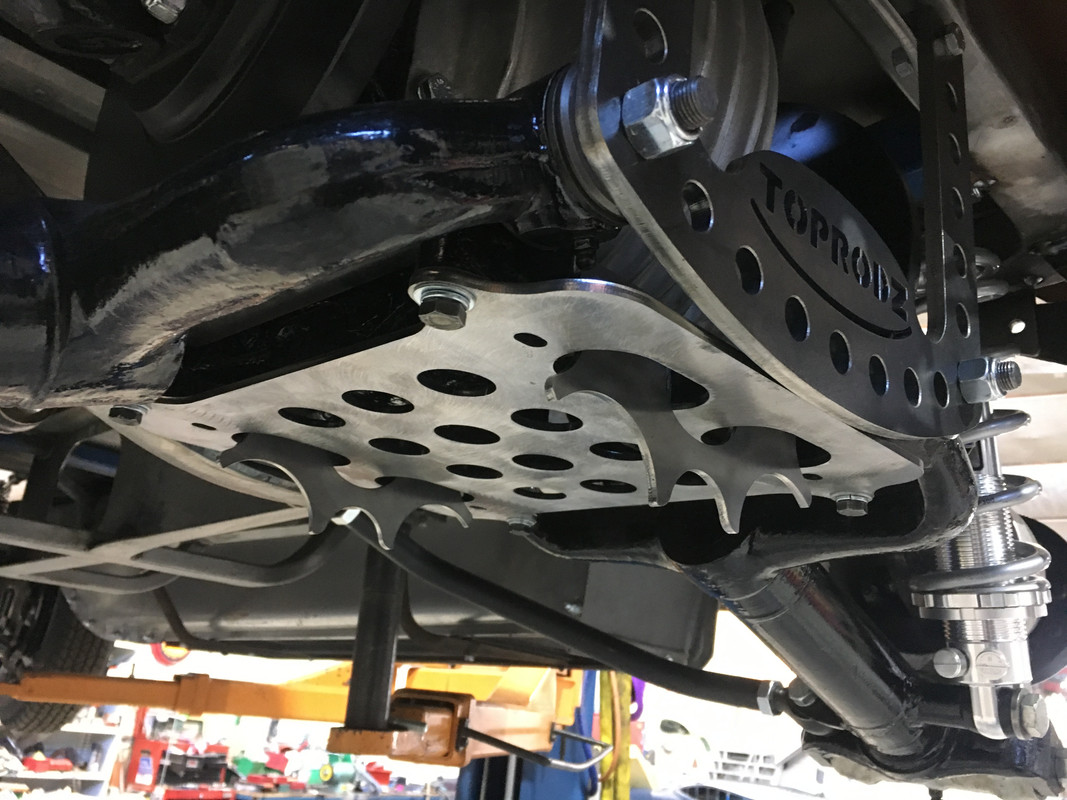
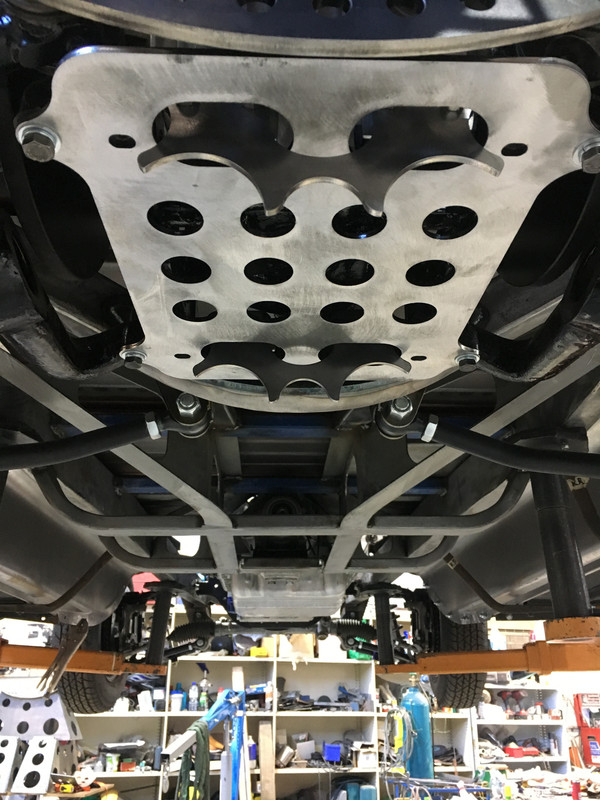
Well things have been progressing on my build, and it looks like it has a date at the big dance “Motor Ex 2019” in Melbourne May 11 & 12th at the show grounds, it is in the exhibition class so no judging which suits me, so it is full steam ahead to make it look like a nearly complete car.
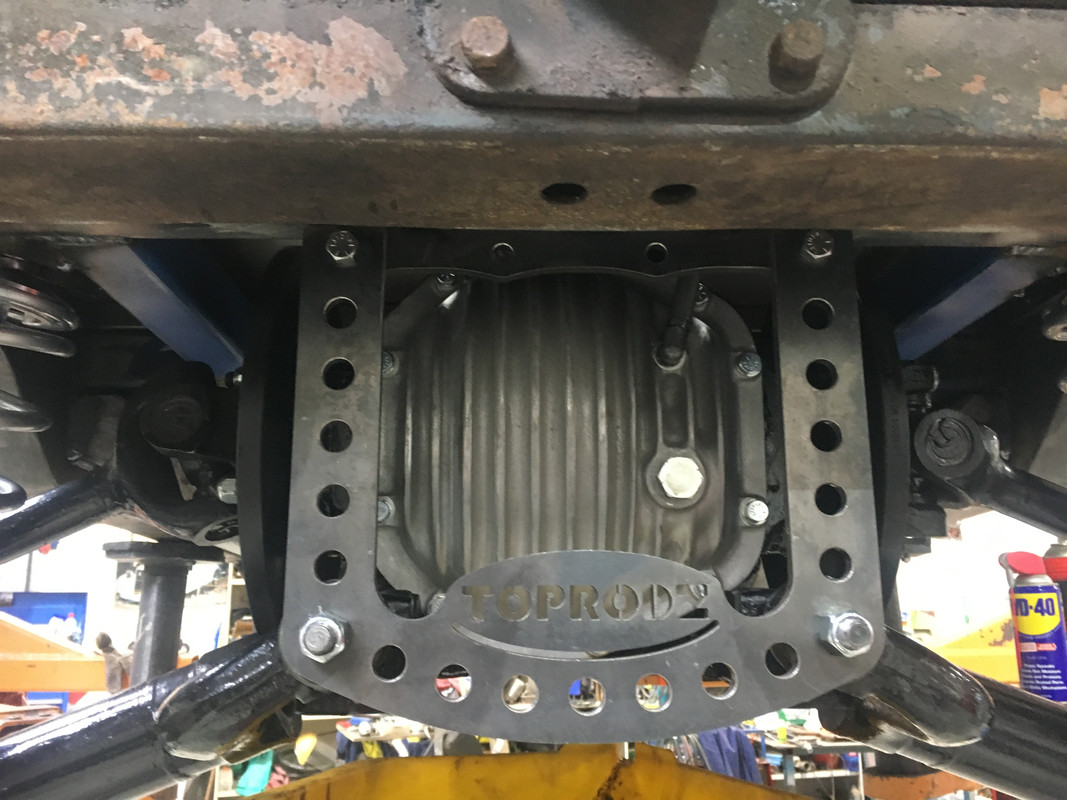
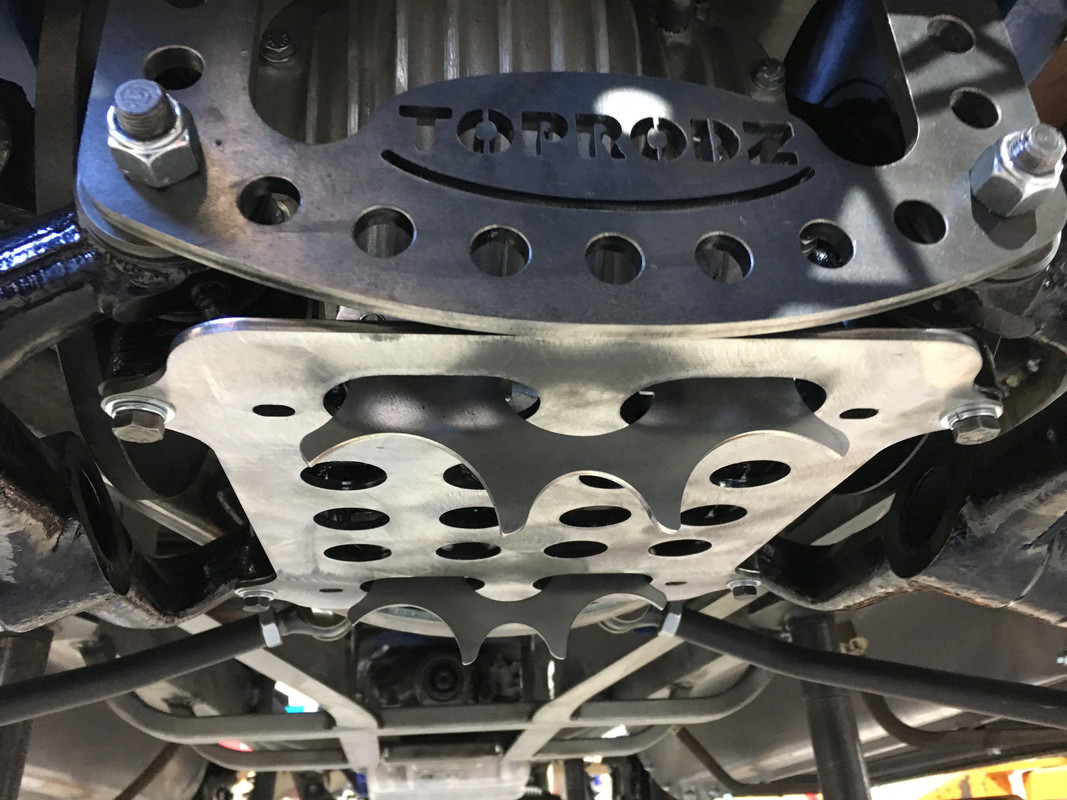
I had the challenge of mounting the exhaust under the jag diff, so I designed a mount plate in 3D to confirm it would work
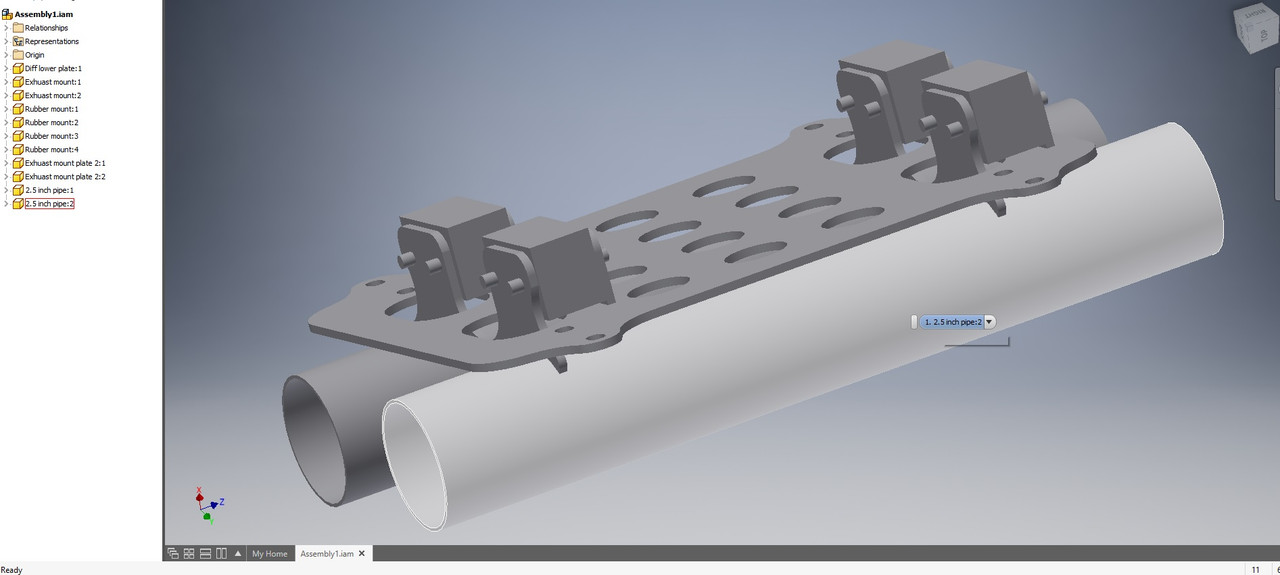
Then it was time to get it cut and weld it together.
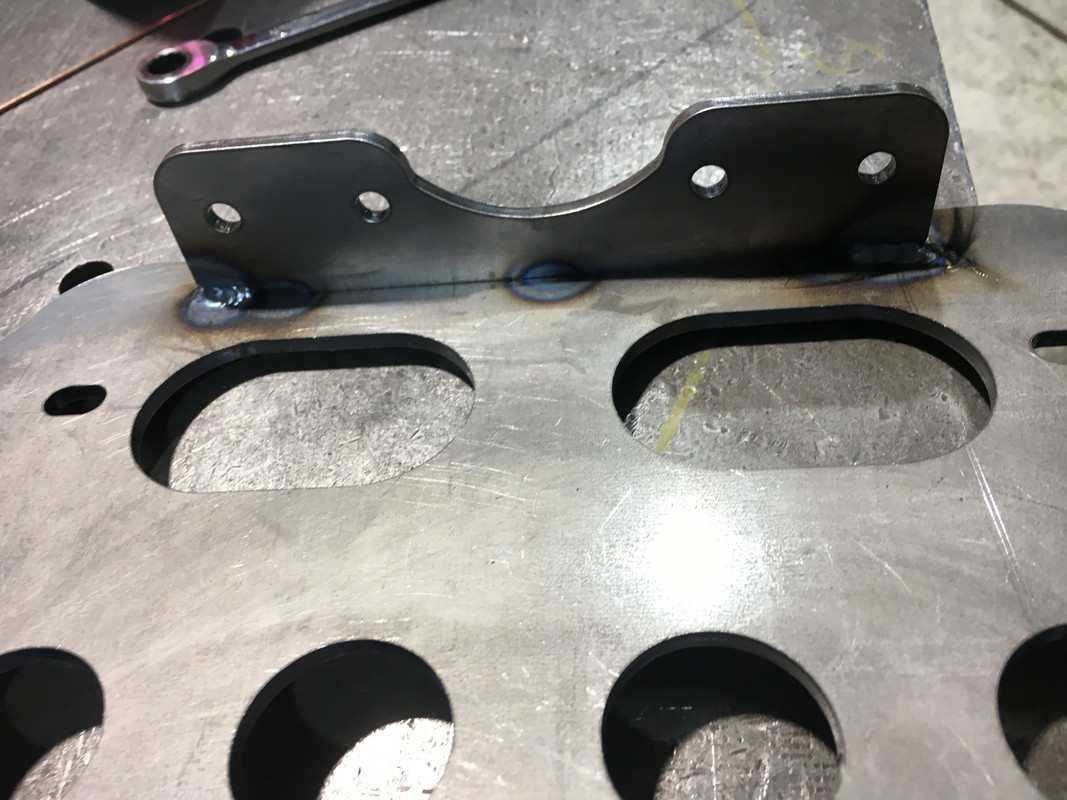
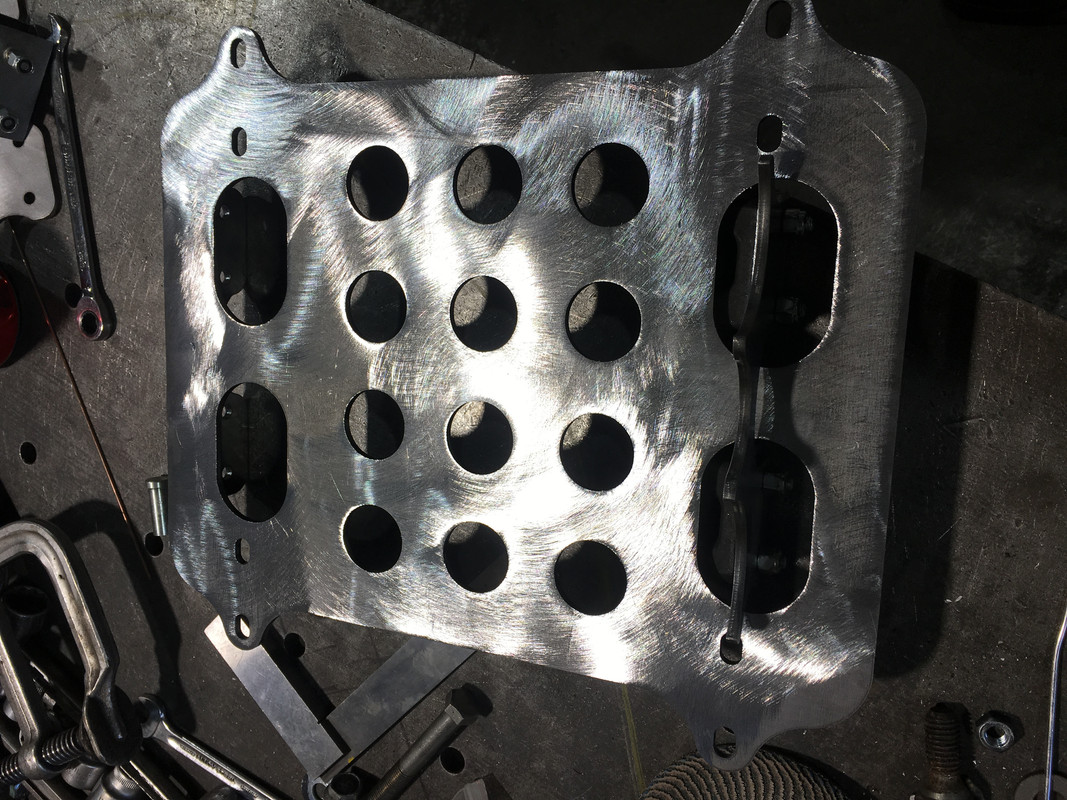

This is was the diff before the plate was added to the diff
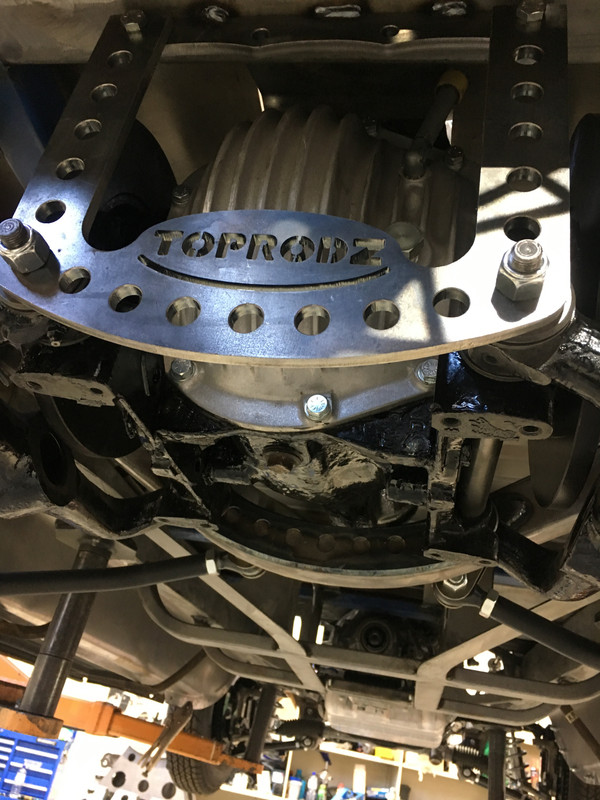
And after, you can see the pieces that the twin 2 ½” pipes will weld to.
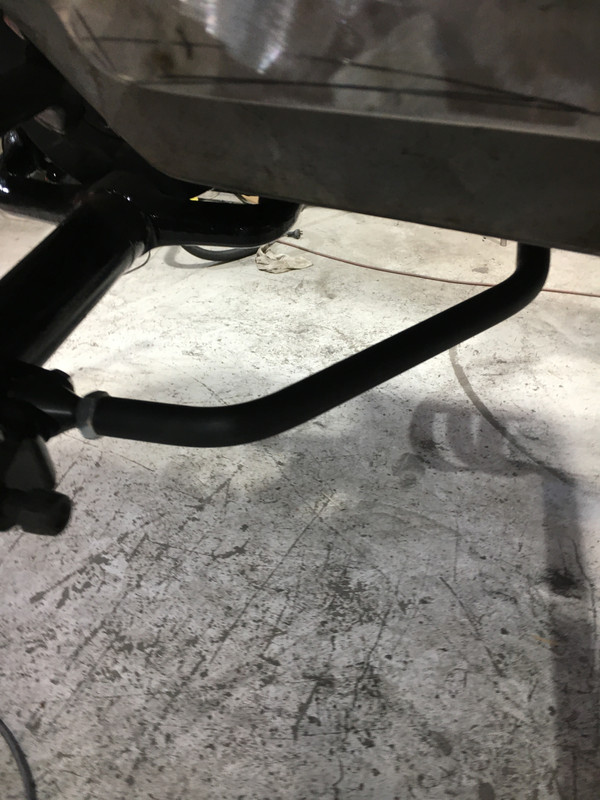
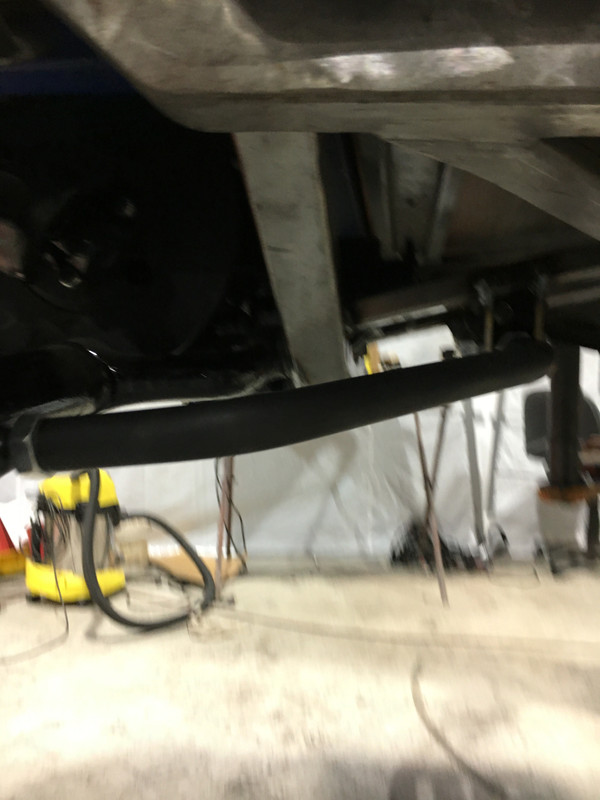
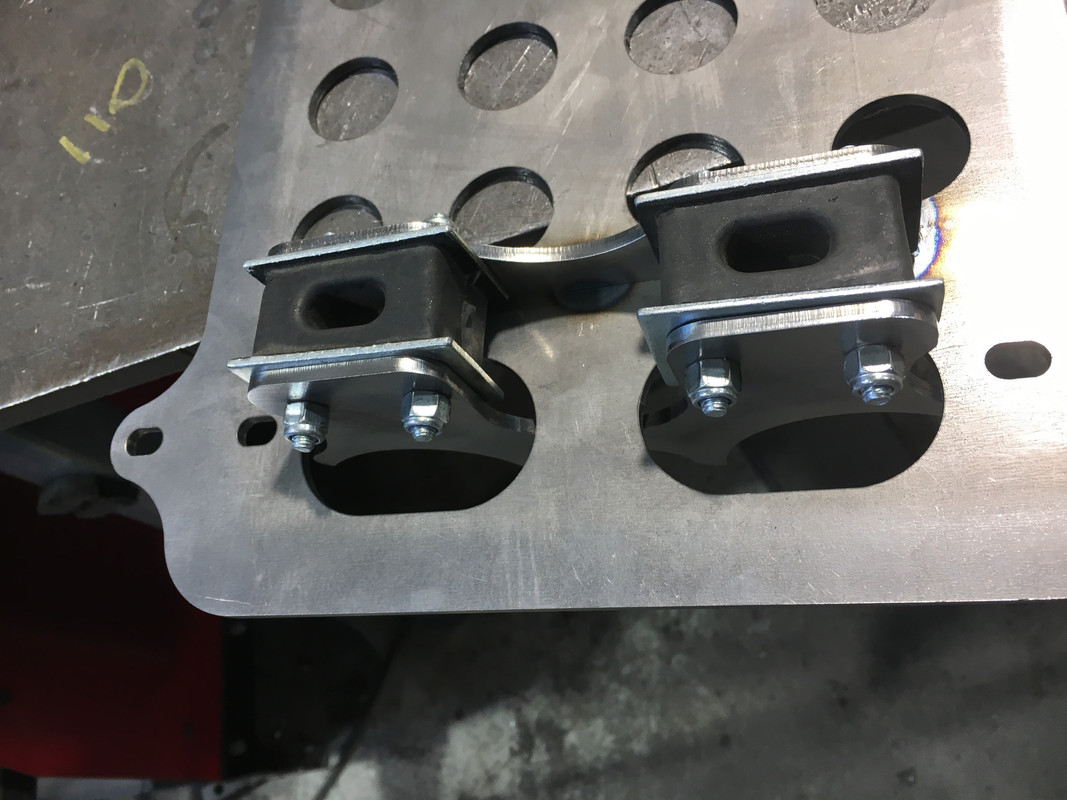
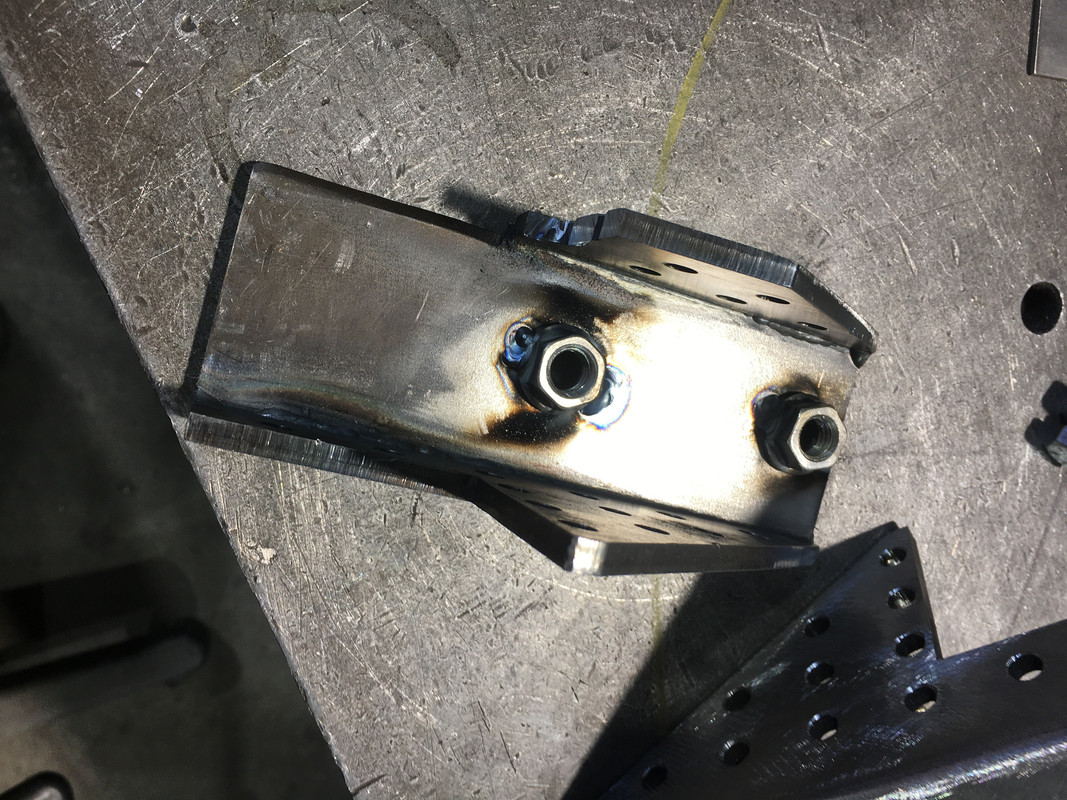
Next was make the rear sway bar mounts and weld them in place
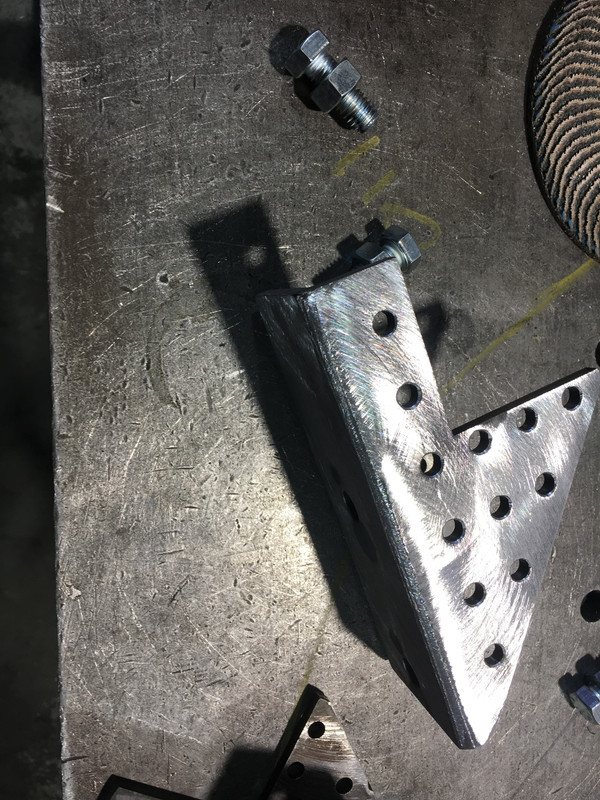


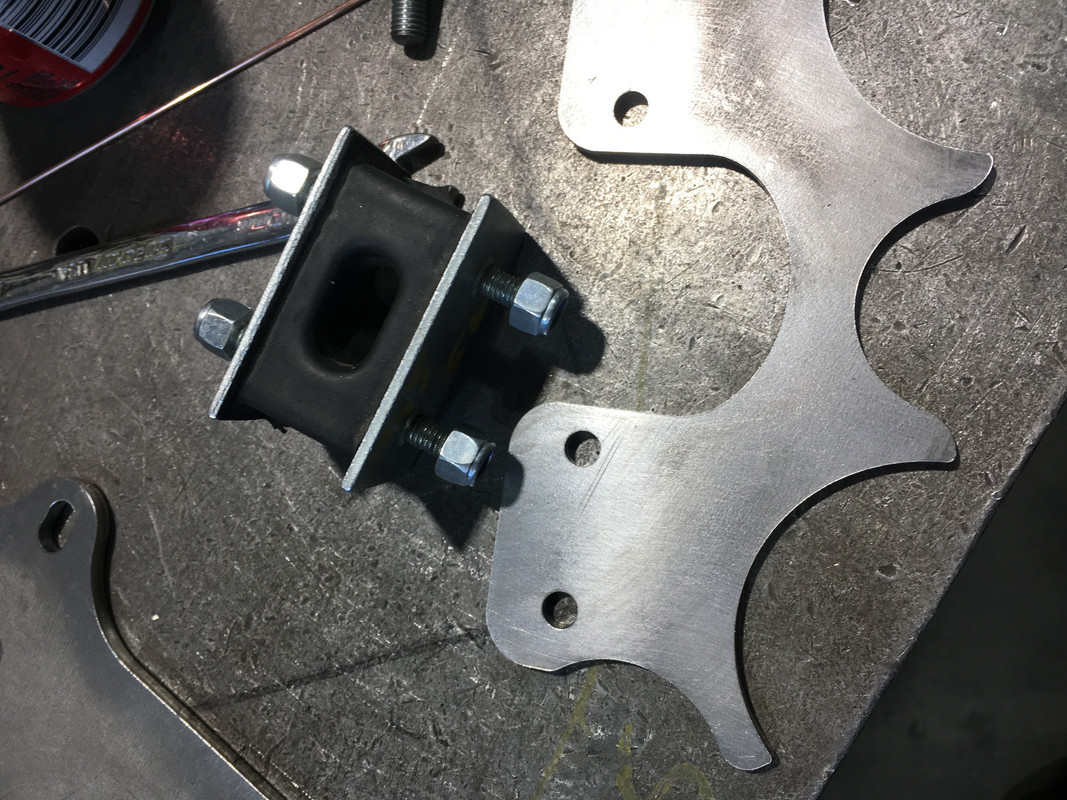
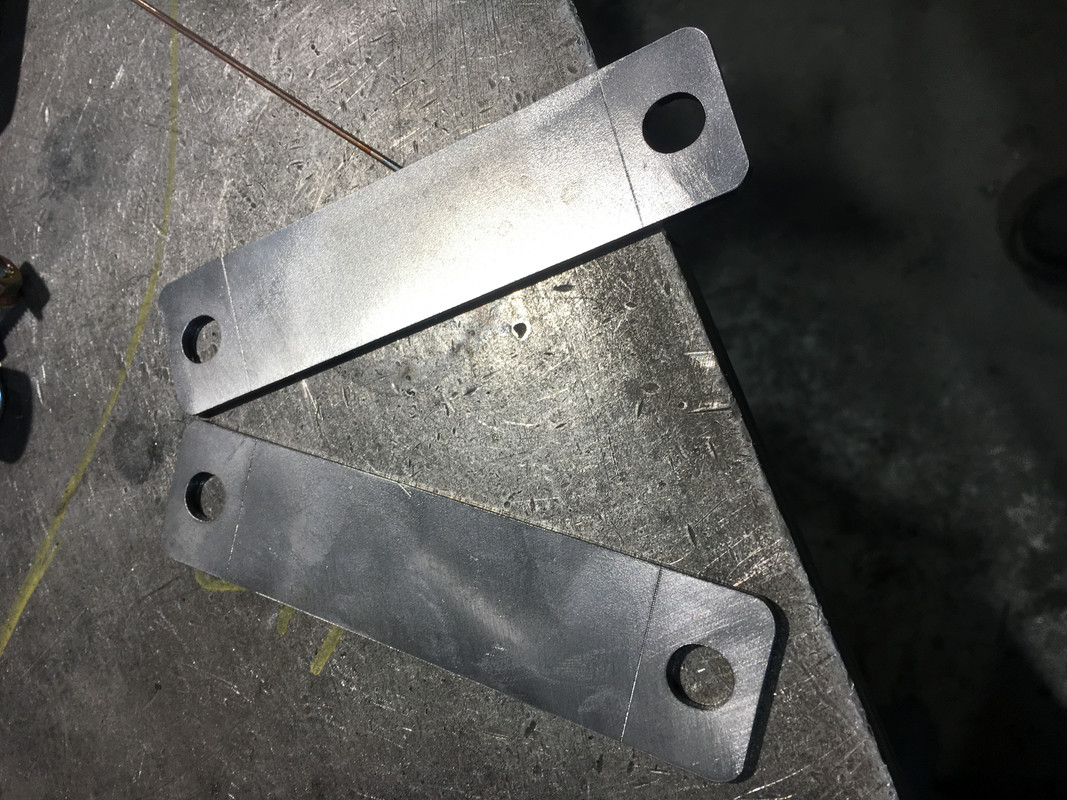
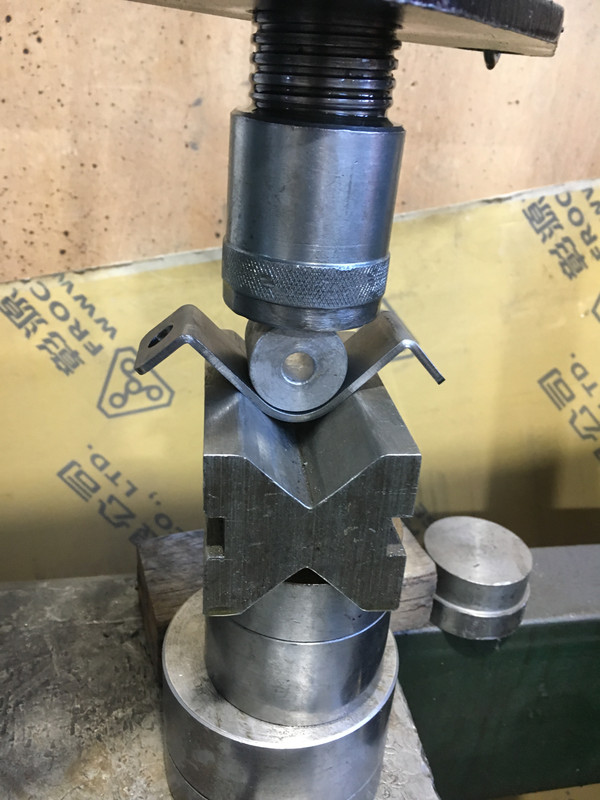
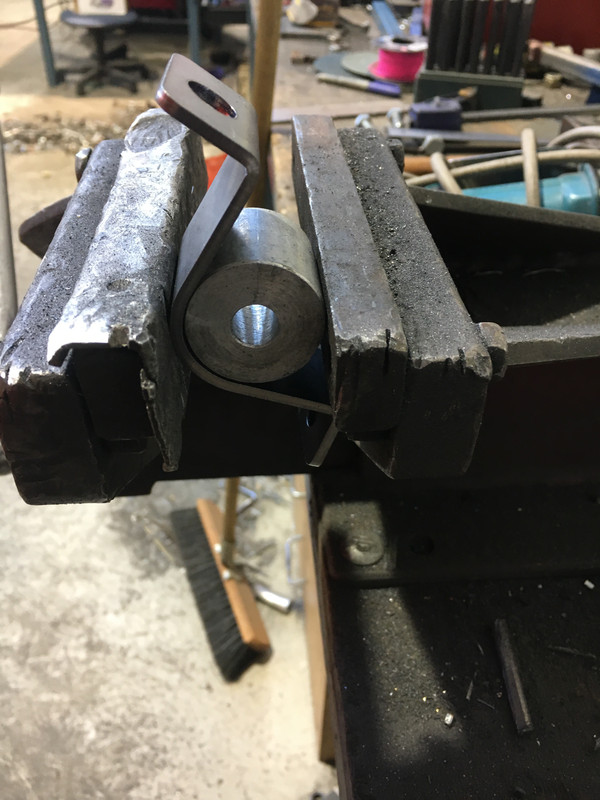
I decided to make my own saddle type mounts, as the ones that came in the sway bar mount kit were a bit ugly
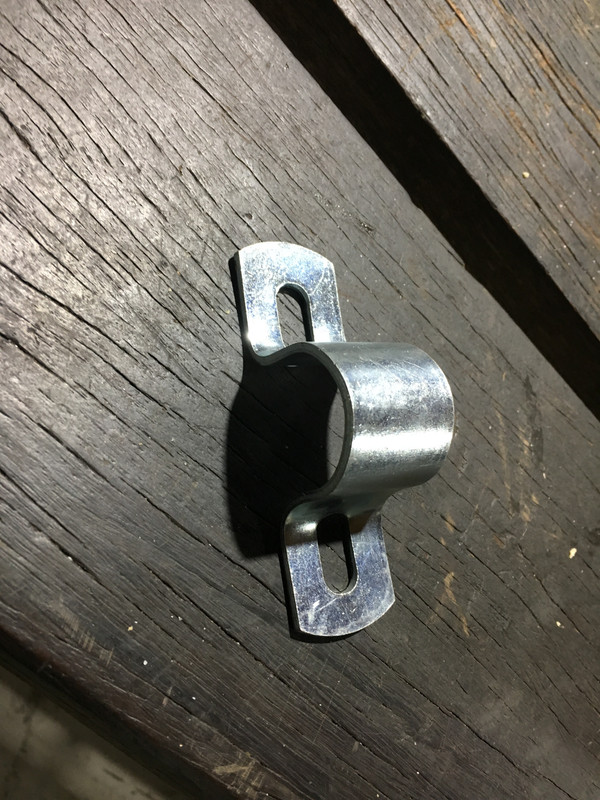
I started by having the pieces laser cut and then folded the ends, pressed them in an old V block with a round piece of aluminum the same size as the bush, along with a little extra bending in the vice,


The mounts were welded in place, a piece of 16mm bar was test fitted in place, until I have time to bend the spring steel bar and shape the ends
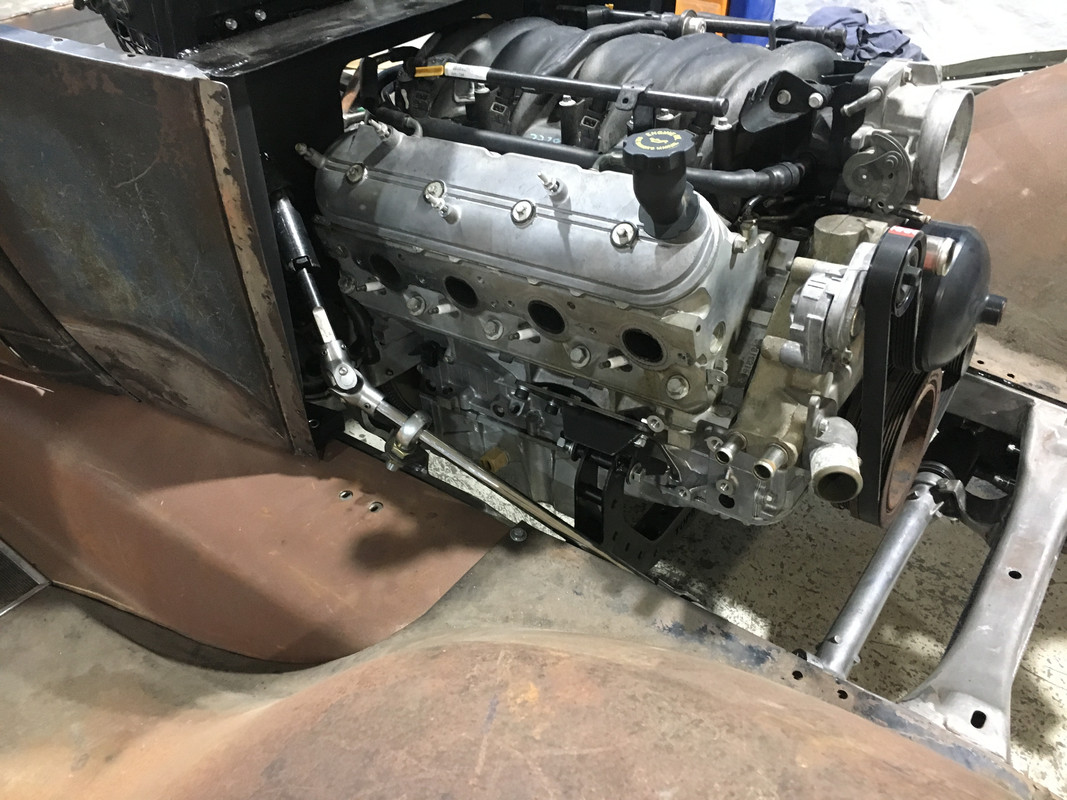
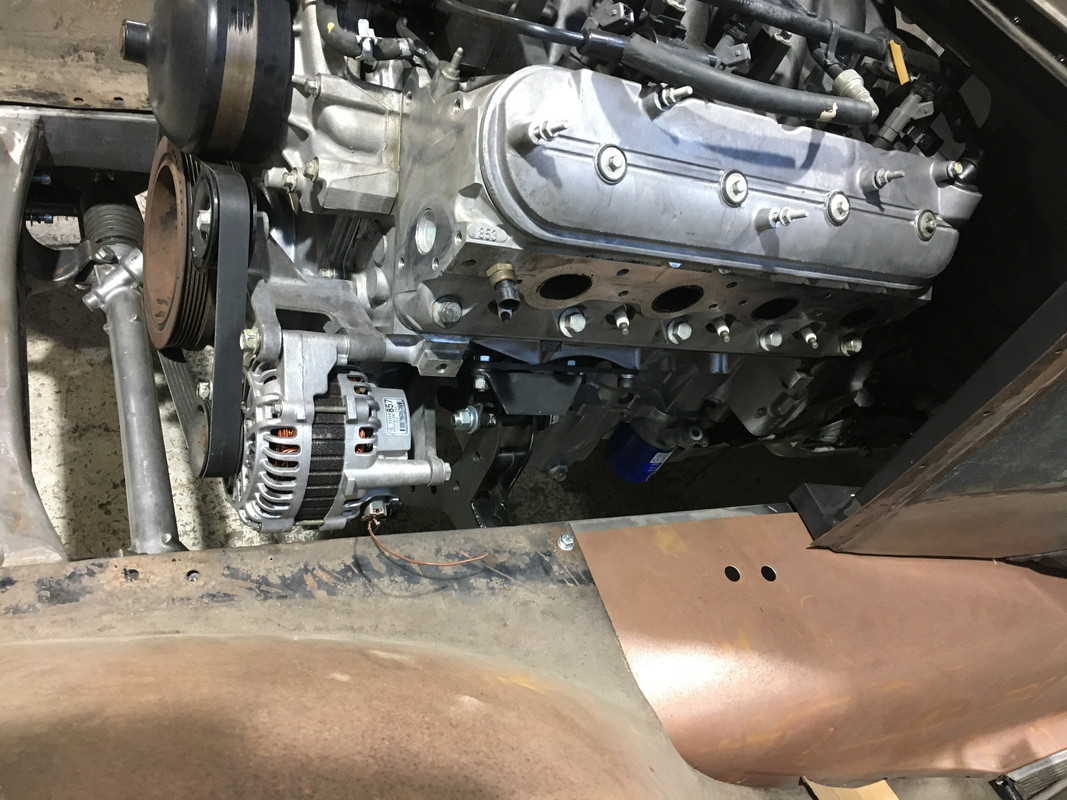
I had the motor and box out while I finished a bit of welding on the front end and firewall, so I fitted a new rear main seal, along with the windage tray pickup and sump, also front and rear seals, filter and new pan gasket to the trans, everything got a good clean and the motor was refitted into the chassis,
Well that’s about all for now, I have a heap to do over the next week and a half, I will keep you posted
I had the challenge of mounting the exhaust under the jag diff, so I designed a mount plate in 3D to confirm it would work
Then it was time to get it cut and weld it together.
This is was the diff before the plate was added to the diff
And after, you can see the pieces that the twin 2 ½” pipes will weld to.
Next was make the rear sway bar mounts and weld them in place
I decided to make my own saddle type mounts, as the ones that came in the sway bar mount kit were a bit ugly
I started by having the pieces laser cut and then folded the ends, pressed them in an old V block with a round piece of aluminum the same size as the bush, along with a little extra bending in the vice,
The mounts were welded in place, a piece of 16mm bar was test fitted in place, until I have time to bend the spring steel bar and shape the ends
I had the motor and box out while I finished a bit of welding on the front end and firewall, so I fitted a new rear main seal, along with the windage tray pickup and sump, also front and rear seals, filter and new pan gasket to the trans, everything got a good clean and the motor was refitted into the chassis,
Well that’s about all for now, I have a heap to do over the next week and a half, I will keep you posted
Regards
Peter Gough
FOUNDING MEMBER #24 OZ-E-RODDERS ROD & KUSTOM CLUB
Peter Gough
FOUNDING MEMBER #24 OZ-E-RODDERS ROD & KUSTOM CLUB