Yes mate I used a XG/XH Ute tank...Van will be the same,,...utes are easy to find,..
.but they come in Carby n EFI i think cause I chased one down for mate n its carby n has no in tank EFI Pump n the size of the sender hole is smaller for Non EFI..
But the XG/XH Utes come in either 60 or 80L the 3 ive seen so far are 80L...n they fit nice between the rails.
Newbee's 52 Mainline Ute
-
Angry
- Member
- Posts: 571
- Joined: Wed Nov 27, 2013 10:55 pm
- Location: Wagga Wagga Riverina NSW
Re: Newbee's 52 Mainline Ute
Al.
64 Ford F100 SWB Patina Pickup
69 Camaro Z28 Clone....
64 Ford F100 SWB Patina Pickup
69 Camaro Z28 Clone....
-
53vicky

- Posts: 303
- Joined: Fri Dec 25, 2009 9:30 pm
- Location: Somerville, Vic
Re: Newbee's 52 Mainline Ute
Looking good.
When I had the mounts in the Vicky the bottom of the mount was horizontal or very close to.
Knowing me, I probably marked the mounts incorrectly so give a try changing from left to right
Here’s a pic of when it was installed?.
Great work !!
Hope this helps....
When I had the mounts in the Vicky the bottom of the mount was horizontal or very close to.
Knowing me, I probably marked the mounts incorrectly so give a try changing from left to right
Here’s a pic of when it was installed?.
Great work !!
Hope this helps....
You do not have the required permissions to view the files attached to this post.
-
Newbee

- Member
- Posts: 578
- Joined: Mon May 26, 2014 10:59 pm
- Location: YP of SA
Re: Newbee's 52 Mainline Ute
Few more jobs underway or ticked off last week.
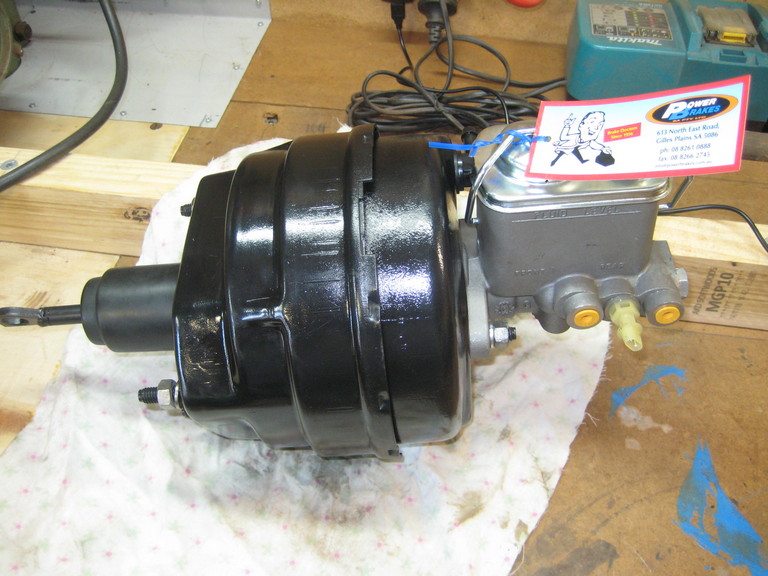
This is how my $50 XB Booster turned out, with the new Master Cylinder all adjusted and tested.
Its now worth $525
Made up this 1.2 mm reinforcing piece for the trans tunnel where the inner seat mounts will go.
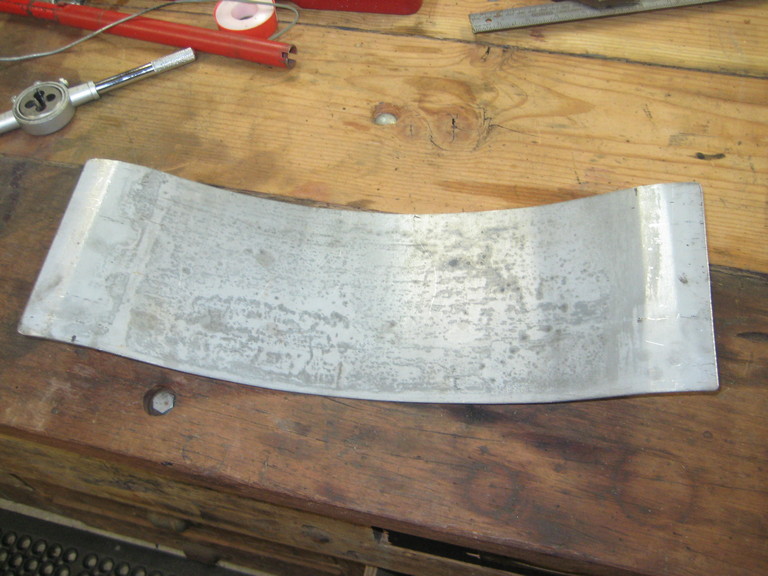
This area is only one layer of floor skin, the Centre Console/Arm Rest will also mount up here.
The inner front mount will be over one of the braces running under the floor so it won't need extra.
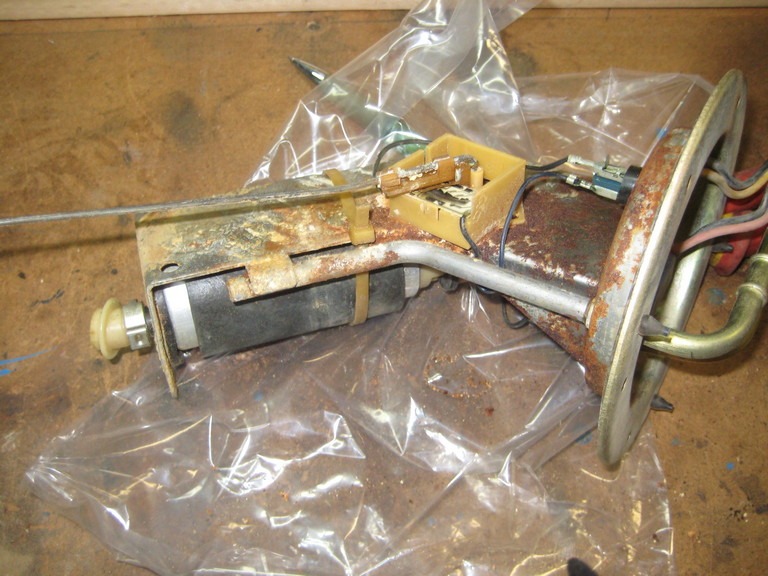
The fuel pump and sender out of the XH Ute was a little worse for wear, but overnight in the citric acid bath
it was ready to paint with the KBS Tank Paint. The pump was stuffed, so a new one was aquired and I tested the fuel gauge
sender, had nil resistance one way and a lot more the other way so I'm hoping it will drive the old fuel gauge.
(forgot what the resistance figures were).
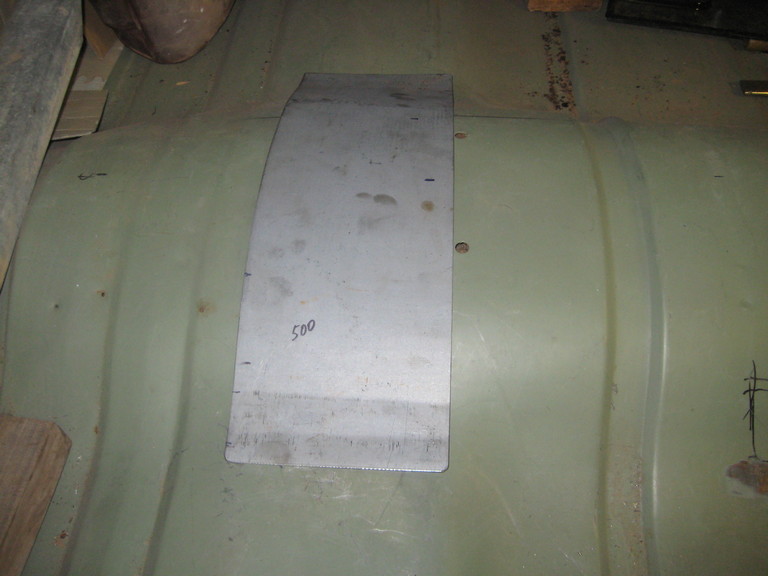
This is the tank inside after coating with the KBS.
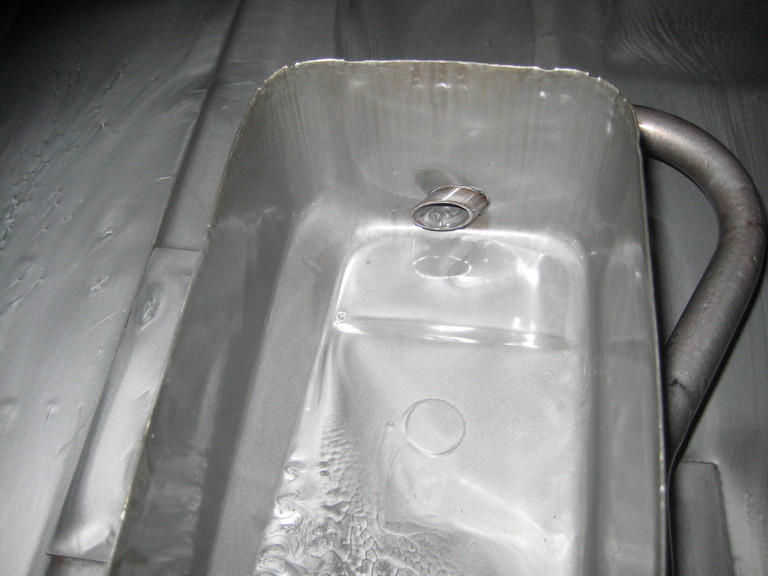
There was plenty of the paint left over, even after draining I still had to scoop plenty out,
enough to seal the outside, I only did the top section which won't be seen, (luckily as there are a few runs)
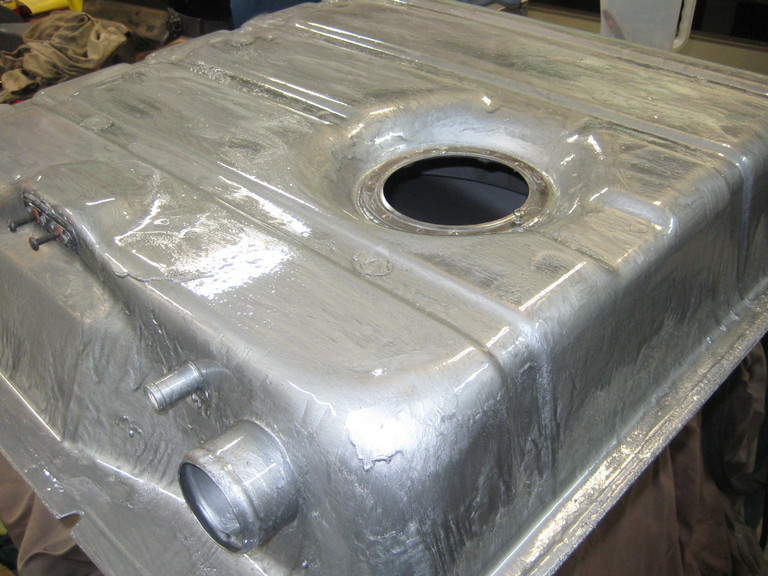
So the stink of rotten petrol is now out of my shed, now its replaced with paint fumes.
Regards Newbee
This is how my $50 XB Booster turned out, with the new Master Cylinder all adjusted and tested.
Its now worth $525
Made up this 1.2 mm reinforcing piece for the trans tunnel where the inner seat mounts will go.
This area is only one layer of floor skin, the Centre Console/Arm Rest will also mount up here.
The inner front mount will be over one of the braces running under the floor so it won't need extra.
The fuel pump and sender out of the XH Ute was a little worse for wear, but overnight in the citric acid bath
it was ready to paint with the KBS Tank Paint. The pump was stuffed, so a new one was aquired and I tested the fuel gauge
sender, had nil resistance one way and a lot more the other way so I'm hoping it will drive the old fuel gauge.
(forgot what the resistance figures were).
This is the tank inside after coating with the KBS.
There was plenty of the paint left over, even after draining I still had to scoop plenty out,
enough to seal the outside, I only did the top section which won't be seen, (luckily as there are a few runs)
So the stink of rotten petrol is now out of my shed, now its replaced with paint fumes.
Regards Newbee
-
Chrisso
- Old Hand
- Posts: 4178
- Joined: Thu Apr 12, 2012 10:44 am
- Location: Albury NSW
Re: Newbee's 52 Mainline Ute
Great stuff Newbee going gangbusters ol mate. 
-
Angry
- Member
- Posts: 571
- Joined: Wed Nov 27, 2013 10:55 pm
- Location: Wagga Wagga Riverina NSW
Re: Newbee's 52 Mainline Ute
Nice work mate,...more progress
ill chase that Fox sump in the morning
ill chase that Fox sump in the morning
Al.
64 Ford F100 SWB Patina Pickup
69 Camaro Z28 Clone....
64 Ford F100 SWB Patina Pickup
69 Camaro Z28 Clone....
-
Newbee
- Member
- Posts: 578
- Joined: Mon May 26, 2014 10:59 pm
- Location: YP of SA
Re: Newbee's 52 Mainline Ute
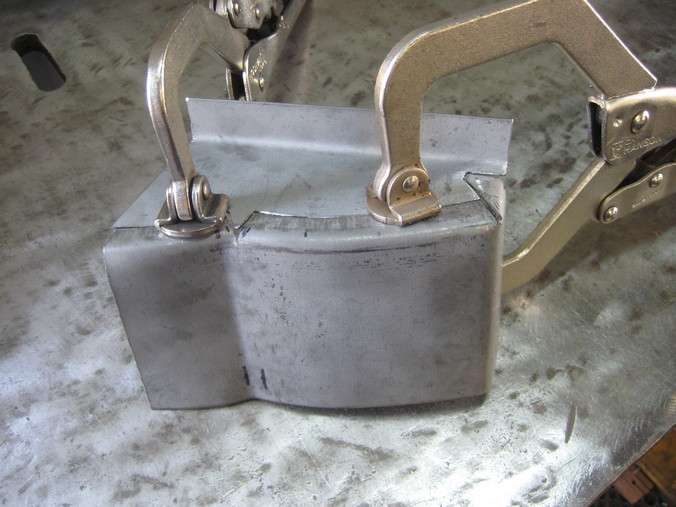
Had a go at some rust repair parts, while waiting for a couple of other things to come into line.
This is the the bottom of the A pillar RHS, the LHS is not as good. There is a number of parts that fit together
to make up this area, sill panel, inner sill panel, floor, inside kick panel and a floor brace.
I have sill panels from EMS for the '50 but they are surprisingly different, anyway I think I can use them
because they are for a 2 door car so are longer and can be reworked I hope.
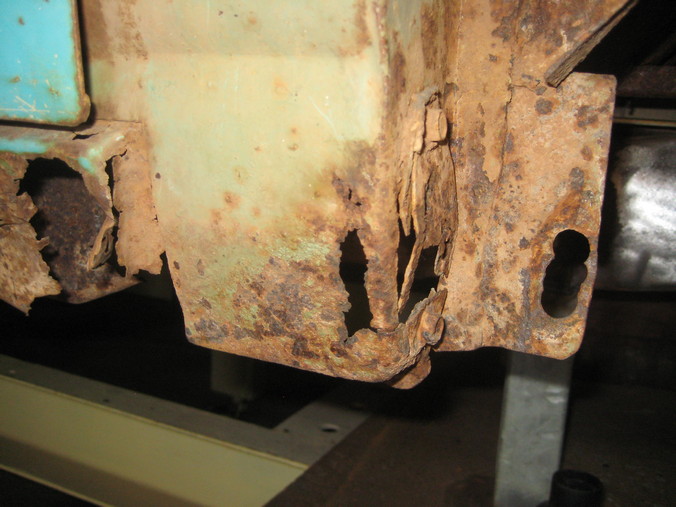
I have some Zinc anneal 1.2 mm for these areas so started with the lower bend, this is where the lower guard mounts
using captive nuts.
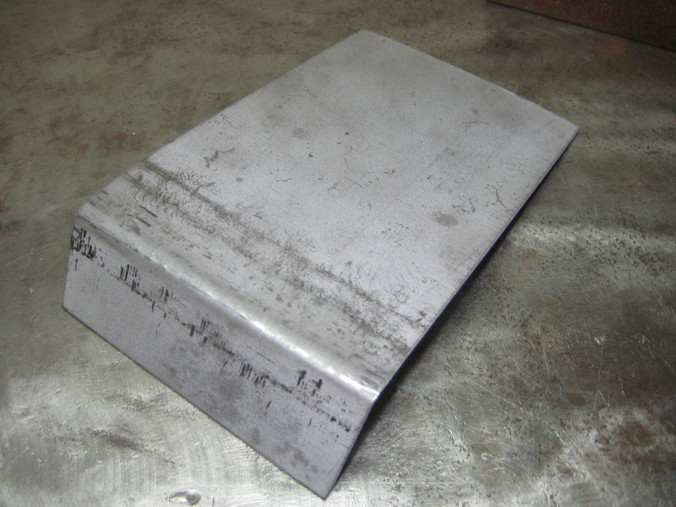
I knew I wouldn't be able to make it in one piece, so I folded the edge so I could weld onto it and put a cut at the
required places.
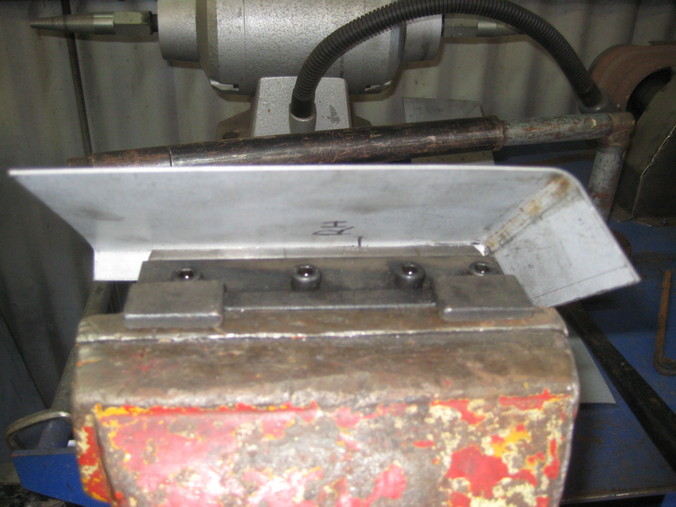
This gave me a good chance to give my shrinker/stretcher its first run, it worked a treat on the 1.2 mm.
I used a profile gauge for the curves, it took a few adjustments to get it close.

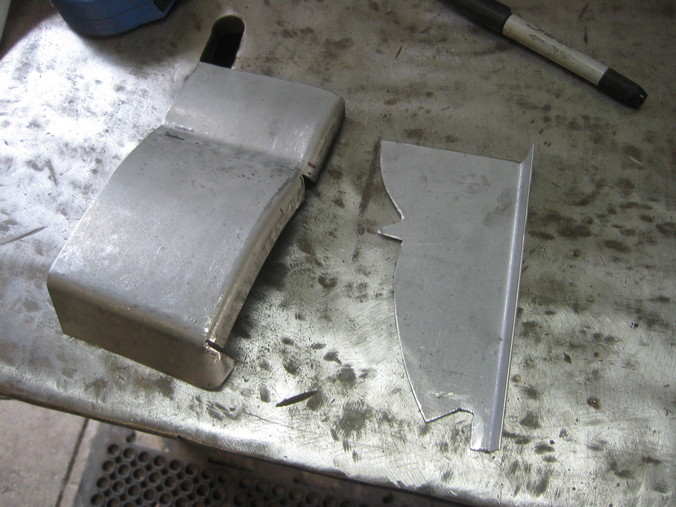
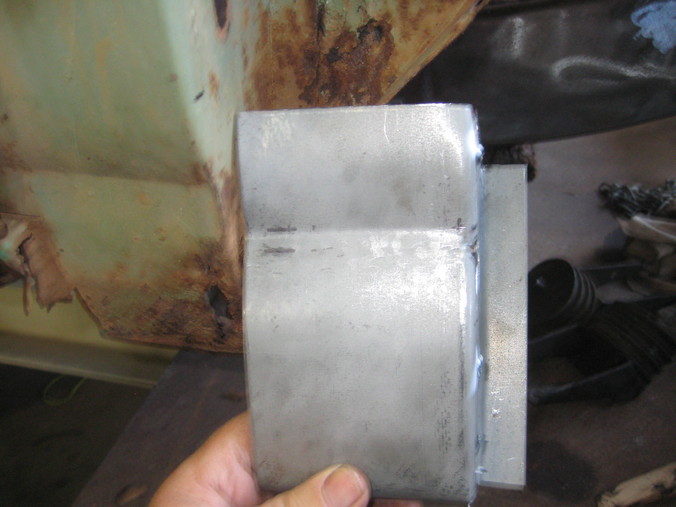
I cut and bent the return onto another piece, then scribed it to fit the curved outer section.
Ready for tacking together.
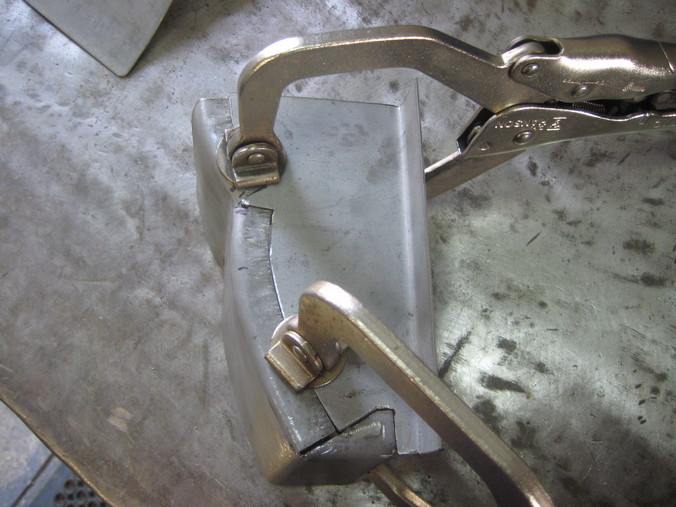
I have only tacked it together for now just in case it needs a little modification when I cut the original out.
Looks close.
Where it will live later on, now see if I can mirror that for the LHS.
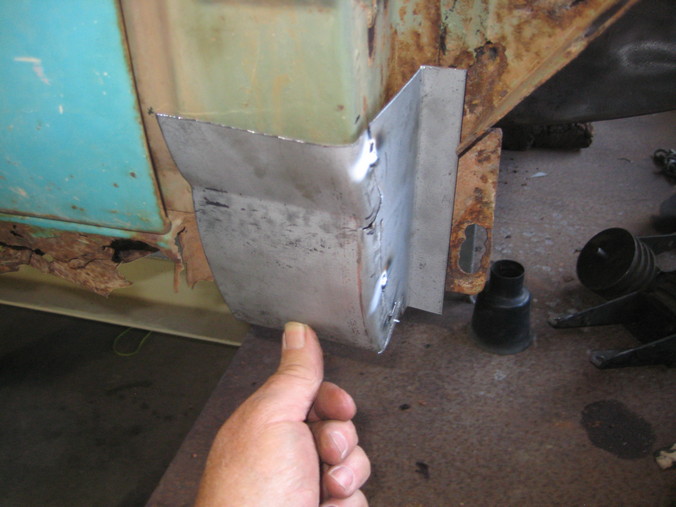
Regards Newbee
This is the the bottom of the A pillar RHS, the LHS is not as good. There is a number of parts that fit together
to make up this area, sill panel, inner sill panel, floor, inside kick panel and a floor brace.
I have sill panels from EMS for the '50 but they are surprisingly different, anyway I think I can use them
because they are for a 2 door car so are longer and can be reworked I hope.
I have some Zinc anneal 1.2 mm for these areas so started with the lower bend, this is where the lower guard mounts
using captive nuts.
I knew I wouldn't be able to make it in one piece, so I folded the edge so I could weld onto it and put a cut at the
required places.
This gave me a good chance to give my shrinker/stretcher its first run, it worked a treat on the 1.2 mm.
I used a profile gauge for the curves, it took a few adjustments to get it close.
I cut and bent the return onto another piece, then scribed it to fit the curved outer section.
Ready for tacking together.
I have only tacked it together for now just in case it needs a little modification when I cut the original out.
Looks close.
Where it will live later on, now see if I can mirror that for the LHS.
Regards Newbee
-
Chrisso
- Old Hand
- Posts: 4178
- Joined: Thu Apr 12, 2012 10:44 am
- Location: Albury NSW
Re: Newbee's 52 Mainline Ute
Sweet....who's a clever boy then......
-
Sly Fox
- Senior Member
- Posts: 1923
- Joined: Sat Apr 24, 2010 7:10 pm
- Location: Castle Hill, NSW
Re: Newbee's 52 Mainline Ute
Nice work Newbee, good to have the toys to help make the parts
51 Dodge Custom & 63 EH Ute - Dare to be different
-
toprodz

- Old Hand
- Posts: 2604
- Joined: Sun Mar 23, 2003 10:44 am
- Location: Wallan Victoria 0412 81 1932
Re: Newbee's 52 Mainline Ute
That looks like a great start to the rust repairs, keep up the great work
Regards
Peter Gough
FOUNDING MEMBER #24 OZ-E-RODDERS ROD & KUSTOM CLUB
Peter Gough
FOUNDING MEMBER #24 OZ-E-RODDERS ROD & KUSTOM CLUB
-
Gojeep
- Old Hand
- Posts: 7221
- Joined: Mon Jan 07, 2008 1:24 pm
- Location: Eastern Suburbs of Melbourne
- Contact:
Re: Newbee's 52 Mainline Ute
Nicely done.
Marcus
To try where there is little hope, is to risk failure.
Not to try at all, is to guarantee it!
____| \______\
|/¯\ |¯ |----O||||O
()_)-o-)¯¯()_)-o-)_)
To try where there is little hope, is to risk failure.
Not to try at all, is to guarantee it!
____| \______\
|/¯\ |¯ |----O||||O
()_)-o-)¯¯()_)-o-)_)
-
Angry
- Member
- Posts: 571
- Joined: Wed Nov 27, 2013 10:55 pm
- Location: Wagga Wagga Riverina NSW
Re: Newbee's 52 Mainline Ute
Nice patch mate,...love ya work
Al.
64 Ford F100 SWB Patina Pickup
69 Camaro Z28 Clone....
64 Ford F100 SWB Patina Pickup
69 Camaro Z28 Clone....
-
jailbar joe
- Old Hand
- Posts: 3440
- Joined: Sat Oct 24, 2009 8:33 pm
- Location: york west aus
Re: Newbee's 52 Mainline Ute
your on the way now...you made it look easy ....
a lot of satisfaction making your own patches,'specially when they work
a lot of satisfaction making your own patches,'specially when they work
cheers joe
if you do nothing then nothing happens
if you do nothing then nothing happens
-
SimonG
- Posts: 499
- Joined: Wed Jan 20, 2016 3:56 pm
- Location: Cairns, Nth Queensland
Re: Newbee's 52 Mainline Ute
Who needs patch panels when you can achieve such a great result
-
Newbee
- Member
- Posts: 578
- Joined: Mon May 26, 2014 10:59 pm
- Location: YP of SA
Re: Newbee's 52 Mainline Ute
Thanks for the comments guys, I got the LHS one done tonight, hopefully they will work.
I've had the shrinker for a few years, I got the '50 sills out storage but looking at them I don't think they will work.
Regards Newbee
I've had the shrinker for a few years, I got the '50 sills out storage but looking at them I don't think they will work.
Regards Newbee
-
King Willy
- Senior Member
- Posts: 1042
- Joined: Fri Jan 25, 2008 2:11 pm
- Location: Forest Lake QLD
Re: Newbee's 52 Mainline Ute
That's an impressive bit of fab work there Newbee, well done!