Dad-bud builds a rod

Go here for info on chassis construction, body work and suspensions
Post Reply
Maffra
Old Hand
Posts: 2759
Joined: Mon Jan 28, 2008 11:18 am
Location: Ivanhoe, Victoria

Re: Dad-bud builds a rod

Post by Maffra »

Dad-bud wrote: Cheers Maffra. (BTW, I had an uncle who lived in Maffra - I presume you do live there......?
Hi Graeme,
I was born and bred in Maffra, great place, but no, haven't lived there for a number of years now.
Regards :)
Last edited by Maffra on Wed May 08, 2019 9:17 pm, edited 1 time in total.
Maffra

. . . . Living and Learning . . . .

Member of Oz E Rodders Street Rod and Kustom Club
Havok1
Posts: 218
Joined: Fri Apr 01, 2011 9:58 pm
Location: Woodcroft SA

Re: Dad-bud builds a rod

Post by Havok1 »

Wow!!
I somehow lost track of this build back around page 3. I must say it has been a great catch up to now! Awesome progress. I certainly won't be losing track again!
User avatar
Dad-bud
Posts: 157
Joined: Mon Jul 07, 2014 2:33 pm
Location: Wangara, Perth, WA

Re: Dad-bud builds a rod

Post by Dad-bud »

Hello Everyone.
Well, I guess I've been a bit slack.
I've been building but not posting.
I've got excuses - none of them any good but why don't I wheel a couple out.
1. Lazy
2. Didn't want to post anything up until I'd actually done something with a bit of a degree of difficultness.
3. Went on a holiday ............... for 3 months ............... to the US and Canadia .............. we drove from Dallas to St John's, Newfoundland, across Canada to Vancouver, then to LA, the long way, via SEMA. >30,000km in a renter in just over 12 weeks.
4. After getting back from overseas, I had a bad case of the 'just don't wannas' - I did little things on the car but didn't make any progress worth talking about. Excuses within an excuse were that it was too hot plus there was Christmas.
(Kinda sound pathetic really, doesn't it? I won't waste any more time on excuses)
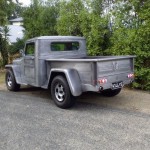
Anyway, I have progressed. The following query from Greg N Smith made me think.

One question - With the pivots low on the screens will the wind fold them back ?
I had that problem with rear view mirrors


Good point - I had been just hoping that I'd be able to tighten the nuts and bolt used as pivots enough to stop the screens being affected by the wind but realised that was unlikely to really be feasible to work and that I'd probably just strip the threads, so decided to make up some stops.

I cut a quadrant which I welded to the screen and could drill and use a screw to fix the screen's angle.
20190627_142848Reduced20Percent.jpg
This gives me 3 positions from matching the stanchions to lying flat with the ability to just drill some more holes if I want a different angle for some reason.
You do not have the required permissions to view the files attached to this post.
Last edited by Dad-bud on Sat Mar 07, 2020 1:24 am, edited 1 time in total.
Perth, WA
User avatar
Dad-bud
Posts: 157
Joined: Mon Jul 07, 2014 2:33 pm
Location: Wangara, Perth, WA

Re: Dad-bud builds a rod

Post by Dad-bud »

OK, I had a bit of a look back through my previous posts to see what I had shown and what hadn't been shown.

There were some words about the doors but not any pics.

After setting up the door leading edge, trailing edge, top and bottom, it was time to sort out how to hinge the doors. I'd already made a set of concealed hinges including a solid SHS tube to fit into the A-pillar. The hinge part that fitted to the door was about 125 long - it extended around 100 through the 50 x 25 tube that formed the leading edge of the door, so I needed to add some braces which the hinge would mount to and tie into the door edge to help support the door.

I cut the following shapes out of 2.0mm sheet that I had and formed them to do the job.
20190306_091000Compressed48KB.jpg
After welding the braces to the door frame, drill and tap the hinges.
20190308_164353Compressed48KB.jpg
As you might imagine, I broke a tap. What an absolute pain in the arse. I swore - almost as much as when I hurt my finger. Of course, you can't just drill out a broken tap like you can a bolt. I had to chip bits of it off - enough so I could slide the hinge back out through the slot in the door frame. I drilled another hole and tapped that and still have a small bit of broken tap in the hinge. Ah well.
You do not have the required permissions to view the files attached to this post.
Perth, WA
User avatar
Dad-bud
Posts: 157
Joined: Mon Jul 07, 2014 2:33 pm
Location: Wangara, Perth, WA

Re: Dad-bud builds a rod

Post by Dad-bud »

I had a door frame but figured it was pretty flimsy, plus I needed somewhere to add a door handle, so I rolled up some of the 2.0 thick top hat that I had used for my floor frame to kinda match the shape of the door(s).

They were welded in around mid-height and act as side-intrusion protection (well, probably not against anything other than a bicycle), they stiffen the door up and I mounted the handle to them - best of all, it all works.
20190320_103713Compressed48KB.jpg
20190320_103722Reduced20Percent.jpg
20190401_151819Compressed48KB.jpg
You do not have the required permissions to view the files attached to this post.
Perth, WA
User avatar
Dad-bud
Posts: 157
Joined: Mon Jul 07, 2014 2:33 pm
Location: Wangara, Perth, WA

Re: Dad-bud builds a rod

Post by Dad-bud »

So, now I had most of a body frame with working doors and boot lid frame. I had braced up the cowl and welded in all the toe-board supports,
20190321_110043Resized20Percent.jpg
so time for a dashboard, I figured.

Easiest solution would have been just a flat panel with a bunch of gauges............... it's never that easy.

A friend was working on a guy's Toyota FJ40 and he had a spare cowl which had an old set of instruments - km/h speedo plus 4 gauges in a single binnacle - best bit about it was it was free (well, kinda) and it had some old age patina - not the homemade added variety, it had been painted over sometime in the past and had the paint scratched off the hi-beam telltale. I took it to the local instrument repair shop to get it checked. He cleaned up inside, checked everything was working fine and it looks like it's going to work.

Anyway, the instrument binnacle was a reasonable size, and I'd previously decided where the steering column and wheel should sit, so it wouldn't fit above the column - let's put it in the middle.
20190417_105942Reduced20Percent.jpg
20190416_140819Reduced20Percent.jpg
You do not have the required permissions to view the files attached to this post.
Perth, WA
User avatar
rx4ord
Old Hand
Posts: 6853
Joined: Tue Jan 11, 2005 8:08 pm
Location: Tasmania! Tasmania!

Re: Dad-bud builds a rod

Post by rx4ord »

That is a great pictorial update.Thanks.
The dash looks like it will be perfect for the car.

Tassie Dave
Founding Member of OZ-E-Rodders
Twin Spinner
Senior Member
Posts: 1445
Joined: Mon Jan 02, 2012 7:45 pm
Location: Brisbane.

Re: Dad-bud builds a rod

Post by Twin Spinner »

Great progress Bud, thanks for posting 8)
If it has tits or wheels, you can expect trouble.
User avatar
Chrisso
Old Hand
Posts: 4178
Joined: Thu Apr 12, 2012 10:44 am
Location: Albury NSW

Re: Dad-bud builds a rod

Post by Chrisso »

Ditto, keep'em coming please :wink: :wink: 8) 8) 8) 8) 8) 8) 8) 8) 8) 8)
User avatar
Dad-bud
Posts: 157
Joined: Mon Jul 07, 2014 2:33 pm
Location: Wangara, Perth, WA

Re: Dad-bud builds a rod

Post by Dad-bud »

Thanks guys for the kind words.

Next, mount the column.
20190429_104100Reduced20Percent.jpg
Zip ties will work, won't they? Nuh? OK. Let's make a column drop. ................... I had an old falcon conrod that was sitting around looking for a place to be used.

I cut down the conrod, fitted it inside a section of rectangular tube, drilled and tapped the conrod, made a pair of plates which will allow me to space them if I need the column a bit lower after I've fitted the final seats.
20190501_131506Reduced20Percent.jpg
A piece of 50 x 25 was used as a drop from the round tube used as the back edge of the cowl top. I braced that to the firewall support frame to make a very sturdy arrangement. The photo that follows shows this but is a bit confusing. It's looking directly down on the column drop and braces - the front of the car is to the right in the pic, and you can see the floor and transmission below. Hopefully it doesn't look too stupid.
20190507_164049Reduced20Percent.jpg
You do not have the required permissions to view the files attached to this post.
Perth, WA
User avatar
Dad-bud
Posts: 157
Joined: Mon Jul 07, 2014 2:33 pm
Location: Wangara, Perth, WA

Re: Dad-bud builds a rod

Post by Dad-bud »

I've always liked old fashioned steering wheels, and thought that a Bell style 4-spoke wheel would look good.

I also like the cord-wrapped look that was popular on old Bentleys and other similar vintage European racing cars, so I bought a Bell wheel from Speedway Motors during a previous visit to the US and found some cord at Bunnings. I used black cord rather than the white as it will get dirt-stained too quickly while the black will hide that.

I made a temporary stand that I could fix the wheel to which would allow me to wind the cord around the rim. The spokes proved a bit tricky to work around so I got 'creative' (secret in case it just doesn't work). I bought some waterproof glue to soak the cord in which should help hold it all together, making the cord stiffer but it should still prove to have reasonable grip qualities. Anyway, here's a couple of pics.
20190506_135937Reduced20Percent.jpg
20190506_151541Reduced20Percent.jpg
The wheel comes with a horn button of a style that hopefully won't look too bad.
You do not have the required permissions to view the files attached to this post.
Perth, WA
User avatar
Dad-bud
Posts: 157
Joined: Mon Jul 07, 2014 2:33 pm
Location: Wangara, Perth, WA

Re: Dad-bud builds a rod

Post by Dad-bud »

So, a little bit of jumping around here.

I told you about the instrument panel I have - here it is in all its glory, set into a galv sheet panel which I plan to use as a surround to 'frame' it. I'm not sure it's not a bit wanky but I do like the galvanising pattern and think it might look OK if it's painted in a tinted clear .................................... maybe a bit too arty, but worst case, I can paint the surround black or try to do some engine turning on it. Dunno. Time will tell.
20190614_151412Reduced20Percent.jpg
The surround is used to mount the instruments to and it in turn will be fitted to the dashboard. To give the dashboard some strength, I fitted 2.0 sheet which I can screw it to.

I want to be able to have a radio/stereo to listen to tunes while driving, so decided to get a modern stereo but I will hide it behind a glovebox door. I added some 2.0 sheet to fit that to and added a cigarette lighter for a power outlet plus a double USB to charge phones, etc.
20190627_142858Reduced20Percent.jpg

The stereo I bought is a double DIN size which includes a reverse camera. I doubt I'll use that much, as the screen is on the other side of the car plus it's a roadster but hey, it was included and didn't cost much from eBay. I got some decent JBL speakers and fitted them behind/beside the seats so we should be able to hear the radio or music on my phone.

In the second pic you can see where I 'blended' the top of the doors around into the top of the cowl - in an attempt to make it kinda like a 32.

Also in the second pic is the front edge of a shelf that will be used to hold loose items like keys, phone, etc. It's just a bit of 20 square tube that I shaped with lots of small hacksaw cuts plus weld plus grinding and filing to shape. It turned out OK, so I'll run with it.
You do not have the required permissions to view the files attached to this post.
Perth, WA
User avatar
Dad-bud
Posts: 157
Joined: Mon Jul 07, 2014 2:33 pm
Location: Wangara, Perth, WA

Re: Dad-bud builds a rod

Post by Dad-bud »

OK, so finally it's time to show what I'm working with now (well, this pic was taken before we went overseas last August for 3 months). I've shown you lots of detail stuff but here is what the whole looks like.
20190516_095345Reduced20Percent.jpg
20190516_095320Reduced20Percent.jpg
I'm quite pleased with the overall look - the proportions look OK to me.

When we were away, I dropped in to see a guy by the name of Wray Schellin - he owns a business/website called ProShaper and runs classes for people wanting to learn metalshaping as well as builds panels and cars from scratch. He leans more towards the Ferrari. Aston Martin, Deusenberg end of the market but metals shaping is metal shaping, so I called in.

He was surprised that someone would just 'drop in' and spent some time expressing his surprise. We discussed what he does and what I was doing.

He knows Clive from Hammerworks in Rockingham and he let me wander around his enormous factory (Probably 2-3000 m2 building). It is chock-a-block with cars and panels. I was amazed.

Anyway, I showed him the above pics and his first comment was : "That looks like a Ford".

Well, I was chuffed. I said that was exactly what I was hoping for and I took it that I hadn't created a monster.
You do not have the required permissions to view the files attached to this post.
Perth, WA
User avatar
Dad-bud
Posts: 157
Joined: Mon Jul 07, 2014 2:33 pm
Location: Wangara, Perth, WA

Re: Dad-bud builds a rod

Post by Dad-bud »

Before we went off on holiday, I made the most basic start on shaping the metal which I will use to wrap the frame of the car.

After cutting my first sheet to make the firewall, the leftover was enough to make the cowl sides.

I used the English Wheel to put a little bit of shape into the flat metal so it curved to match the sides of the firewall and door A-pillar. These aren't parallel but that doesn't matter - that's what metal shaping is all about.

I also used the Bead Roller to step the edge and then added a bead for strength and to support the bonnet.

I attached it temporarily using tek screws which will give me some holes to use for plug welds. I could use Clecos if I had some but the teks help to pull the sheet to where I want it.
20191204_134331Reduced15Percent.jpg
I'd finished up to there when we left.

You can see the relief line along the bottom edge. That was also done with the bead roller and blends the bottom edge of the panel into where the chassis is just a bit wider than the firewall. It also continues under the door and will finish at the leading edge of the rear wheel arch.

I finished the bottom edge relief after we got home and made up the matching pieces to go under the doors.

These finish off the bottom of the body and provide a very slight channelled look.

Now I'm not a fan of channelled cars but because it's not a curved 32 chassis but made up of 'stepped/segmented rectangular shapes' with fishplates which, while strong enough, aren't really pretty. So the part-channel is used to disguide the chassis a bit.

I've convinced myself it's going to work out OK, so I'm sticking with it for now.
You do not have the required permissions to view the files attached to this post.
Perth, WA
User avatar
Gojeep
Old Hand
Posts: 7215
Joined: Mon Jan 07, 2008 1:24 pm
Location: Eastern Suburbs of Melbourne
Contact:

Re: Dad-bud builds a rod

Post by Gojeep »

It was great reading what you have been up to.
Keep the updates coming.
Marcus

To try where there is little hope, is to risk failure.
Not to try at all, is to guarantee it!


____| \______\
|/¯\ |¯ |----O||||O
()_)-o-)¯¯()_)-o-)_)
Post Reply