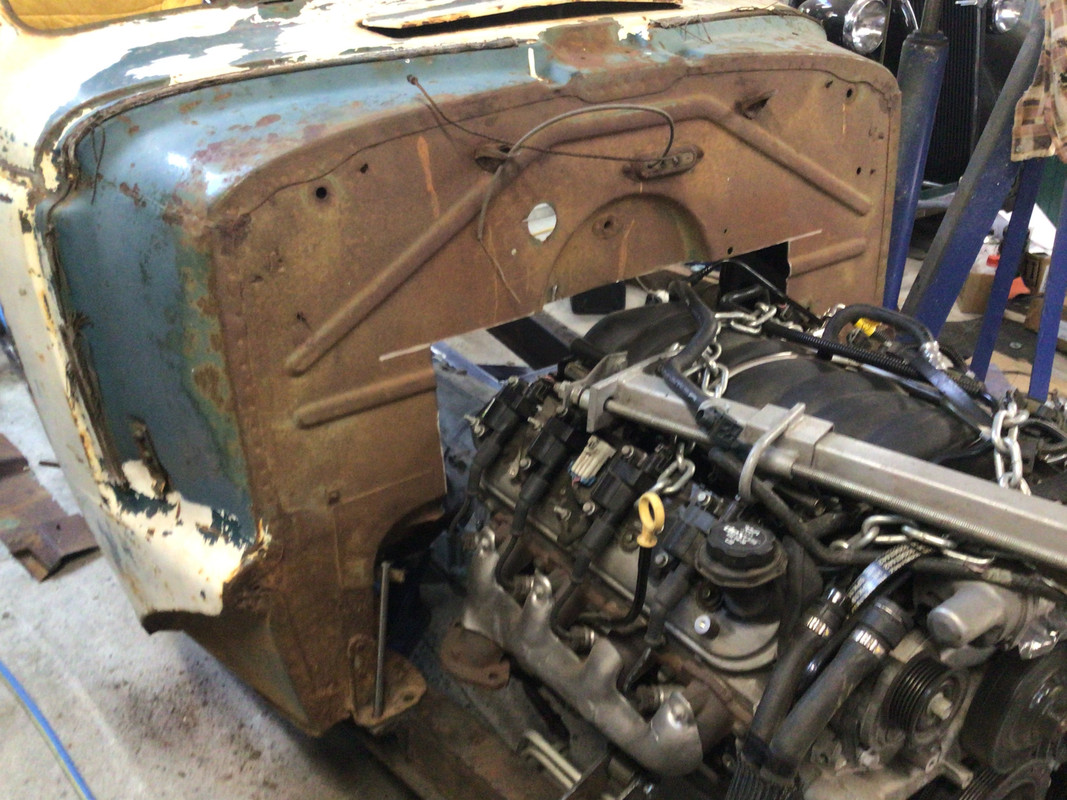
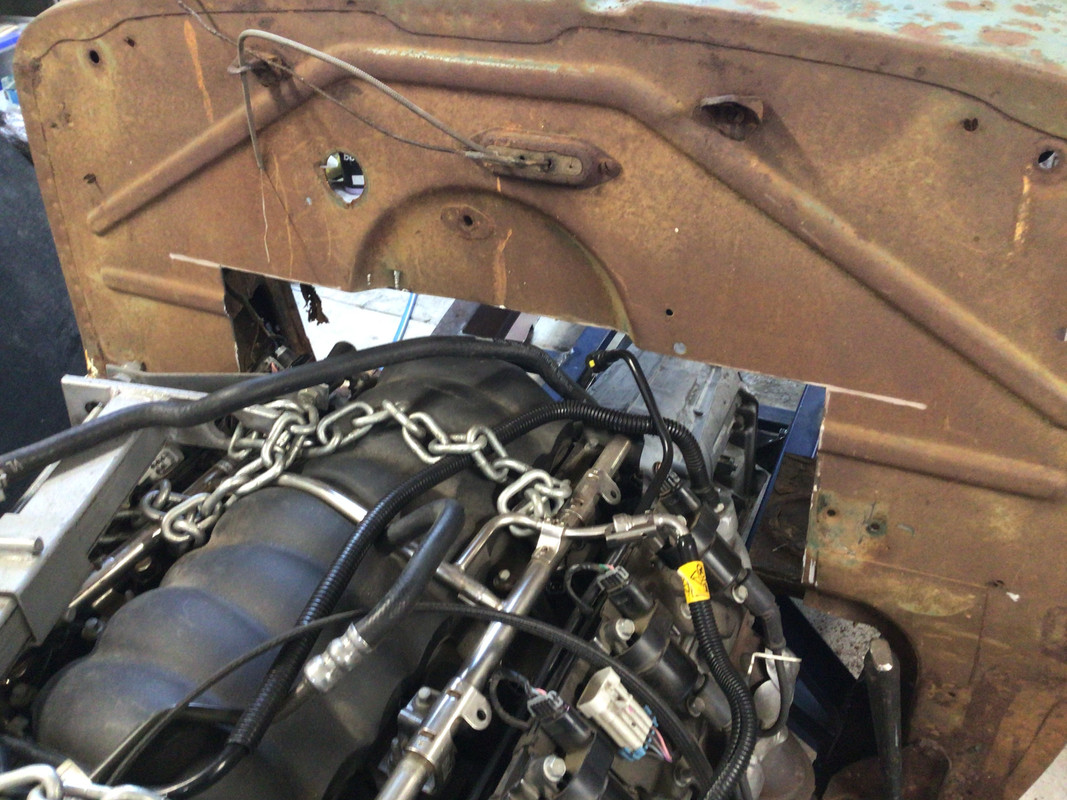
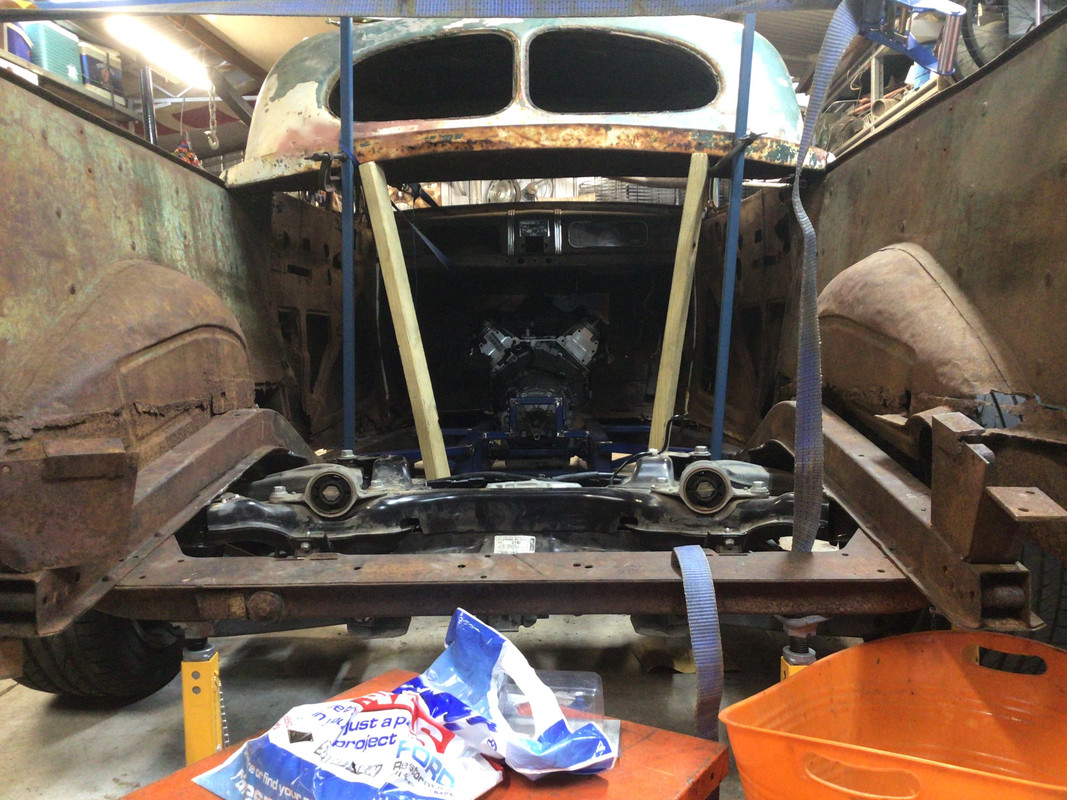
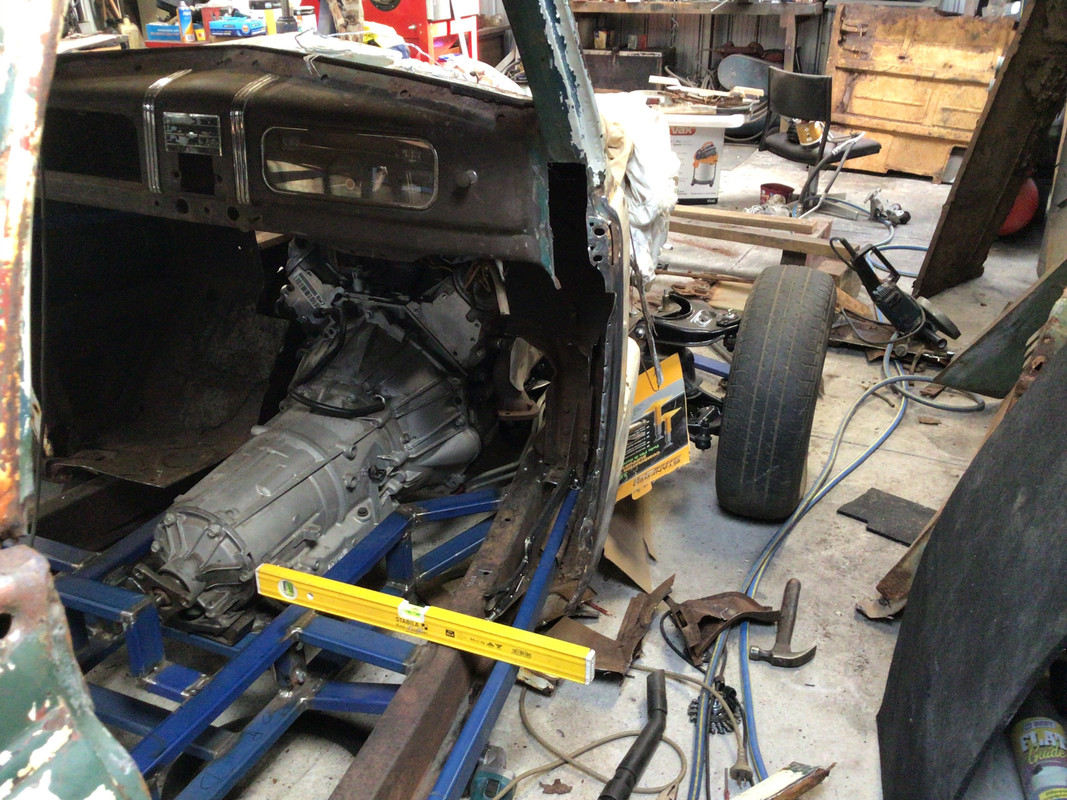
It fits although a small area of firewall was removed , and depending on how I decide to put it back together maybe a bit more to still be removed . Hope everyone has a safe and productive Easter , Pete
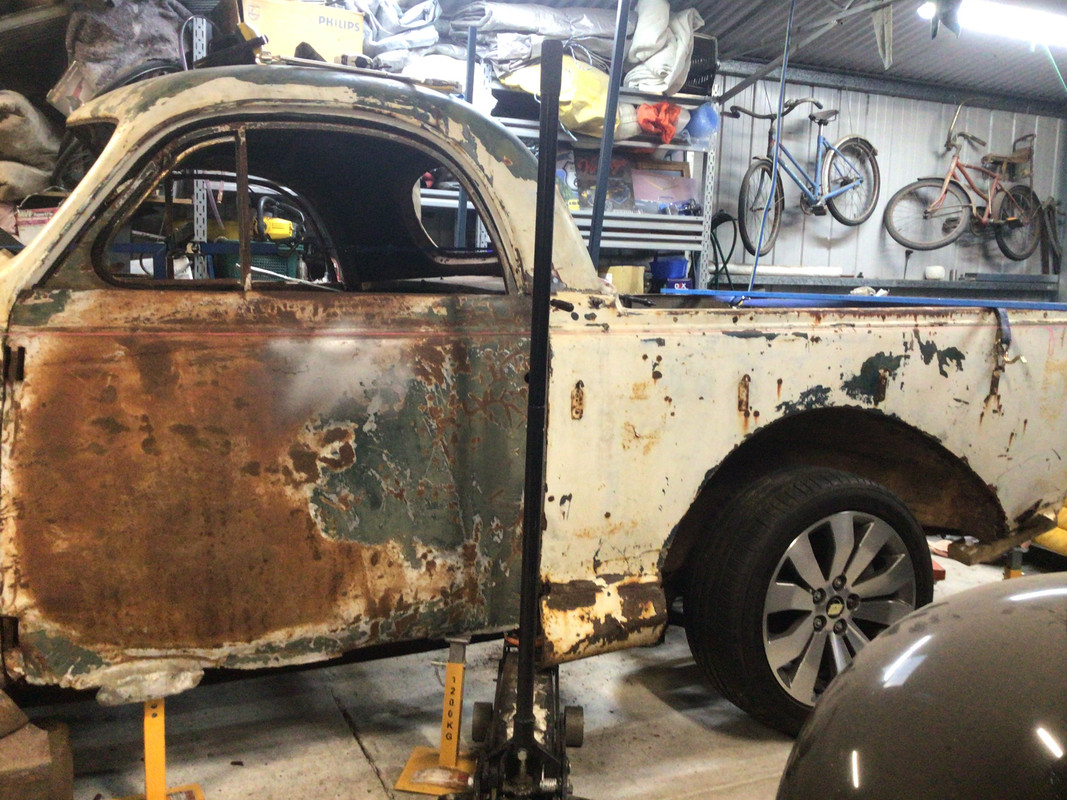
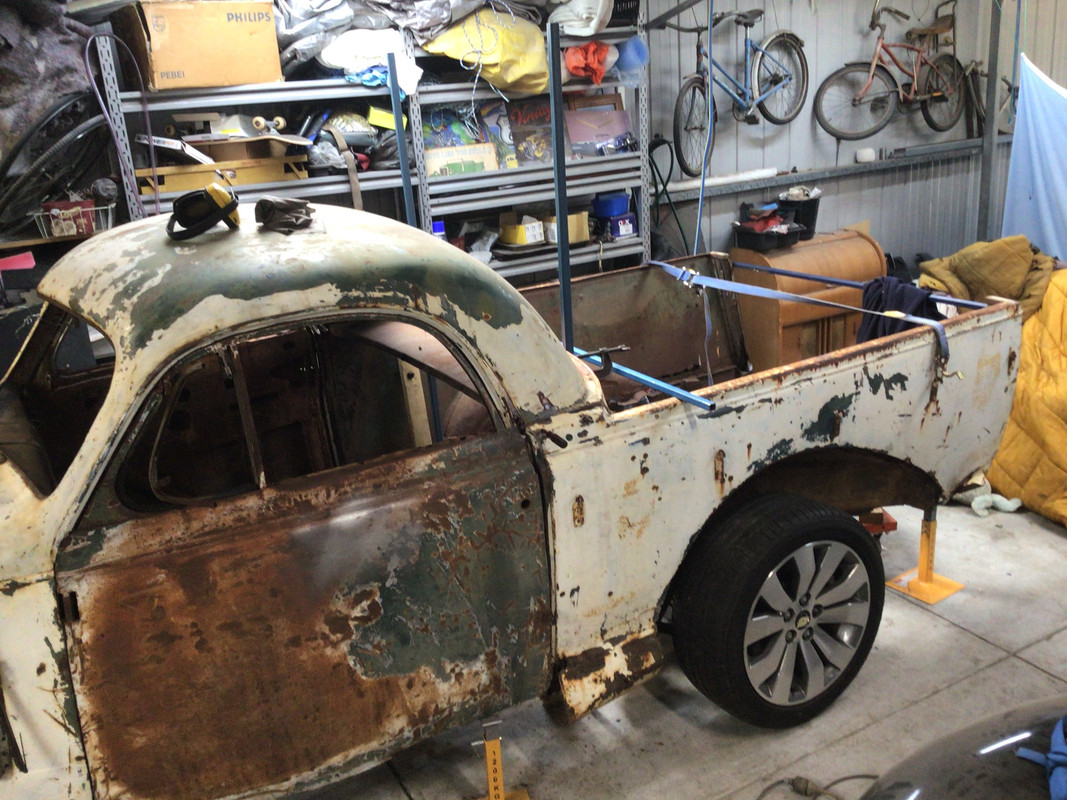
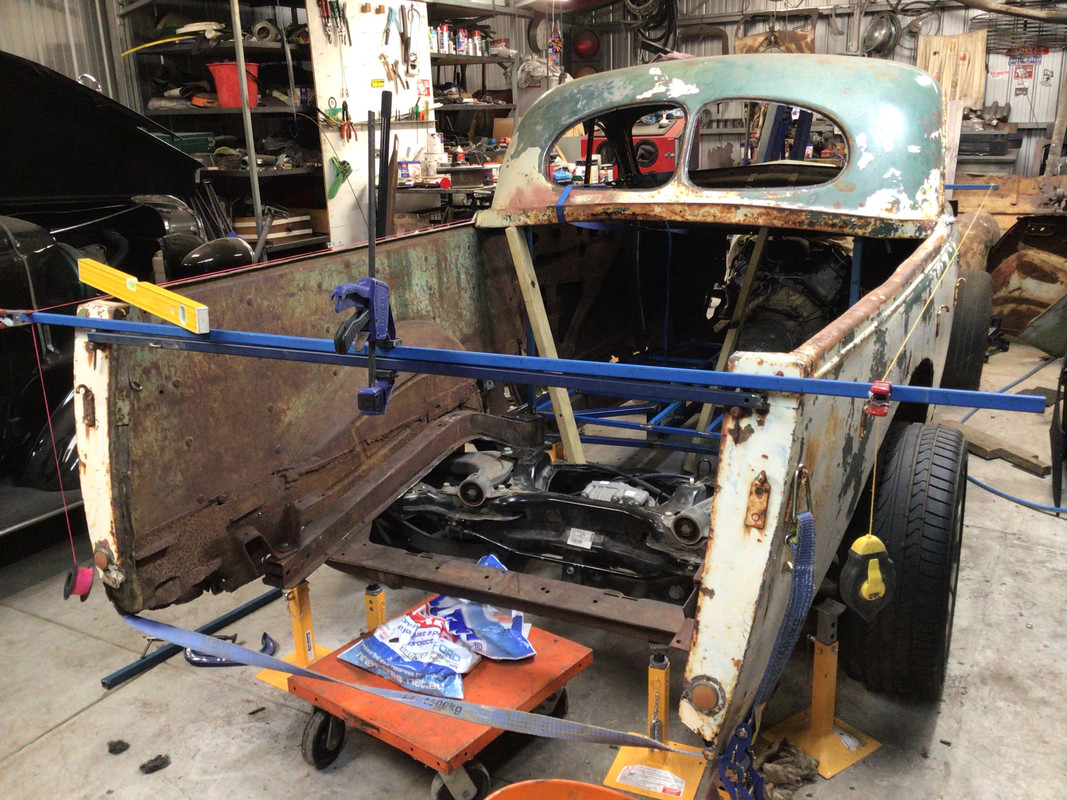
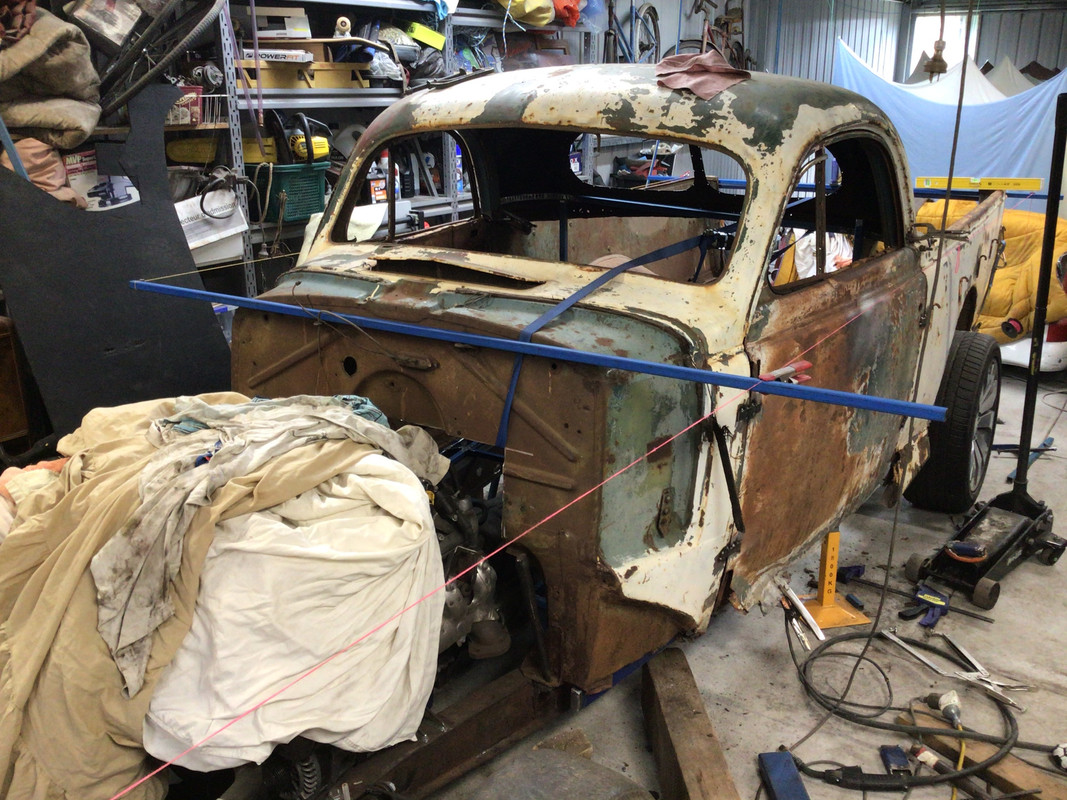
Thought I would start on the sills , floor and rear panel behind the seat . The problem I have is not having a height at the rear of the cab to work from so anything I make has the potential to put the cowl on the wrong angle and effecting the front panels and rear tub , so back to piecing the jigsaw together again . I know when new they probably weren’t totally even side to side and seeing as most of the door and rear needs renewing I think I am at a point where I can make a start
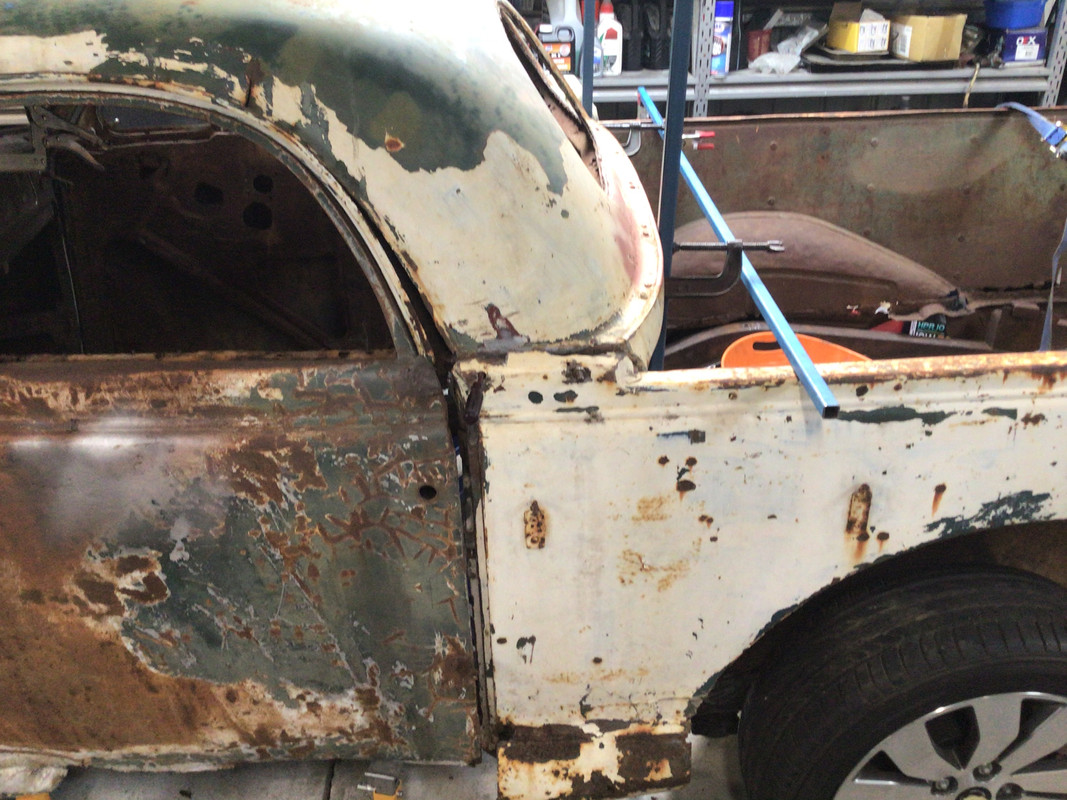
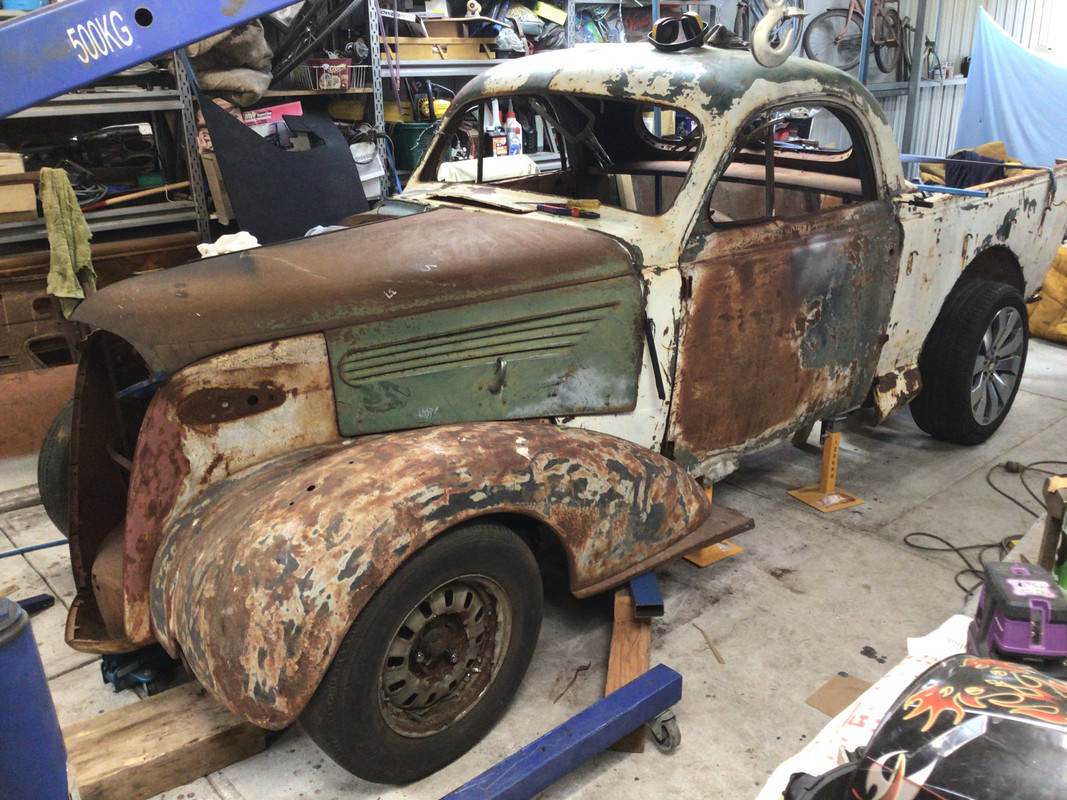
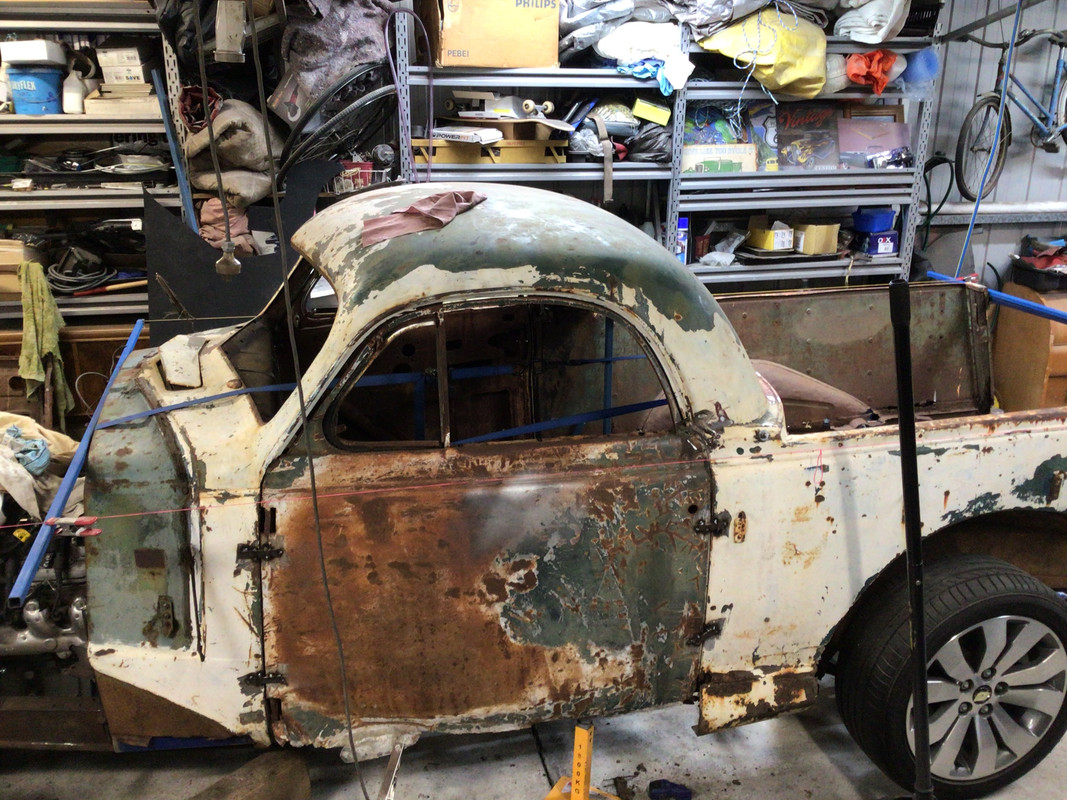
This area around the roof , door opening is a bit of a concern . The door jam has come away from the roof which now has a tear and is a bit out of shape . A ratchet strap around the firewall and window opening pulled it in a little ,still more to go
The barely visible pink string is the body line , so I have it pretty close
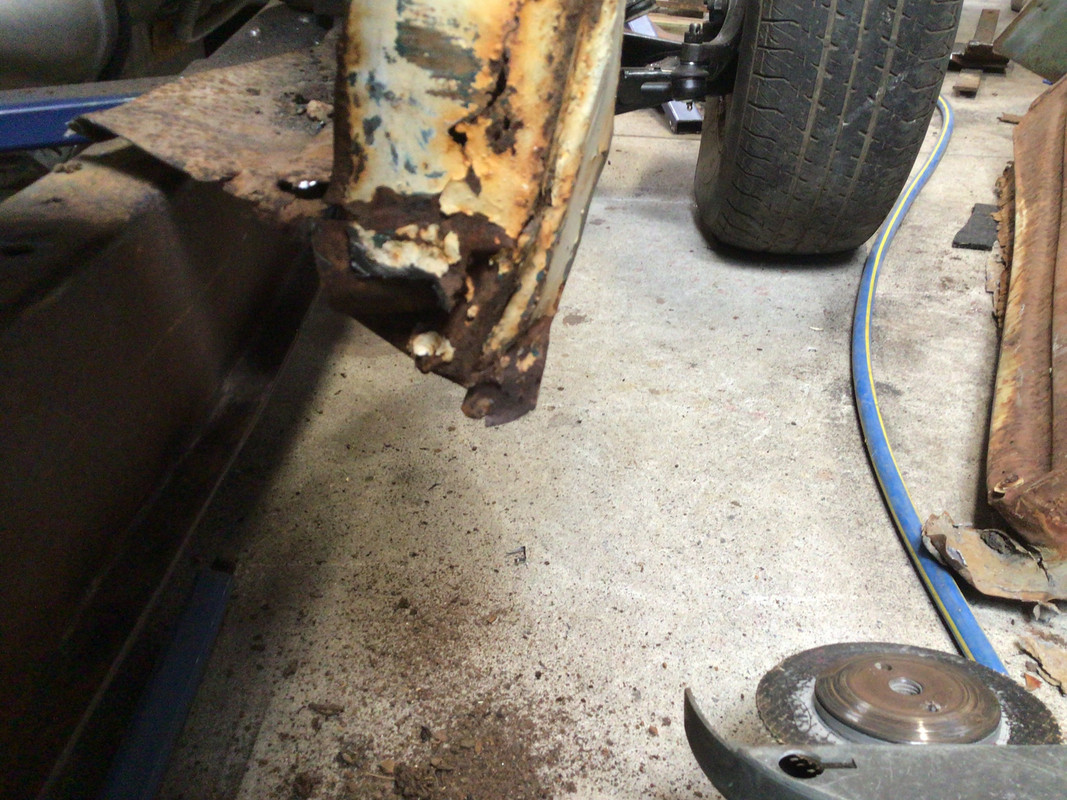
So this is what I’m up against to get a solid fixing , start cutting the rust away and keep cutting till there is nothing left . Now I think I have the right height for the back of the cab I think I will remove the rear again and start on the sills and floor frame to hold it all together
Your pictures of the rear end mounting reminded me of my '36 Chev, but with a Jag rear mounted on the standard Jag "V" mounts. As was said earlier, the Jag mounts suit the Chev chassis exactly. (I cut slots through the chassis flange and mounted the "V" mounts wth crush tubes through the chassis).
Your HG front end is almost the same as I used, except I kept the chassis flange complete and using a mounting plate on the top of the front end cross member. I used 3 bolts each side, two in front of the cross member, one behind. My Engineer was happy with that, but suggested I add 4 high tensile bolts on each side, through the flanges (8 in all).
Oh, and yes, I recognise the rack! Identical to the one I am using.... I, too have slots in the mounting bracket to allow me to adjust the angle of the pinion. (Great minds).
Only difference I can see is I found the brackets flexed a little when turning from lock to lock, so I put a "web" in between the two brackets and the HG cross member.
Great rack those, 2 1/2 turns lock to lock!
Yeah. I've changed my signature. The old one was out of date...
What if climate change IS a hoax, and we make a better world for nothing?
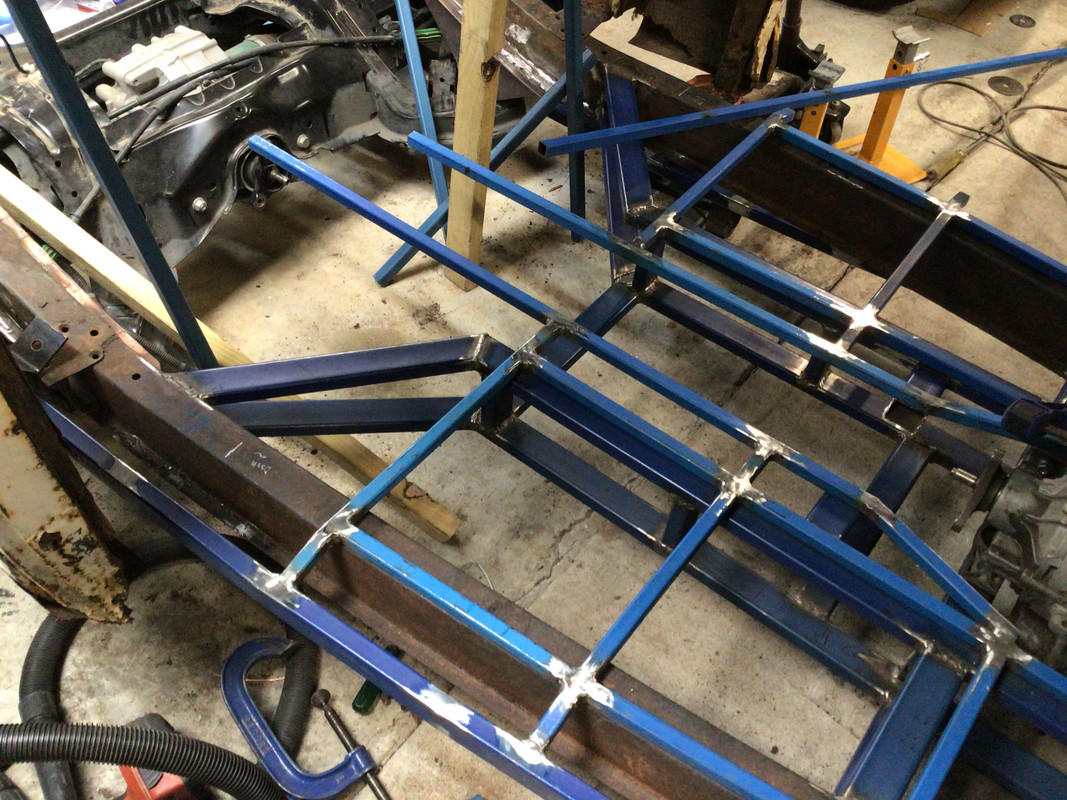
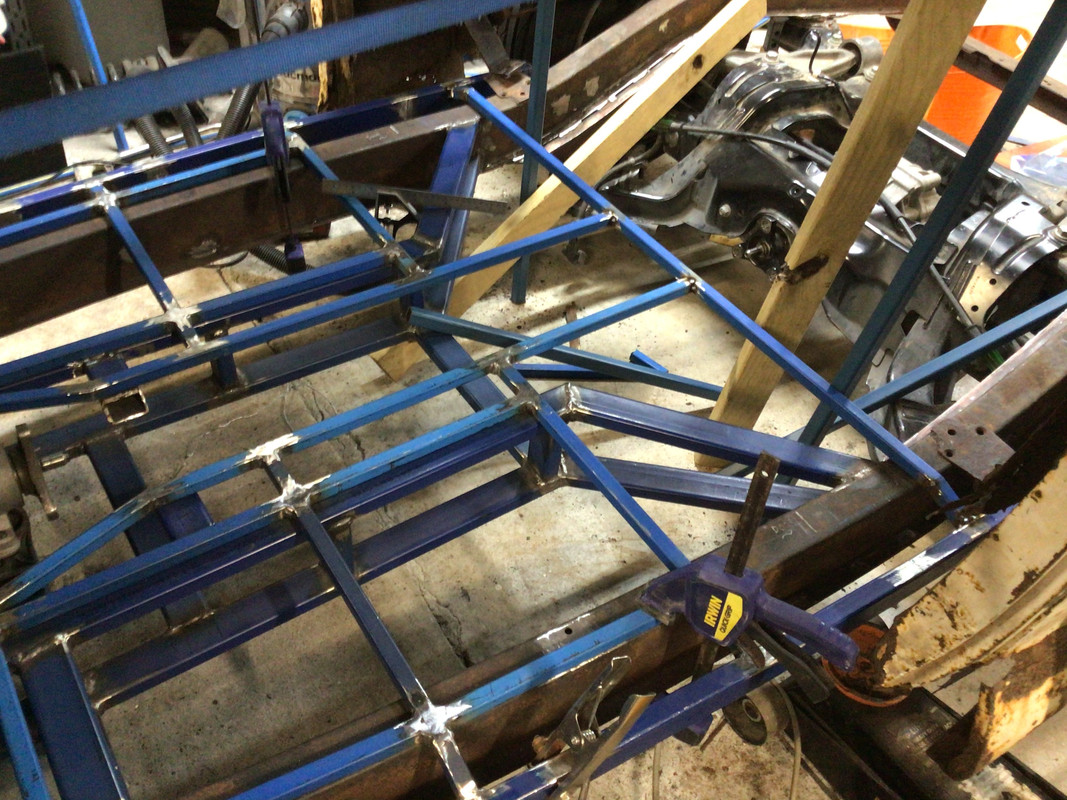
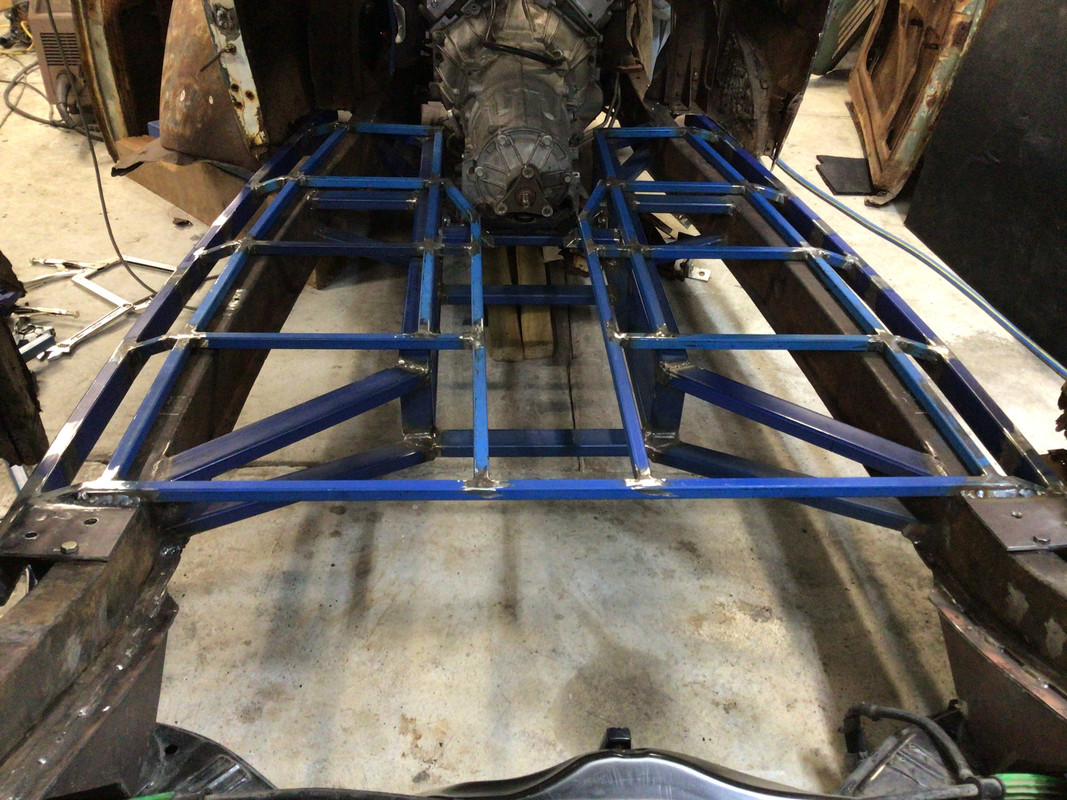
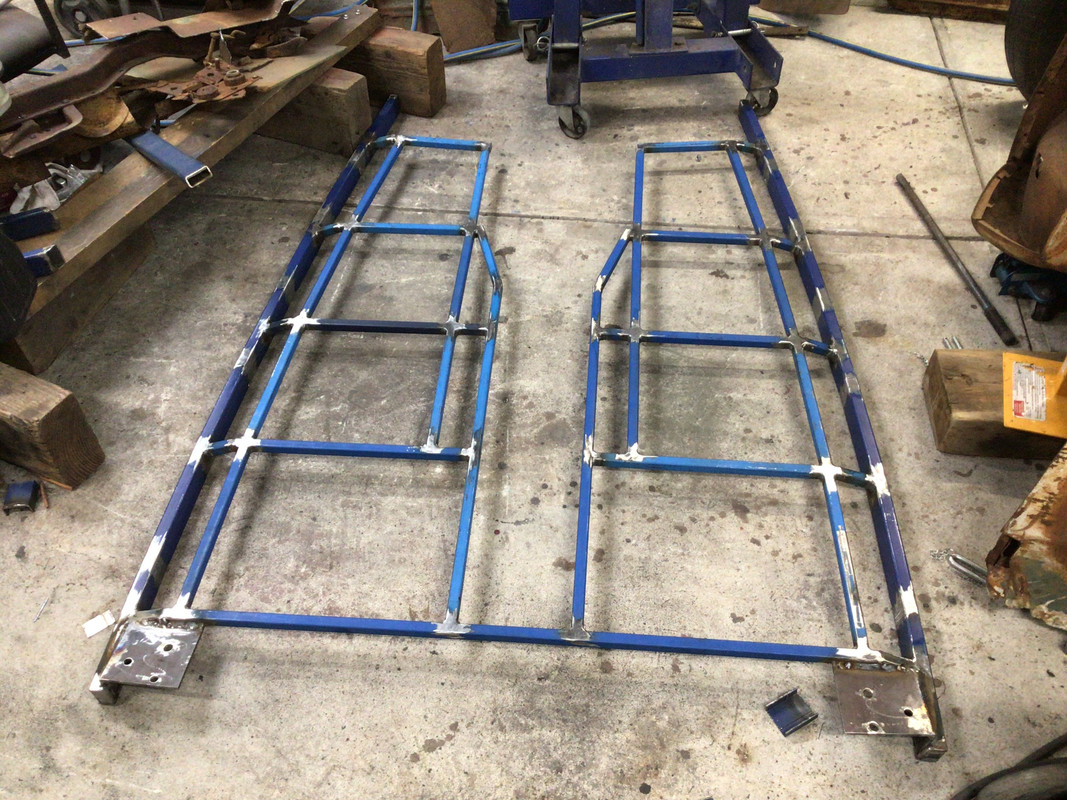
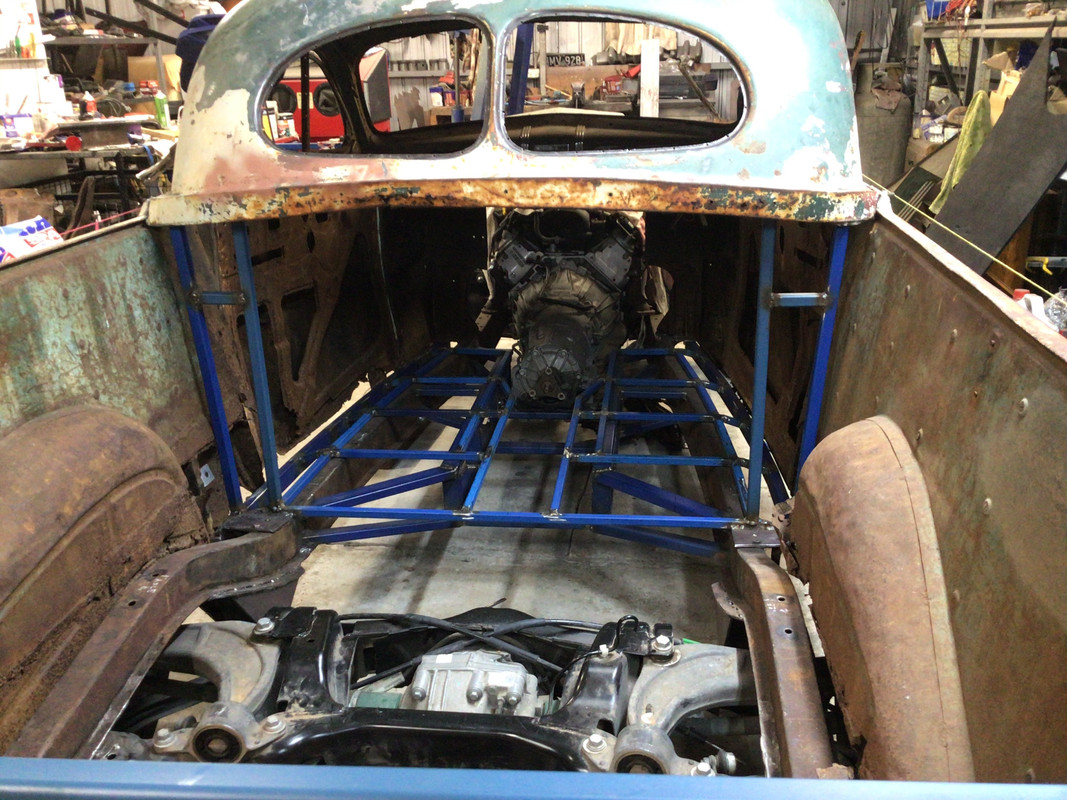
Started on the sill and floor frame with the aim to lock all the cabin in place to stop movement . Sill is 50mm x 25mm box the same as the chassis cross members with the floor base 20mm x 20mm box section , sill runs under the front cab to chassis mounting bracket and will be welded to this at a later date when I can sit the cab on its end and give it a good derust and clean
Drivers side ready to lay in
Floor frame nearly done , just a few more pieces to weld in , then on to the risers
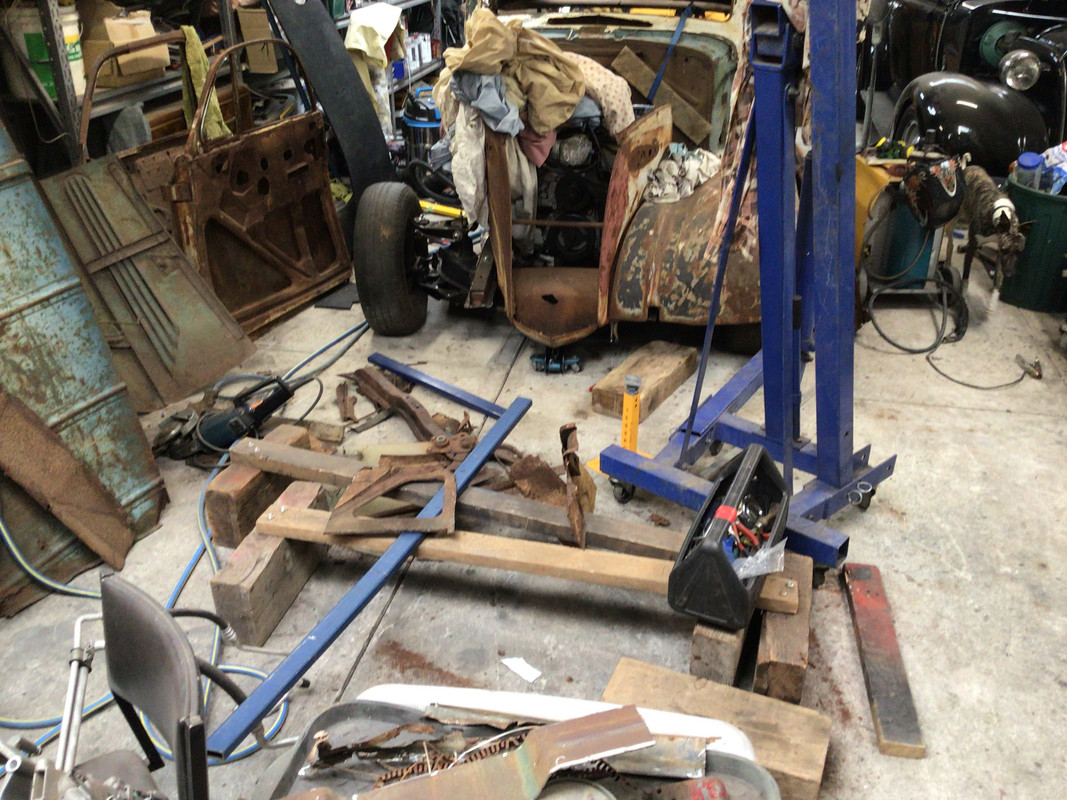
Does anyone else get mess like this whilst working on their project , time for a clean up I think
Mess equals progress Ratty, when its time to clean up its amazing how many things you've got out and have to be put away.
Those floor frames will change the game once installed and you get the start tying it all back together and get some strength and stability in the panels.
Keep plugging away mate.
Last edited by Sly Fox on Tue Apr 20, 2021 7:52 am, edited 2 times in total.
51 Dodge Custom & 63 EH Ute - Dare to be different
Back to piecing it together yet again , I guess this is the norm when there are no mounts left on the body and tub except for two on the firewall.First got the belt line straight again , welded the doors shut at my desired edge gaps , I have no door locks or hinges the are acceptable,and then ran a string down each side at even spaces from the centre line of the car and chassis . Surprisingly , not really ,the gap was about 40 mm difference at the rear of the door at each side , so it was sitting like a banana. A lot of pushing , pulling and remeasuring and finally I have it straight and was able to weld some uprights to hold the rear of the cab up in the correct position . Some extra bracing will go in at a later date as this is my only access into the cab and I’m a bit old to enter Dukes of Hazard style through the window